Debugging React Native Apps: 5 Best Tools and Practices

Hey there, all code wizards and pixel pushers! Imagine this: You’ve just created a fantastic new feature for your app with the help of React Native. It’s sleek, it’s responsive, and you can’t wait to see it in action. You launch the app, but instead of the smooth experience you envisioned, you’re met with bugs and crashes. The frustration will surely kick your mind at that moment, making you stare at lines of code and wonder where things went down. And, in such conditions, only one thing will help you: Debugging React Native Apps.

Whether you’re dealing with performance issues, UI glitches, or unexpected crashes, debugging React Native apps will surely help you identify and fix problems. The debugging process may seem simple, but it can sometimes feel like trying to find a needle in a haystack.

However, fear not! 

Deftsoft has come up with a detailed blog post to guide you through the best tools and practices for debugging React Native apps easily. Our expert developers recommend the top 10 tools and practices to execute a hassle-free debugging of React Native apps.

So, let’s jump straight into the blog post without further ado.

Let’s Know the Basics first!

Before delving into the tools and techniques for debugging React Native apps, let’s first understand the basics. Read this section to learn what React Native and debugging React Native apps are exactly.

What, Exactly, is React Native?

As a passionate and well-informed developer, ‘React Native’ wouldn’t be a strange term for you. It is a popular JavaScript-based mobile app development system that helps developers build seamless, high-quality, cross-platform mobile apps with a single codebase. The history of React Native can be traced back to 2013 when Facebook was improving the efficiency of its mobile app. While doing this, Facebook’s lead developer, Jordan Walke, made one revolutionary discovery. He found a hassle-free method for the generation of UI elements using JavaScript.

(Generating UI elements on Facebook’s mobile webpage was essential to elevate its efficiency)

As soon as Walke found this method, an immediate Hackathon (a social coding event) was organized to learn more about this method.

Today, this same method is popularly known as React Native. The moment it came into the life, the mobile app development industry changed forever.

Jordan Walke initially used React Native to generate UI elements on iOS apps in 2013. Android support through React Native came in 2015. Months later, Facebook publicly debuted a framework for debugging React Native apps.

In just three after its public launch, React Native became the second biggest project on GitHub.

That’s enough information about React Native. Now, let’s understand debugging React Native apps in detail.

Understanding Debugging React Native Apps

As mentioned earlier, React Native is an open-source Facebook project that was created to develop seamless mobile applications.

Ultimately, the mobile applications developed using the React Native framework are known as ‘React Native Apps.’ There are a wide range of benefits of creating a mobile app through React Native. However, with the plethora of benefits, such as cost-efficiency, consistent user experience, and access to native modules, you can also encounter several bugs and glitches. Eventually, the bugs in a mobile app negatively impact not only the app’s functionality but also the user experience and reputation of the brand value. Altogether, this can lead to lost revenue, increased support costs, and higher development expenses. Therefore, debugging React Native apps becomes essential.

Debugging involves a series of steps that help developers to analyze and remove the problem effectively. In short, debugging is the process of identifying, analyzing, and fixing errors or bugs in software code.

In the words of Kyle Simpson, author of ‘You Don’t Know JS,’

“Good debugging tools & practices can significantly reduce the number of bugs in your application, leading to a smoother and more reliable user experience.”

– Kyle Simpson, author of ‘You Don’t Know JS

Reading this quote, you may be wondering, what are the best debugging tools to effectively identify and fix the errors in React Native apps?

Well, to find the answer to this, read the next section. 

Essential Debugging Tools for React Native

Honestly, debugging is one of the critical aspects of software development, and its importance in elevating React Native apps cannot be overstated. By debugging React Native apps, developers not only identify and resolve prevalent issues but also ensure the reliability of the codebase. A wide range of effective tools are available for successfully executing and debugging React native apps. Some of the best ones include:

1. React Native Debugger (Including React DevTools)
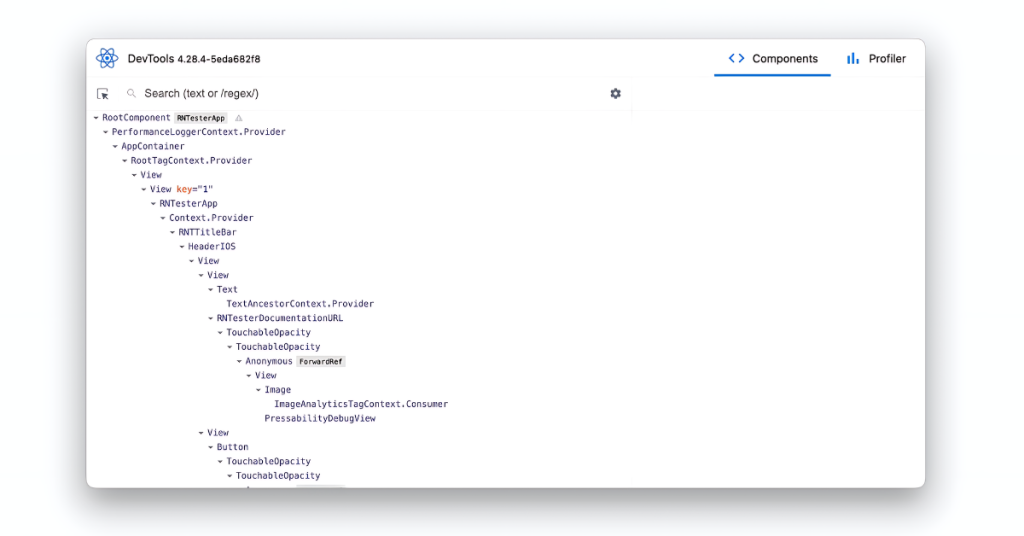
React DevTools

React Native provides its own in-app debugging tool specifically designed for React Native applications. It started gaining a lot of popularity in 2017 as a standalone app built on top of the Chrome Developer Tools. Moreover, it can also integrate with Chrome DevTools and Redux DevTools, providing an ultimate enhancement.

You can access this tool by directly visiting React Native’s official website. To execute a debugging of React Native apps, either shake your device or use the below keyboard shortcuts.

Assessing the Dev Menu on Different Platforms

For iOS Simulators

Either press’ Cmd ⌘ + D’ or visit the menu bar at the top of your screen, navigate to ‘Device,’ and select ‘shake.’

For Android Emulators

Either press’ Cmd ⌘ + M’ or simulate a shake by selecting the corresponding option from th emulator’s extended controls.

Besides using keyboard shortcuts and gestures, you can also access the Developer Menu on Android devices and emulators through ‘adb’ (Android Debug Bridge). This is a leading command-line tool that allows seamless communication with an Android device or emulator.

Here’s how it works:

Open a terminal window (on macOS or Linux) or a command prompt (on Windows).Enter the command – ‘adb shell input keyevent 82’. 

Key Features of React Native Debugger

React Native Debugger is a powerful mobile app development tool that combines multiple debugging tools into a single interface. It provides comprehensive functionalities that streamline the development process. Here are the key features of this effective tool for debugging React Native apps. 

1. Reload

A ‘Reload’ feature aims to provide instant feedback when identifying and fixing bugs. To enable this feature, navigate to the ‘Default’ option.

2. Open Debugger

Clicking on ‘Open Debugger’ allows you to access Chrome Developer Tools.

3. Open React DevTools

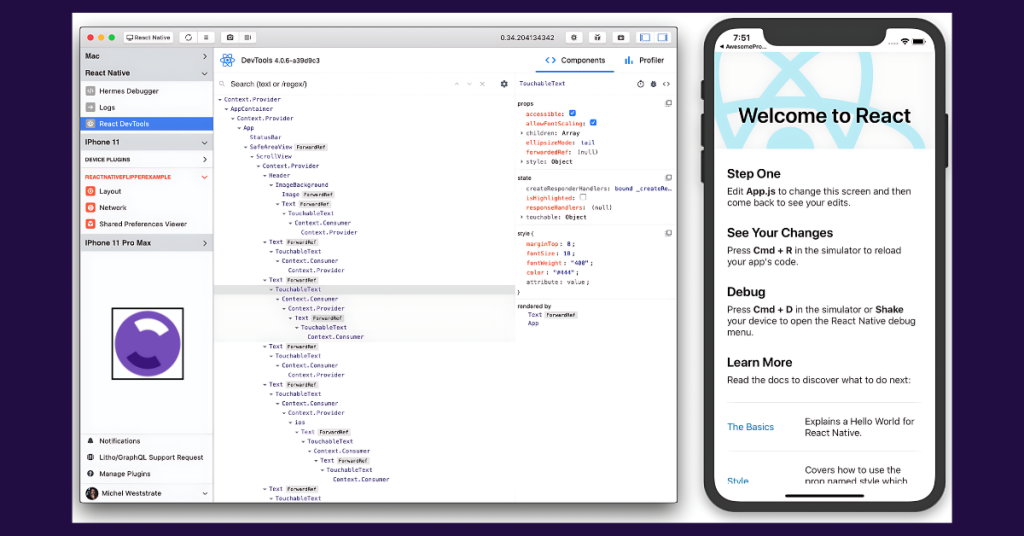
It is a standalone tool for debugging non-browser-based React Native apps. Thus, clicking on ‘Open React DevTools’ doesn’t redirect you to the tools. Consider installing or running the’ dev tools’ package to access it. Moreover, we highly recommend running this command via nix.

4. Show Inspector

By tapping on ‘Show Inspector,’ you can get detailed info about a specific bug.

5. Disable Fast Refresh

‘Fast Refresh’ is a separate feature in React Native that allows you to instantly see changes in their app without losing the current state. It updates the app when changes are made to the code. However, there may be situations where it is necessary to disable Fast Refresh to debug certain issues.

6. Configure Bundler

‘The Bundler’ is a feature that allows the successful bundling of JavaScript Code and assets for the React Native apps. However, by configuring the bundler, you’ll be able to adjust various settings effectively.

7. Show Performance Monitor

It provides real-time metrics and insights into the performance of your React Native apps.

How to Set Up and Use React Native Debugger?

I. Install React Native Debugger

II. Integrate with Your Project

React Native CLI

  1. Open React Native Debugger.
  2. Start the app’s development server: npx react-native start
  3. Enable debugging:
    • Shake your device or use the simulator’s menu to open the developer menu.
    • Select Debug JS Remotely.

Expo

  1. Open React Native Debugger.
  2. Start Expo project: expo start
  3. Enable debugging:
    • Open the developer menu.
    • Select Debug Remote JS.

III. Use React Native Debugger

  • React DevTools: Inspect and modify components.
  • Redux DevTools: View and manage Redux state and actions.
  • Console: Check app logs.
  • Network: Monitor network requests.

IV. Troubleshooting

  • Ensure ports match (default is 8081).
  • Check network connections.
  • Restart tools if necessary.

2. LogBox

As a well-updated developer, many of you would remember ‘React Native 0.69’ in June 2020. React Native Team debuted an updated framework with the name of ‘React Native 0.69’. This framework brought several improvements and features, including enhancements to LogBox (an innovative tool designed to improve error and warning logging).

LogBox is a comprehensive logging system in React Native that replaces older YellowBox and RedBox systems. It provides more actionable error and warning messages, making logs easier to understand and act upon.

Key Features

1. Notifications

This support of log notifications allows all consoles. Warn and console.log messages to being showed up easily.

2. Code Frames

The inclusion of code frames on the right side of the log inside the app allows you to identify the source code of every warning and error quickly.

3. Component Stacks

Component stacks in LogBox provide detailed information about the hierarchy of React components leading up to an error. Eventually, this feature will allow developers to quickly identify the origination of issues within their code.

4. Stack Frame Collapsing

It is important to clean the relevant codes or frames in an app while executing debugging. This is why Stack Frame Collapsing in LogBox is designed to intelligently collapse frames that are not immediately relevant to the current debugging task, such as internal framework code.

5. Syntax Error Formatting

Syntax error formatting in LogBox enhances the clarity of error messages related to syntax issues, making it easier for developers to spot and fix mistakes in their code.

How to Set Up and Use LogBox?

Before delving into the steps, first, make sure your React Native project is using version 0.63 or higher. You can check this by running the following code.

Check the React Native version by running this code.

After this, enable LogBox in your ‘App.js’ or ‘index.js’ file. Use these codes to do so:

enable LogBox in your ‘App.js file

Once LogBox is set up, consider debugging React Native apps with it. Here’s how it works.

1: LogBox will display a notification at the bottom of your app’s screen whenever an error or warning occurs. Consider tapping on the notification to get detailed information about the error or warning.

2: Upon tapping the notification, you’ll see an error or warning message at the top. Below this message, you’ll see the component stack trace. This is where you’ll see a list of stack frames (specific lines of code). Consider clicking on these frames to redirect yourself straight to the relevant code in your editor.

3: You may find a plethora of stack frames in it. Ultimately, one may feel confused about the most pertinent parts of the stack trace. But you don’t need to worry. LogBox automatically collapses less relevant stack frames to reduce clutter. This way, you can focus on important parts of the stack trace.

4: In the worst scenario, if there’s a syntax error in your code, LogBox will highlight its exact location to help identify the spot and correct the mistake. Moreover, if you find any warnings or errors (that even LogBox features can’t fix), suppress them using:

LogBox features can’t fix

#5: After fixing all the issues, disable LogBox with:

disable LogBox with this code

3. Flipper

flipper react native

Flipper is an open-source platform developed by Facebook that is designed to provide comprehensive debugging and performance tools for mobile app developers. Launched in 2019, Flipper supports both iOS and Android applications, integrating various tools and plugins to streamline debugging workflows. It emerged from the need for a unified platform that could enhance mobile development processes and provide more detailed insights into app behavior.

Features

There are various features that altogether establish Flipper as a reliable tool for debugging React Native apps. Take a look below:

1. Unified Debugging Interface:

Flipper provides a single platform where you can access various debugging tools, streamlining the process of diagnosing and resolving issues. This unified interface helps developers quickly switch between different aspects of debugging without needing multiple tools.

2. Plugin Architecture:

One of Flipper’s key strengths is its extensibility. It supports a wide range of plugins, such as React DevTools, Redux DevTools, and Hermes Debugger. These plugins integrate directly into Flipper, offering specialized functionality for React Native and other frameworks.

3. Interactive Debugging:

Through Flipper, you can interact with your app in real-time. This feature allows you to inspect and modify the app state, trigger actions, and observe changes dynamically, which is helpful for debugging complex issues.

4. Performance Monitoring:

Flipper includes performance monitoring tools that provide insights into key metrics like memory usage, CPU consumption, and network activity. These tools help identify performance bottlenecks and optimize the app’s performance.

5. Network Inspection:

The network plugin in Flipper allows you to inspect and analyze network requests and responses. You can view request details, headers, and payloads, which is crucial for debugging API interactions and ensuring correct data flow.

How to Set Up and Use?

Installation:

Download Flipper from the Flipper website. Choose the appropriate version for your operating system (Windows, macOS, or Linux) and follow the installation instructions.

Integration with React Native:

For iOS:

Add Flipper dependencies to your Podfile:

use_flipper!

Run pod install in your iOS directory to install the dependencies.

For Android:

Modify your android/app/build.gradle to include Flipper dependencies:
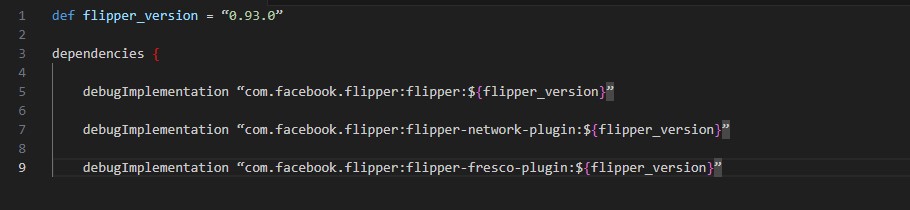
Modify your android/app/build.gradle to include Flipper dependencies:

Sync your project with Gradle files to apply the changes.

Configuration:

Ensure that Flipper is correctly initialized in your app’s entry point. For React Native, this usually involves configuring the Flipper initialization in your MainApplication.java file for Android and AppDelegate.m for iOS.

Usage:

Launch Flipper on your desktop and connect it to your running application. You’ll see various plugins and tools in the Flipper interface. Use the plugins to inspect logs, debug errors, and interact with your app.

4. Reactotron

Reactotron is a desktop application developed by Infinite Red specifically for React and React Native developers. It was introduced to offer a straightforward tool for debugging React applications and enhancing developer productivity. Reactotron provides real-time insights and interactions with React applications, making it a valuable asset in development.

Key Features

A significant reason behind the popularity of Reactotron is its features. Take a look below!

1. Real-time State Inspection

Reactotron provides a live view of your app’s state, including Redux store and component state. This real-time inspection helps developers understand how state changes over time and diagnose state-related issues.

2. Action Tracking

It tracks and displays Redux actions and their effects on the state. This feature is useful for debugging Redux-related issues and ensuring that actions are being dispatched and processed correctly.

3. Performance Monitoring

Reactotron offers performance monitoring capabilities, including network request logging and performance metrics. These helps identify slow network requests and optimize the app’s performance.

4. Customizable Plugins

The tool supports various plugins for extended functionality, such as React Navigation tracking, API request logging, and more. These plugins can be tailored to fit specific needs in your development workflow.

How to Set Up and Use?

Installation:

Download Reactotron from the Reactotron GitHub repository. Install the desktop application according to your operating system.

Integration with React Native:

Install Reactotron dependencies in your project:

Install Reactotron dependencies

Configure Reactotron in your project:

  • In your index.js or App.js, initialize Reactotron:

In your index.js or App.js, initialize Reactotron
  • If you’re using Redux, install and configure the Redux plugin for Reactotron:

install and configure the Redux plugin for Reactotron

Add the plugin to your Reactotron configuration:

Add the plugin to your Reactotron configuration

Configuration:

Run your app and check the Reactotron desktop application for activity to ensure Reactotron is properly connected. If needed, configure specific plugins or settings through Reactotron’s configuration options.

Usage:

Launch Reactotron on your desktop and connect it to your app. Use the Reactotron interface to inspect the state, track actions, debug errors, and monitor performance.

5. VS Code Extensions

Visual Studio Code (VS Code) is a popular open-source code editor developed by Microsoft. Over the last years, VS Code has become widely adopted due to its versatility, rich feature set, and extensive ecosystem of extensions.

It was first announced and released in April 2015. Initially, it was introduced as a cross-platform editor built on the Electron framework, which allows applications to be built using web technologies like HTML, CSS, and JavaScript.

However, in 2016, Microsoft expanded VS Code’s functionality by introducing the Extensions Marketplace.

Key Features

The main features of VS Code Extension are given below.  

1. Rich Extension Ecosystem:

VS Code’s extension marketplace offers a vast array of extensions to enhance coding efficiency, including tools for debugging, code linting, and integration with various services.

2. Customizable Environment:

Extensions enable users to customize their coding environment, including themes, keybindings, and settings. This flexibility helps tailor the editor to individual preferences and project needs.

3. Integrated Debugging:

VS Code’s built-in debugging features include breakpoints, variable inspection, call stacks, and interactive debugging. These tools make it easier to diagnose and fix issues directly within the editor.

4. Code Intelligence:

IntelliSense provides autocompletion, code navigation, and refactoring tools. Extensions can enhance IntelliSense capabilities for different languages and frameworks, improving coding efficiency.

How to Set Up and Use?

Installation:

Download and install VS Code from the official VS Code website.

Access Extension Marketplace:

Open VS Code and access the Extensions view by clicking on the Extensions icon in the sidebar or pressing Ctrl+Shift+X.

Search and Install:

Search for extensions relevant to your needs, such as React Native Tools, ESLint, or Prettier. Click “Install” to add them to your VS Code setup.

Configuration:

Configure each extension according to your project requirements. For example, set up debugging configurations in the .vscode/launch.json file for React Native or customize ESLint rules in .eslintrc.

Usage:

Utilize the features provided by the extensions to enhance your development workflow, including debugging React Native apps. Use integrated debugging tools to set breakpoints, inspect variables, and step through code. Apply code linting and formatting to maintain code quality and consistency.

Nuclide: One of the Reliable Tools for Debugging React Native Apps, But No Longer Available Now!

As a well-informed developer, you would definitely have heard of ‘Nuclide.’

Nuclide was a powerful integrated development environment (IDE) created by Facebook in 2015. It was designed and developed by Facebook to enhance the development experience of React Native, Flow, and other technologies. Nuclide was built as a package on top of Atom.

(Atom is an open-source text editor developed by GitHub)

In the mid-2010s, Nuclide became a reliable tool for integrated debugging React Native apps. However, this success was only short-lived. In 2018, Facebook announced that it would discontinue the development and maintenance of Nuclide. Eventually, Nuclide was officially Sunsetted.

While you may still find older versions of Nuclide or its codebase online, they are no longer actively maintained. We highly recommend against using them, as more reliable and technologically advanced tools for debugging React Native apps have arrived on the market.  

(We have provided this information on Nuclide as there were mixed and confused viewpoints on the existence of Nuclide online. Back then, it was a great option for debugging React Native apps. But, in 2024, there are better options)

Best Practices for Effective Debugging

Since we’ve gone through all the best tools for successfully debugging React Native apps, let’s look at the best practices to facilitate an effective debugging process.

1. Using Breakpoints

In simple words, Breakpoints are a fundamental tool for debugging, allowing developers to pause the execution of their code at specific points to inspect the app’s state. This is why and how you can use breakpoints effectively.

a. Strategic Placement

Consider placing breakpoints where you suspect a little about the occurrence of any issue at a key point in the code flow.

(We highly recommend you avoid scattering breakpoints randomly as this can lead to a lot of confusion)

b. Conditional Breakpoints

As their name suggests, ‘Conditional Breakpoints’ can only be used to pause execution when a specific condition is met. Typically, conditional breakpoints are useful in loops or repetitive code where you want to catch a specific case.

2. Source Maps

While using languages that compile to JavaScript (such as TypeScript or CoffeeScript) in debugging, Source Maps are often used to restore minified code to its original state.

Source Maps are files that map the compiled or minified code back to the original source code.

Here are the best practices for using Source Maps.

a. Enable Source Maps in Development

Make sure source maps are enabled in your development environment. You can do this by setting a configuration option in your build tool (e.g., Webpack, Babel).

b. Verify Source Map Accuracy

Double proofreading or verification is an essential task while debugging React Native Apps.

Sometimes, source maps may not accurately map to the original source due to incorrect configuration. Therefore, ensure your build pipeline is correctly set up so that you can generate accurate source maps.

3. Using Log Statements Effectively

If you don’t want to use ultra-technical methods to analyze your code, it is best to write log statements.

Log statements are a simple yet powerful way to understand what is happening in your code at different points in time. By doing so, you can easily identify, analyze, and fix issues.

Given below are some of the best practices for using log statements. Consider reading this.

a. Log Relevant Information

Many developers often understate this practice, but honestly, focusing on logging relevant data like variable values and function entry/exit points surely helps understand the existence of any issue.

b. Use Log Levels

While debugging React Native apps, consider implementing different log levels (like debug, info, warning, and error) to categorize the severity and purpose of the logs. By doing so, you can remove all the irrelevant logs based on what you’re currently investigating.

In JavaScript, use the following codes to categorize logs.

In JavaScript, use the following codes to categorize logs.

Keep these effective practices in mind while debugging React Native apps. By mastering this, you can quickly identify and resolve any existing issues in React Native applications.

Deftsoft: A Leading React Native App Development Company, Helping You in Debugging

With over 18+ years of experience, Deftsoft is a premier React Native App development company. In today’s dynamic world, a well-organized React Native app is essential to enhance the visibility of your business or brand. Trust the expertise of Deftsoft to experience unparalleled React Native app development services. Our team excels in crafting robust, user-friendly apps while prioritizing efficient debugging processes. We leverage advanced debugging techniques to identify and resolve issues swiftly.

Wrapping Up

Mastering debugging React Native apps is essential for making high-quality, reliable applications. In this guide titled ‘Debugging React Native Apps: 5 Best Tools and Practices’, Deftsoft hopes you’ve gained valuable knowledge about this challenging task. Use these effective tools and practices to enhance your debugging process and significantly streamline issue resolution. However, if you’re unable to do it, consider contacting Deftsoft. As a premier React Native app development company, we provide effective solutions, including debugging. Our highly skilled React Native developers use the best tools and practices to ensure a smoother, more productive debugging process, ultimately leading to a more polished and dependable app. Let Deftsoft be a trusted React Native debugger for you!

Contact us for any related information today!  
Unity vs Unreal Engine 5: Which is Better?

Game development is currently experiencing a major boom and game developers are becoming more enthusiastic than ever. They’ve been on a constant hunt for the best game development tools. Talking about game development tools, Unity vs Unreal is a significant game development battle.

The popularity of these two game development engines has enhanced multifold in the past few years. Thanks to the robust and numerous features of the two, game developers can create hyper-realistic games through their help.

If you’re a game developer or gaming fanatic, this blog is a useful resource for you to understand the dynamics of Unity vs Unreal Engine 5. We’ll discuss the advantages and disadvantages of the two gaming engines and which one is more popular.

Without further ado, let’s begin!

What is Unity in Game Development?

Created by Unity Technologies, Unity is a cross-platform game development engine. It is extensively used by developers to create 2D and 3D games across multiple platforms, such as mobile devices, consoles, and PCs. Unity offers a comprehensive set of tools and features that simplify the game development process, making it accessible to both beginners and experienced developers.

Unity game development engine

First released in June 2005 at the Apple Worldwide Developers Conference as a Mac OS X game engine, it now supports multiple platforms, enabling developers to build their game once and deploy it across various devices, including iOS, Android, Windows, macOS, and major gaming consoles.

Note: The latest version of Unity, Unity 6, is now available for preview.

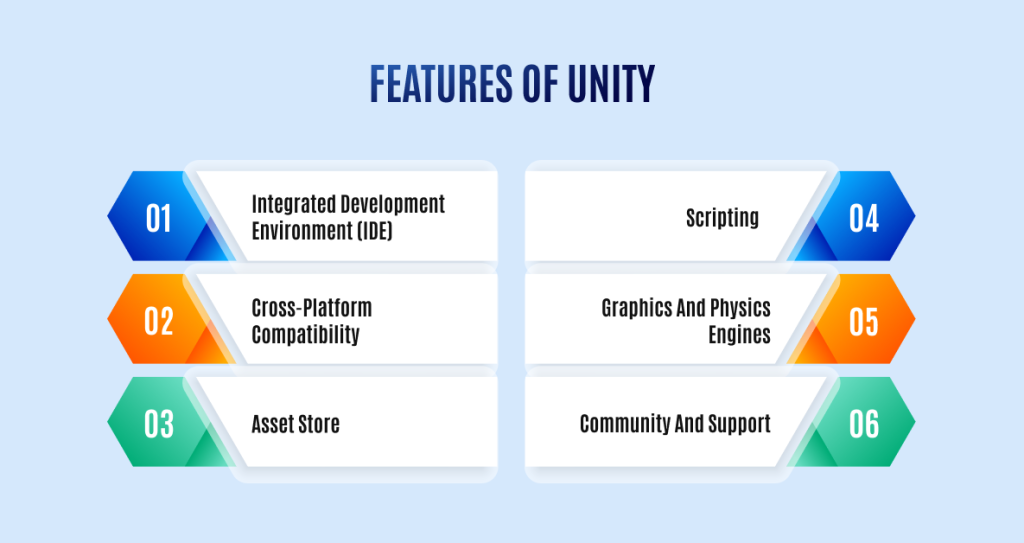
Features of Unity Game Engine

Features of Unity Game Engine

The significant features of Unity are as follows:

  • Integrated Development Environment (IDE)

Unity offers an intuitive and user-friendly interface where developers can design, develop, and test their games.

  • Cross-Platform Compatibility

Unity supports multiple platforms, allowing developers to build their game once and deploy it across different devices, including iOS, Android, Windows, macOS, and gaming consoles like PlayStation and Xbox.

  • Asset Store

Unity has an extensive asset store where developers can find pre-made assets such as characters, environments, sounds, and plugins to enhance their games.

  • Scripting

Unity uses C# as its primary scripting language, providing powerful capabilities for customizing game mechanics and behaviors.

  • Graphics and Physics Engines

Unity includes robust graphics and physics engines that enable realistic rendering and interaction within the game world.

  • Community and Support

Unity has a large, active community and a wealth of tutorials, documentation, and forums where developers can find support and share knowledge.

What are the Advantages of Unity Game Development?

Considered one of the most beginner-friendly game development platforms, the Unity engine has many benefits. In fact, this is what an anonymous Reddit user has to say:

“…….To conclude this poem, Unity from my perspective can bring my dream of making a game to life quicker than UE, and most importantly can fuel my motivation more easily.”

There are numerous advantages of Unity game development, thus making it a popular choice among game developers across the globe. The following are the noteworthy benefits of Unity:

  • User-Friendly Interface and Ease of Use

Unity’s integrated development environment (IDE) is known for its intuitive and user-friendly interface. This makes it accessible to beginners who are new to game development. The drag-and-drop functionality, combined with visual editing tools, allows developers to quickly prototype and iterate on their games without needing extensive coding knowledge.

  • Cross-Platform Compatibility

One of Unity’s standout features is its ability to build games for multiple platforms from a single codebase. Developers can create games for iOS, Android, Windows, macOS, Linux, WebGL, and major gaming consoles like PlayStation and Xbox. This cross-platform compatibility significantly reduces development time and effort, allowing developers to reach a broader audience with minimal additional work.

  • Extensive Asset Store

Unity’s Asset Store is a treasure trove of pre-made assets, including 3D models, animations, sound effects, and plugins. This allows developers to quickly find and integrate high-quality assets into their projects, speeding up the development process and reducing costs. The asset store also offers various tools and extensions that enhance the functionality of the Unity engine.

  • Scripting with C#

Unity uses C# as its primary scripting language, which is known for its ease of use and versatility. C# allows developers to implement complex game mechanics and behaviors efficiently. Additionally, Unity provides extensive documentation and a large community of developers who contribute tutorials and support, making it easier to learn and troubleshoot.

  • Graphics and Performance

While Unity is often compared to Unreal Engine 5 in terms of graphics capabilities, it holds its own with a robust graphics engine that supports advanced rendering techniques. Unity is well-suited for both 2D and 3D games, providing tools to create visually appealing games. When considering Unity vs. Unreal Engine 5, Unreal might have an edge in photorealistic graphics, but Unity excels in flexibility and ease of use for a wide range of projects.

  • Strong Community and Support

Unity boasts a large and active community of developers, which is a significant advantage. The community contributes to forums, shares knowledge, and collaborates on projects, providing a valuable resource for troubleshooting and learning. Unity Technologies also offers extensive documentation, tutorials, and support to help developers at all skill levels.

What are the Disadvantages of Unity Game Development?

While Unity offers numerous advantages, it also has some disadvantages that developers should consider. Here are some of the key drawbacks:

  • Performance Limitations

One significant disadvantage of Unity is its performance limitations, particularly for high-end, graphically intensive games. Compared to Unreal Engine, Unity’s graphics rendering capabilities are not as advanced. This can be a critical factor in the debate of Unreal Engine vs Unity, especially for developers aiming to create photorealistic environments or highly detailed 3D models.

  • Asset Overhead

Unity’s extensive asset store, while beneficial, can sometimes lead to issues with asset quality and optimization. Developers may rely heavily on third-party assets, which can result in inconsistent performance and visual quality. Managing and optimizing these assets to ensure smooth gameplay can be challenging, adding to development time and effort.

  • Limited Out-of-the-Box Tools

Unity provides a versatile platform, but some advanced features and tools may require additional plugins or custom development. For example, high-end visual effects, advanced physics, and certain AI functionalities often need third-party plugins or extensive scripting. In the comparison of Unreal Engine vs Unity, Unreal Engine offers more built-in tools and features for such complex requirements, potentially reducing the need for additional resources.

  • Complexity in Larger Projects

As projects scale up in size and complexity, Unity can become harder to manage. Large teams may struggle with version control and project organization. Unity’s component-based architecture, while flexible, can make maintaining clean and efficient codebases for extensive projects difficult.

  • Subscription Costs

While Unity offers a free version, the Pro version comes with subscription costs that might not be affordable for all developers, especially indie developers and small studios. The ongoing costs can add up, making budget management a concern. This financial aspect is often highlighted in discussions of Unreal Engine vs Unity, where Unreal Engine’s royalty-based model might be more attractive for some developers.

  • Limited High-End Visual Capabilities

Unity’s graphics engine, though robust, does not match the high-end visual capabilities of Unreal Engine. Developers looking for cutting-edge graphics often find Unreal Engine more suitable due to its superior rendering capabilities and advanced visual effects. This difference is crucial in the Unreal Engine vs Unity debate for developers prioritizing top-tier visual fidelity.

What is Unreal Engine in Game Development?

Unreal Engine is a game development platform introduced by Epic Games, the same company that created Fortnite. This game development engine was showcased for the very first time in a first-person shooter video game called Unreal in 1998.

unreal engine game development engine

It is a powerful and widely-used game development engine known for its high-fidelity graphics and robust feature set. Unreal Engine 5, the latest iteration, pushes the boundaries of visual realism and performance with groundbreaking technologies.

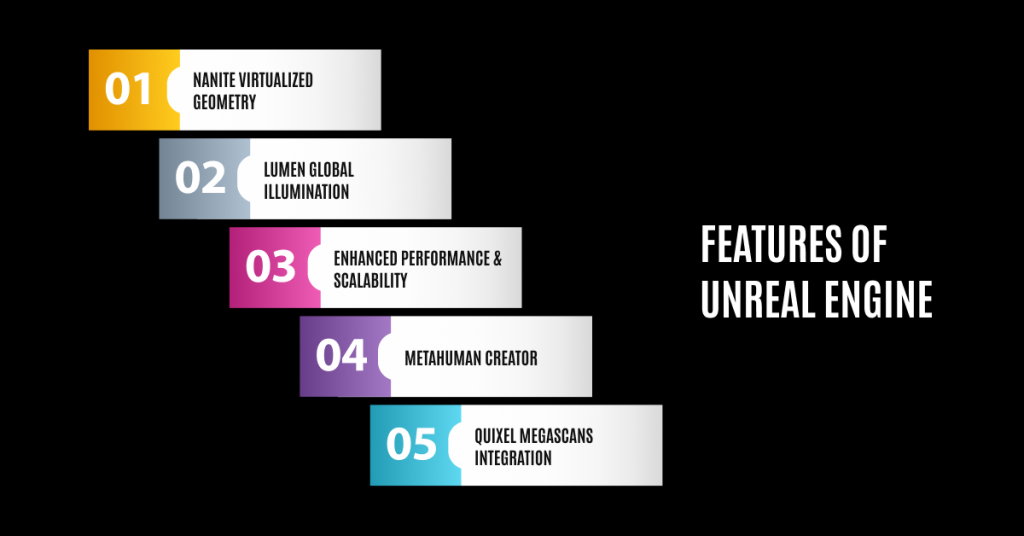
Features of Unreal Engine

features of Unreal Engine

The significant features of Unreal Engine are as follows:

  • Nanite Virtualized Geometry

Nanite allows developers to create highly detailed environments without compromising performance. It efficiently handles millions of polygons, enabling stunningly detailed models and textures that scale seamlessly.

  • Lumen Global Illumination

Lumen provides real-time dynamic lighting, offering realistic lighting and reflections without the need for complex baking processes. This makes it easier to create immersive environments that respond to changes in lighting conditions.

  • Enhanced Performance and Scalability

Unreal Engine 5 is optimized for next-generation consoles and high-end PCs, delivering exceptional performance. Its scalable architecture ensures compatibility with a wide range of devices, from powerful gaming rigs to mobile platforms.

  • MetaHuman Creator

This tool enables the creation of highly realistic human characters quickly and easily. Developers can generate lifelike characters with detailed facial animations and expressions.

  • Quixel Megascans Integration

Unreal Engine 5 integrates with Quixel Megascans, providing access to a vast library of high-quality 3D assets and textures. This integration streamlines the asset creation process, saving time and enhancing visual quality.

What are the Advantages of Unreal Engine Game Development?

Here are some of the key advantages of using Unreal Engine for game development:

  • High-Quality Visuals and Graphics

Unreal Engine is renowned for its capability to produce stunning, high-quality visuals. Its rendering engine supports complex shaders and high-resolution textures, allowing developers to create realistic and immersive environments. The visuals make it a strong contender in the Unity vs Unreal debate, especially for projects that prioritize graphical excellence.

  • Blueprint Visual Scripting

Unreal Engine’s Blueprint system offers a visual scripting language that enables developers to create gameplay mechanics, animations, and more without writing code. This feature is particularly useful for designers and artists who may not have extensive programming knowledge but want to prototype and implement features quickly. In the Unity vs Unreal Engine 5 comparison, Blueprint gives Unreal an edge in terms of accessibility for non-programmers.

  • Strong Community and Support

The Unreal Engine community is large and active, providing a wealth of resources, tutorials, and forums for developers to seek help and share knowledge. Epic Games also offers extensive official documentation and learning resources, making it easier for developers to get started and improve their skills. 

  • Integrated Tools and Ecosystem

Unreal Engine comes with a suite of integrated tools that streamline the development process. These tools include a robust animation system, a material editor, and advanced physics and particle systems. This comprehensive toolset reduces the need for external plugins and third-party tools, which is a notable advantage when comparing Unity 3D to Unreal Engine.

  • Versatility Across Industries

While primarily known for game development, Unreal Engine is also used in various other industries, such as film, architecture, automotive, and virtual production. Its versatility and high-quality output make it suitable for creating cinematic experiences, architectural visualizations, and interactive simulations.

  • Performance and Optimization

Unreal Engine is designed to maximize performance and optimize game rendering. Its architecture supports the efficient handling of complex scenes and high-fidelity graphics, ensuring smooth gameplay even on demanding projects. This focus on performance is a key advantage when considering Unity vs Unreal for high-end game development.

  • Marketplace and Asset Availability

The Unreal Engine Marketplace offers a wide range of assets, including 3D models, animations, sounds, and plugins. This extensive library allows developers to find and integrate high-quality assets into their projects easily.

What are the Disadvantages of Unreal Engine Game Development?

While Unreal Engine may be considered a powerful and versatile engine for creating solid games, it also has its fair share of disadvantages. Here are some of the key drawbacks:

  • Steeper Learning Curve

Unreal Engine is known for its complexity, which can pose a challenge for beginners. Its comprehensive feature set and advanced tools require a significant time investment to master. Compared to Unity, which is often considered more user-friendly, the learning curve can be a deterrent for new developers. This is a crucial factor in the Unity vs. Unreal debate, especially for those just starting in game development.

  • Performance Overheads

Despite its high-performance capabilities, Unreal Engine can have substantial performance overheads, particularly for smaller projects or less powerful hardware. The engine’s advanced features and graphical capabilities can lead to longer loading times and higher system requirements. In the Unity vs. Unreal Engine 5 comparison, Unity often proves to be more efficient for simpler, less resource-intensive projects.

  • Licensing and Costs

While Unreal Engine offers a royalty-based licensing model, this can become expensive for successful games. Developers are required to pay a percentage of their revenue after a certain threshold, which can add up for high-earning titles. In contrast, Unity provides a subscription-based model that may be more predictable in terms of budgeting. This aspect is frequently discussed in the Unreal Engine vs. Unity evaluation.

  • Resource Intensity

Unreal Engine’s powerful features come at the cost of being resource-intensive. Development projects in Unreal Engine often require more powerful hardware and larger development teams to fully utilize its capabilities. This can be a limitation for indie developers and smaller studios, making Unity 3D vs. Unreal Engine a critical consideration for those with limited resources.

  • Community and Support Disparities

While Unreal Engine has a strong community and support system, it can be less accessible than Unity’s. Unity’s larger user base and more extensive documentation can make finding solutions and getting help easier.

Which Engine is Better for Game Development: Unity vs Unreal Engine 5?

When entering the Unity vs Unreal Engine 5 debates, there are a significant number of factors that decide which gaming platform is better. The answer is quite subjective. 

If you’re a mere beginner who wants to get the hang of game development, then Unity is more beginner-friendly than Unreal Engine. On the other hand, you need a bunch of dedicated time to figure out how to use the various tools in Unity Engine. Most of the Unreal tools such as animations, VFX, sound, AI, terrains and physics go unused.

Also, Unity supports cross-platform development, supports lower-performance machines and is quick and simple to iterate, therefore, providing a powerful toolbox to create any type of game.

However, if you’ve been a professional in the gaming industry for years, Unreal Engine is your best friend. You can create hyper-realistic games as it provides multi-layered professional tools that require years of dedicated experience to use properly.

And, what about which engine is more popular?

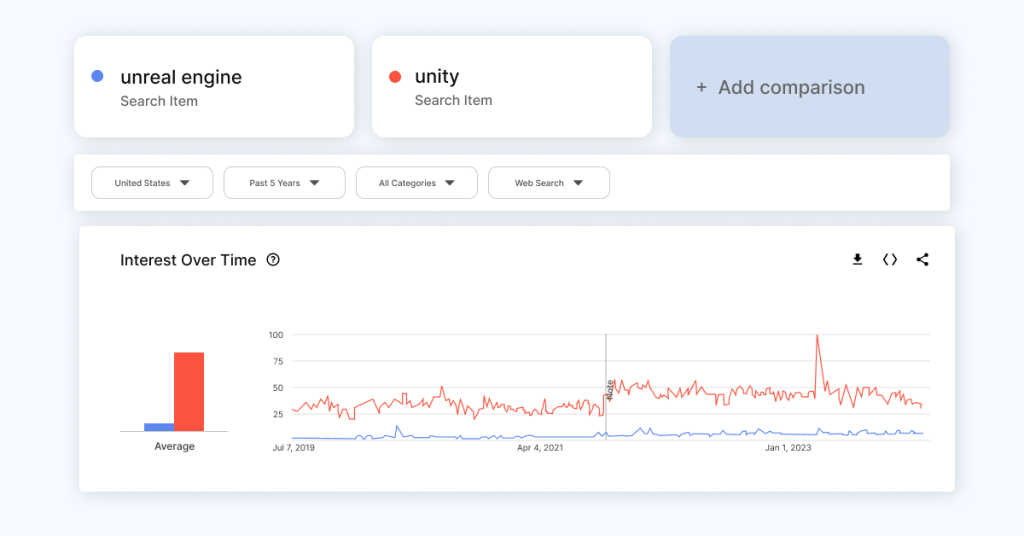
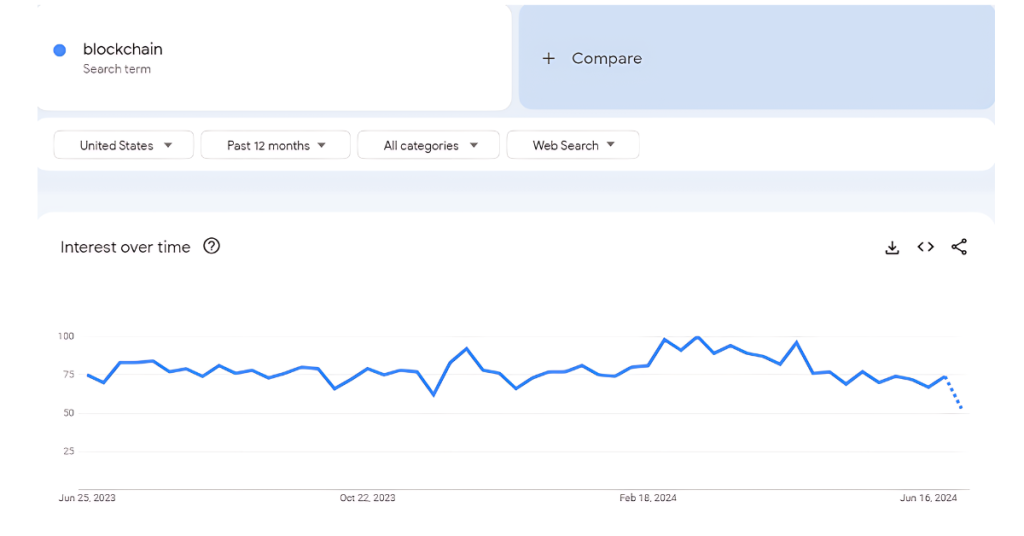
Over the past five years, people are showing more interest in Unity than Unreal Engine because of its beginner-friendliness and the ease to iterate the code. The following data from Google Trends is a witness in itself!

data from Google Trends

Looking for a Hyper-Realistic Game Development Company?

Whether you’re an entrepreneur or enterprise wanting to roll out your own 2D or 3D mobile game in the market, Deftsoft is here to help. We’ve got a seasoned team of game developers, UI/UX designers and testers who can build hyper-realistic games irrespective of the type you want. From Unity 3D to Unreal Engine, we develop next-gen games so that you can target an enhanced user base.
Your search for the best mobile game development company ends here!

FAQs:

1. What are the key differences between Unity vs Unreal Engine 5?

Unity and Unreal Engine 5 both offer powerful tools for game development but they have distinct features. Unity is known for its user-friendly interface and cross-platform compatibility, making it ideal for beginners and smaller projects. In contrast, Unreal Engine 5 excels in high-fidelity graphics and advanced rendering capabilities, making it a preferred choice for experienced developers aiming for photorealistic environments. 

2. How does the learning curve of Unreal Engine vs Unity compare?

Unity is generally considered more beginner-friendly due to its intuitive interface and extensive documentation. Unreal Engine 5 has a steeper learning curve because of its comprehensive feature set and advanced tools. Beginners might find Unity easier to get started with, while seasoned developers might prefer the powerful capabilities of Unreal Engine vs Unity.

3. Which engine performs better for mobile game development: Unity 3D vs Unreal Engine?

Unity 3D is highly regarded for its cross-platform support and optimization for mobile devices, making it a popular choice for mobile game developers. Unreal Engine 5 also supports mobile development but is often favored for its high-end graphics and performance, which might be overkill for simpler mobile games. When considering Unity vs Unreal for mobile, Unity’s efficiency and ease of use give it an edge.

4. What are the advantages of using Unity vs Unreal Engine for indie developers?

Indie developers often prefer Unity vs Unreal Engine due to Unity’s user-friendly interface, extensive asset store, and lower system requirements. Unity allows indie developers to quickly prototype and deploy games across multiple platforms without extensive coding knowledge. Unreal Engine 5 offers advanced features and high-quality graphics but can be more resource-intensive and complex.

5. Which engine is more popular in the industry today: Unity vs Unreal Engine 5?

In recent years, Unity has gained more traction, especially among beginners and small to mid-sized studios. Unity’s ease of use, extensive community support, and cross-platform capabilities are beneficial. Unreal Engine 5 is highly regarded for its cutting-edge graphics and is preferred by larger studios and professionals in the industry. However, Google Trends data indicates a growing interest in Unity vs Unreal due to its beginner-friendliness and iterative development process.

Non-Negotiable Tips for Developing a P2P Lending Platform

The world is emerging with new methodologies to find alternatives to traditional lending systems and P2P lending platforms have democratized the finance scenario. Because of lucrative borrowing and investing options, people are swaying away from conventional monetary systems. 

According to Yahoo Finance, the global P2P lending market is poised for significant growth, with a projected market share of USD 621.3 billion by 2032. This represents a compound annual growth rate (CAGR) of 28.1% between the forecast period of 2023 and 2032, signaling a wealth of opportunities for those in the industry.

Whether you’re a business organization or enterprise looking to build a P2P lending platform, we have gathered the most practical tips to keep in mind before and after developing a successful platform.

Before discovering the tips for a robust P2P lending platform, it is important to understand how these platforms make money.

How Can You Benefit from P2P Lending Platform Development?

A peer-to-peer lending platform is a decentralized common ground for lending and borrowing money. Powered by blockchain, it is not owned by any third-party beneficiary, financial institutions, banks, NBFCs, or credit brokers. 

Borrowers and lenders can sign up on a P2P lending platform through KYC/AML verification. A dedicated crypto wallet is assigned to investors and borrowers. Lenders can find their borrower match and gain competitive interest rates. 

But how does a P2P lending platform earn money?

Investors and borrowers pay a particular platform fee when making transactions on a P2P lending platform. The platform also charges a fee when someone avails of the platform’s services.

Top Tips to Consider Before P2P Lending Platform Development

Tips to Consider Before P2P Lending Platform Development

Here are the top tips to consider right before developing these platforms platform:

1. Research About the Market’s Needs

The first step before developing a P2P lending platform is to perform comprehensive market research about what the user wants. It is very critical to analyze the pain points that are prevailing in conventional lending systems and how you can address the pain points of investors and borrowers. You must also understand how you can offer unique values and attractive interest rates to the users.

2. Focus on a User-Friendly Interface

A user-friendly interface can make or break your P2P lending platform’s success. Make sure that you create a design that is intuitive to navigate, offers a simplified transaction process and streamlined workflows, provides an easy loan application process and is transparent about its terms and conditions.

3. Top-Tier Security and Compliance 

User security and compliance are pivotal in ensuring the safety and protection of users leveraging the P2P lending platform. You must incorporate regulatory standards into the platform’s software along with legal considerations. This practice will help curate such platform with end-to-end security.

4. Broad Spectrum of Lending Products

Your P2P lending platform must offer a diverse range of loans to borrowers and investors. These lending options include business loans, personal loans, student loans, medical loans, etc. Therefore, you will be able to attract a wide variety of users to your P2P lending platform.

5. Implement Credit Scoring and Risk Assessment 

Integrating a credit scoring system is important to help lenders estimate the risk involved in lending money to the borrowers. This system can analyze a borrower’s complete lending history—whether he has previously been a defaulter or not—the borrower’s profile and other important data to understand the risk involved. 

The P2P lending platform developers can use new-age machine learning functionalities and algorithms to build a foolproof and compelling P2P lending platform for investors and borrowers.

6. Built-In Profile Matching

Automation can ease down various processes such as document verification, loan application review, credit history checks and lender-borrower profile matching. P2P lending developers can define certain criteria that can speed up the lending process and facilitate the mediation of successful loan transactions.

7. Integrated Real-Time Updates

You must create a dedicated platform dashboard that provides real-time updates about the loan application, its status, interest rates, loan repayment notifications to the borrowers, monthly interest gained by the lenders, etc. This transparent communication through such platform facilitates real-time updates.

Top Tips to Consider After Developing P2P Lending Platform

Tips to Consider After Developing P2P Lending Platform

Once the P2P lending developers have created the platform, here are some of the top tips to consider for your P2P lending platform:

1. Robust Customer Support

Quick and responsive customer support plays a significant role in determining the success of a P2P lending platform. You must have an effective and easy-to-use customer support system that quickly resolves users’ queries, whether the user has inquiries as a borrower or investor.

2. Efficient Platform Updates

You must ensure that the P2P lending platform is up-to-date with the latest industry standards by frequently pushing out new updates to the platform. Along with regular updates, you must specialize in keeping the app in compliance with the industry’s latest security standards.

3. Smart Default Handling

Your P2P lending platform must also have a smart system for handling the borrower defaults. In case of loan defaults, there must be a robust and efficient dispute system so that the dispute can be resolved easily.

Conclusion

Peer-to-peer lending has revolutionized the lending scenario entirely by eliminating any kind of intrusion from third-party beneficiaries. The rapid growth of the P2P lending market presents a significant opportunity for businesses and enterprises to develop innovative and user-friendly platforms. By focusing on thorough market research, user-friendly interfaces, top-tier security, diverse lending products, and advanced credit scoring, developers can create successful such platforms. 

Post-development, maintaining robust customer support, regular platform updates, and efficient default handling are crucial for long-term success. Embracing these non-negotiable tips ensures the creation of a compelling and secure platform that meets the evolving needs of borrowers and investors.

FAQs

1. What is a P2P lending platform?

A P2P lending platform is a decentralized marketplace that connects borrowers and lenders directly, bypassing traditional financial institutions. It is often powered by blockchain technology to ensure security and transparency.

2. How do P2P lending platforms make money?

P2P lending platforms earn money through platform fees charged to both borrowers and lenders for transactions and services provided on the platform.

3. Why is a user-friendly interface important for a P2P lending platform?

A user-friendly interface ensures that users can easily navigate the platform, apply for loans, and complete transactions smoothly, which is crucial for the platform’s success and user satisfaction.

4. What security measures should a P2P lending platform include?

The platform should incorporate regulatory standards, legal considerations, and robust security protocols to protect user data and ensure compliance with industry standards.

5. How can a P2P lending platform handle borrower defaults?

A smart default handling system should be in place, including an efficient dispute resolution process to manage loan defaults and ensure smooth resolution of any issues that arise.

The 8 Leading Cross-Platform App Development Frameworks You Should Know

The tech world was introduced to the term ‘cross-platform’ right back in September 2018 when Sony announced that it had opened the doors for cross-platform play on PlayStation 4 for Fortnite. It was a game-changer in the gaming and development industry!

This is when many developers and software engineers in the masses got thrilled about the concept of cross-platform development. Fast-forward to 2024, cross-platform app development has become a staple for both iOS and Android apps.

One recent study revealed that approximately 87% of developers are currently relying on cross-platform frameworks for mobile app development. 

This blog will familiarize you with the best cross-platform app development frameworks you can use for your project. You’ll also understand what’s the buzz about cross-platform mobile app development frameworks and how you can find the best cross-platform framework for your project.

Understanding the Buzzword ‘Cross-Platform’ Development

Cross-platform development refers to creating software applications that can run on multiple operating systems (OS) without needing to be rewritten for each one. Instead of building separate versions for Windows, macOS, Linux, Android, and iOS, developers use tools and languages that allow a single codebase to be deployed across different platforms.

Imagine you want to build a mobile app. Traditionally, you would need to write one version in Swift or Objective-C for iOS and another in Java or Kotlin for Android. Cross-platform development simplifies this process.

For example, using a framework like Flutter, you write your app in the Dart programming language. This single codebase can then be compiled to run on both iOS and Android devices.

How Cross-Platform Frameworks Come into Play?

Cross-platform frameworks are essential for the process of cross-platform mobile app development. They provide the necessary tools, libraries, and runtime environments to ensure the app works correctly on various platforms. 

Popular frameworks include Flutter, React Native, Xamarin, and many more. These frameworks bridge the gap between the different operating systems, translating the single codebase into native code for each platform. 

This approach saves time, reduces development costs, and ensures a consistent user experience across devices. Let’s explore the top 8 most popular cross-platform mobile development frameworks that can help you save time and generate an outstanding, power-packed app.

App Developers Most Used Cross-Platform Development Frameworks 

It’s time to explore the best cross-platform app development frameworks that are mostly used by top-notch app developers:

1. Flutter

When talking about their favorite choice, developers talk about Flutter. Created by Google, Flutter is an open UI toolkit that allows web, mobile and desktop app developers to create cross-platform apps. They just need to use a single codebase to build apps for various platforms and devices. 

Programming Language Used: It uses a modern and expressive language called Dart, which allows quicker development.

Best Feature: Your app feels exactly like a native app on any device, as Flutter combines the native code within half the budget.

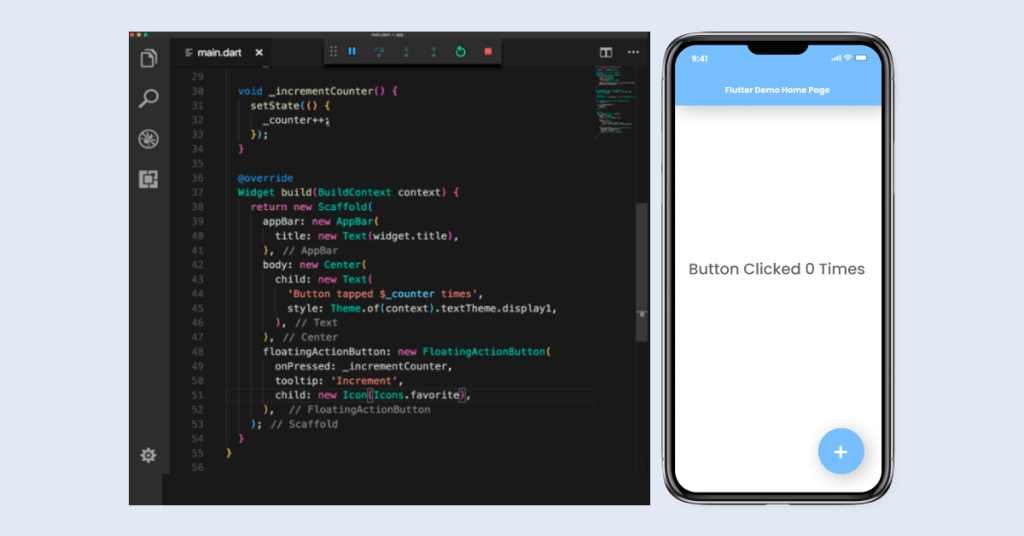
Flutter interface

Some of the main highlighting features of Flutter are as follows:

  • Hot Reload

Developers can easily keep up with the changes in the code as they are reflected simultaneously. Because of the faster development cycles, developers can easily find the best fit for UI concepts and introduce error correction. 

  • Native Feature Adaptation: 

Flutter has the freedom to integrate various native functionalities such as geolocation, camera access, etc. This helps developers to tap into platform-specific widgets such as Google Fuchsia, iOS and Android.

  • Broad-Spectrum Support: 

The Flutter framework is not just a framework to build cross-platform app for iOS and Android, it can also be used to build desktop and web applications. So, if you’re new to development, you can learn Flutter and master building apps for various platforms.

Pros:

  • Useful for startups as it is economical
  • High-customization availability
  • Smooth integration with popular IDEs such as Android Studio and VSCode
  • Extensive widget library

Cons:

  • Not suitable for enterprise-level projects
  • Dart programming language is not that popular
  • It is a comparatively young
  • Apps created are larger in size

Popular Flutter Apps:

  • Alibaba
  • Hamilton
  • BMW
  • GooglePay

2. React Native

React Native is an open-source, cross-platform framework that originated in 2015. It was launched by Facebook and is based on the JavaScript and React. Focused on mobile app development, developers can build robust mobile apps.  This framework enables code sharing between iOS and Android, reducing the time and cost of development.

Programming Language Used: JavaScript

Best Feature: React Native provides a near-native performance for both iOS and Android with a single codebase.

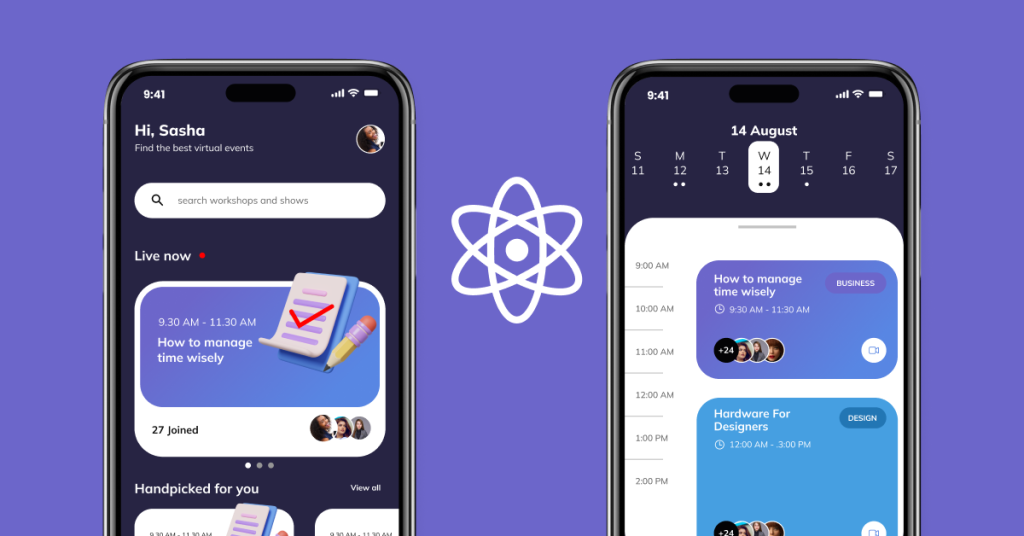
React Native

Some of the main highlighting features of React Native are as follows:

  • Multi-Language Support:

One of the best parts of React Native is that it supports multiple programming languages such as JavaScript, Objective-C, C++, Java and Python.

  • Native Module Integration

React Native allows seamless integration with native modules written in Swift, Objective-C, or Java. Therefore, it saves a lot of time for mobile app developers.

  • Extensive Community Support

 With a vast community of developers, finding solutions to issues and accessing various plugins and extensions is straightforward. This cross-platform framework is relatively older than Flutter and is more popular.

Pros:

  • Reusable code for both iOS and Android
  • Large community and extensive libraries
  • Strong performance close to native

Cons:

  • Native modules might be required for complex features
  • Performance can vary based on the app’s complexity

Popular React Native Apps:

  • Instagram
  • Airbnb
  • Facebook

3. Ionic

ionic framework

Ionic is a popular cross-platform framework that leverages web technologies such as HTML, CSS, and JavaScript to build mobile applications. Established in 2013 by Drift CO, it allows developers to create high-quality apps with a single codebase. In short, it is an open-source mobile UI toolkit.

Programming Language Used: JavaScript (Angular, React, or Vue)

Best Feature: Ionic’s comprehensive library of native plugins and UI components ensures that apps have a native look and feel.

Some of the main highlighting features of Ionic are as follows:

  • Adaptive Styling

Ionic adapts to the platform it’s running on, thus providing a native-like experience on both iOS and Android. When Ionic is paired with Angular, it offers outstanding results, especially in organizing app structure.

  • Cordova Plugins

Ionic cross-platform framework allows you to access native device features using Apache Cordova plugins. This integration helps you provide an immersive experience by harnessing the power of native features including camera, contacts, geolocation, and many more.

  • PWA Support

Ionic is not just limited to native apps but it also extends its support in building Progressive Web Apps (PWAs), allowing for the creation of web-based mobile apps. 

Pros:

  • Extensive UI component library
  • Strong community support
  • Easy integration with Angular, React, or Vue

Cons:

  • Performance can be less optimal for complex applications
  • Requires knowledge of web technologies

Popular Ionic Apps:

  • MarketWatch
  • Pacifica
  • Sworkit

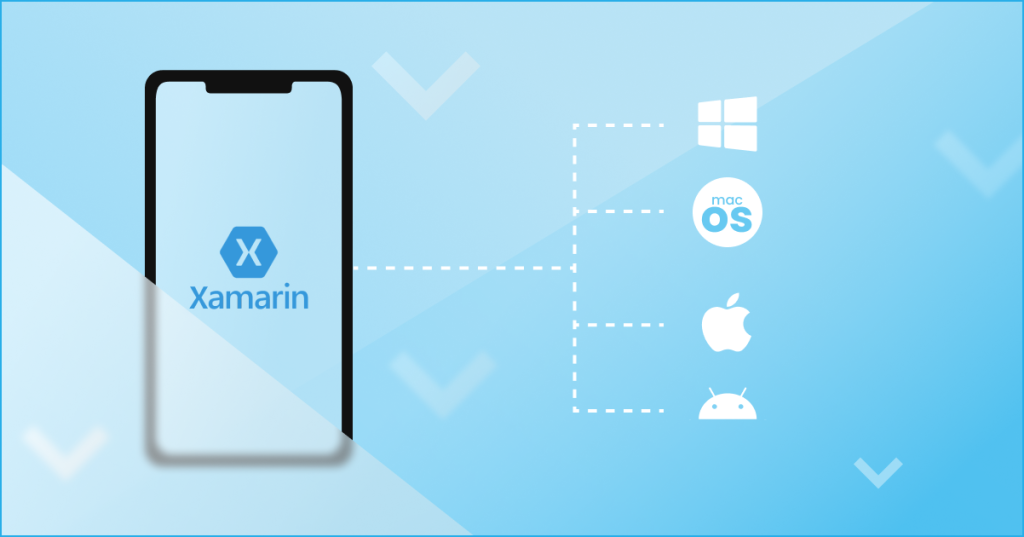
4. Xamarin

Xamarin is a Microsoft product that was launched as a cross-platform framework in May 2011. It is a robust cross-platform mobile app development framework with a high rate of efficiency, as it allows developers to share almost 90% of their code with other platforms. It also allows developers to build iOS and Android applications using C# and .NET.

Programming Language Used: C#

Best Feature: Xamarin provides a near-native performance and extensive access to native APIs, ensuring high-quality app performance.

Xamarin framework

Some of the main highlighting features of Xamarin are as follows:

  • Native Performance

Xamarin uses native UI controls to ensure that apps not only look native but also perform with the same efficiency and responsiveness as applications built specifically for iOS or Android. This means that the user experience is seamless and fluid, closely mirroring that of a fully native app, which is crucial for user retention and satisfaction.

  • Single Tech Stack

With Xamarin, developers can build apps using a single language, C#, across all platforms. This unified approach simplifies the development process, reduces the learning curve, and ensures consistency in code quality. It also allows for easier maintenance and updates.

  • Integrated Testing

Xamarin provides comprehensive tools for testing apps on multiple devices through the Xamarin Test Cloud. This allows mobile developers to ensure their apps function correctly on various devices and screen sizes, identifying and resolving issues before deployment

Pros:

  • Native performance and access to native APIs
  • Comprehensive development environment with Visual Studio
  • Strong support from Microsoft

Cons:

  • Larger app size compared to other frameworks
  • Learning curve for developers unfamiliar with C#

Popular Xamarin Apps:

  • Storyo
  • Alaska Airlines
  • FreshDirect

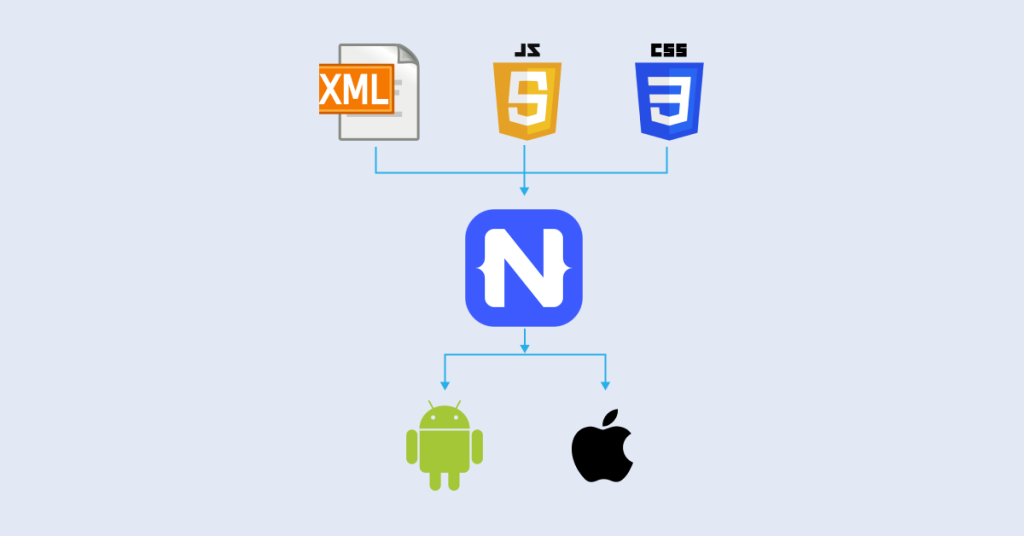
5. NativeScript

NativeScript is an open-source, cross-platform framework for building truly native mobile applications using JavaScript, TypeScript, or Angular. Launched in 2014 by Progress Software Corporation, it allows developers to leverage native APIs directly without any web views.

Programming Language Used: JavaScript, TypeScript, Angular

Best Feature: NativeScript provides direct access to native APIs, ensuring high performance and a native user experience.

NativeScript is an open-source, cross-platform framework

Some of the main highlighting features of NativeScript are as follows:

  • Native Performance

NativeScript utilizes native components for the user interface, ensuring apps have a genuine native look and feel on both iOS and Android. This approach provides seamless and efficient user experiences comparable to fully native apps.

  • Single Codebase

With NativeScript, developers can write their code once and deploy it on both iOS and Android platforms. This significantly reduces development time and costs, allowing for a unified approach to app creation.

  • Extensible Plugins

NativeScript offers an extensive library of plugins that developers can use to enhance and extend the functionality of their apps. This flexibility allows for the easy integration of various features and capabilities.

Pros:

  • True native performance
  • Strong integration with Angular
  • Access to native APIs without additional plugins

Cons:

  • Smaller community compared to React Native and Flutter
  • Learning curve for those new to Angular or TypeScript

Popular NativeScript Apps:

  • SAP Fiori Client
  • Strudel
  • Beachy

6. Unity

Unity is a leading cross-platform development framework released in June 2005 by Unity Technologies. Originally introduced as a Mac OS X game engine, it is primarily used for building games but can also be used to create simulations and other interactive experiences. It supports 2D and 3D game development.

Programming Language Used: C#

Best Feature: Unity’s powerful graphics and physics engines make it ideal for game development.

Unity is a leading cross-platform development framework

Some of the main highlighting features of Unity are as follows:

  • Extensive Asset Store

Unity’s Asset Store provides developers with access to a vast library of assets and plugins. This resource includes everything from pre-built characters and environments to complex scripts and extensions. By integrating high-quality, ready-made components, Unity saves significant development time and effort.

  • Multi-Platform Support

With Unity, developers can create their applications once and deploy them across over 25 different platforms, including mobile devices, desktops, and gaming consoles. This broad support ensures maximum reach and flexibility, allowing developers to target a wide audience with minimal additional work.

  • Strong Community

Unity boasts a large, active community and extensive documentation, providing robust support for developers at all levels. The community offers forums, tutorials, and resources that can help resolve issues, share best practices, and inspire new ideas, making the development process smoother and more collaborative.

Pros:

  • Powerful graphics and physics engines
  • Extensive asset store
  • Wide platform support

Cons:

  • Overkill for simple applications
  • Steeper learning curve for non-game developers

Popular Unity Apps:

  • Pokémon Go
  • Monument Valley
  • Angry Birds 2

7. Solar2D

Solar2D, formerly known as Corona SDK, is a cross-platform framework ideal for 2D game development. It was released in December 2009 and became a preferred language for building mobile, desktop and connected TV apps. It uses a simple, easy-to-learn language and offers a high-performance graphics engine.

Programming Language Used: Lua

Best Feature: Solar2D’s lightweight and fast performance make it ideal for mobile game development.

solar2d

Some of the main highlighting features of Solar2D are as follows:

  • High-Performance Graphics

Solar2D is optimized for 2D graphics, making it an ideal choice for game development. Its high-performance graphics engine ensures smooth animations and detailed visuals, crucial for creating engaging and visually appealing games.

  • Ease of Use

Solar2D uses a simple programming language, Lua, and an intuitive API, enabling rapid development. This ease of use allows developers to quickly prototype, test, and deploy their games, reducing development time and effort.

  • Cross-Platform

With Solar2D, developers can create games for iOS, Android, and other platforms using a single codebase. This cross-platform capability streamlines the development process and maximizes reach.

Pros:

  • High performance for 2D games
  • Easy to learn and use
  • Active community and extensive documentation

Cons:

  • Limited to 2D applications
  • Smaller community compared to major frameworks

Popular Solar2D Apps:

  • Fun Run 2
  • Zip Zap

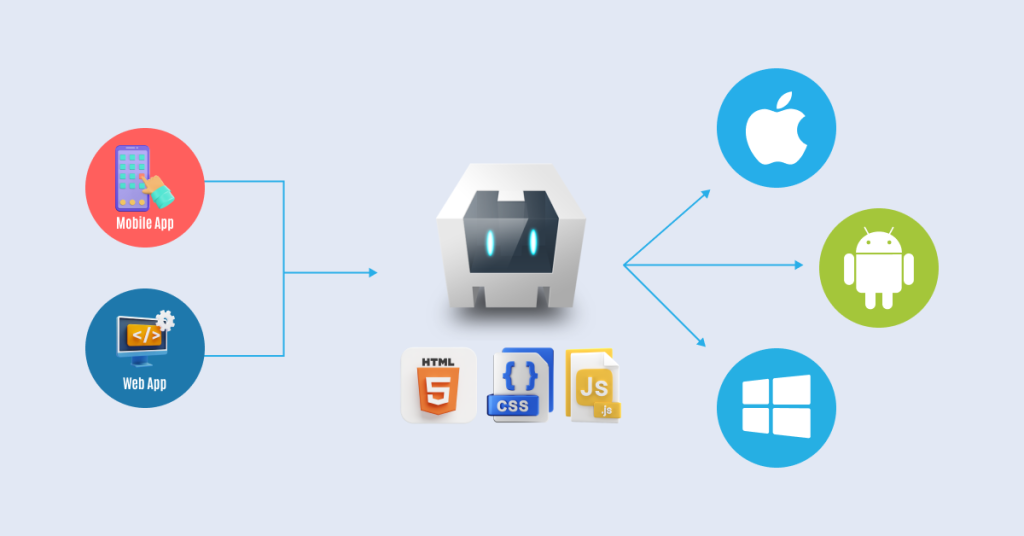
8. Cordova

Apache Cordova (formerly PhoneGap as named by Adobe Systems) is an open-source mobile development framework created in 2009 by Nitobi but was later on purchased by Adobe Systems. It allows developers to build apps using HTML, CSS, and JavaScript. It wraps your code in a native container to access device capabilities.

Programming Language Used: HTML, CSS, JavaScript

Best Feature: Cordova’s extensive plugin library allows access to native device features.

Cordova mobile development framework

Some of the main highlighting features of the Cordova framework are as follows:

  • Plugin Architecture

Cordova extends app functionality with a wide range of plugins. It offers customization, flexibility, modularity, and community engagement. Developers can add or remove features without changing the core application code.

  • Web Technologies

This cross-platform framework leverages web technologies such as HTML5, CSS, and JavaScript to build mobile applications. These apps can potentially run on multiple platforms (iOS and Android) with minimal modifications.

Pros:

  • Familiar web technology stack
  • Extensive plugin library
  • Wide platform support

Cons:

  • Performance might not match native apps
  • Dependence on plugins for native functionality

Popular Cordova Apps:

  • FanReact
  • Pacifica
  • JustWatch

Join Hands with the Innovative Cross-Platform Development Company

Are you struggling to find the right cross-platform framework for your project? Look no further than Deftsoft, a premier cross-platform app development company that builds customized solutions for enterprises, business organizations and startups. 

Our team of experienced cross-platform developers, UI/UX designers and testers have an experience of more than a decade in various avenues and segments. Achieve accelerated business success by opting for outcome-centric cross-platform app development services. Reach out today for customized cross-platform development.

FAQs:

1. What is cross-platform app development?

Cross-platform app development refers to creating software applications that can run on multiple operating systems (OS) using a single codebase. This approach eliminates the need to develop separate versions for each platform, such as iOS and Android, streamlining the development process and reducing costs.

2. Why choose cross-platform frameworks for mobile app development?

Cross-platform frameworks like Flutter, React Native, and Xamarin enable developers to write code once and deploy it across multiple platforms. This not only saves time but also ensures consistency in user experience across different devices, making it a preferred choice for businesses aiming to reach a broader audience efficiently.

3. What are the benefits of using cross-platform mobile development frameworks?

These frameworks offer advantages such as cost-effectiveness due to shared codebase, faster time-to-market, and easier maintenance. They also provide access to native features and APIs, ensuring that apps perform well and integrate seamlessly with device functionalities.

4. Which cross-platform framework is best suited for my project?

The choice of framework depends on factors like project requirements, team expertise, and desired app performance. Flutter is known for its fast development cycles and native-like UI, while React Native offers strong community support and compatibility with JavaScript libraries.

5. Are there any drawbacks to using cross-platform frameworks?

While cross-platform development offers many benefits, challenges may include performance issues on complex applications, dependency on framework updates, and limitations in accessing platform-specific features without custom native code integration.

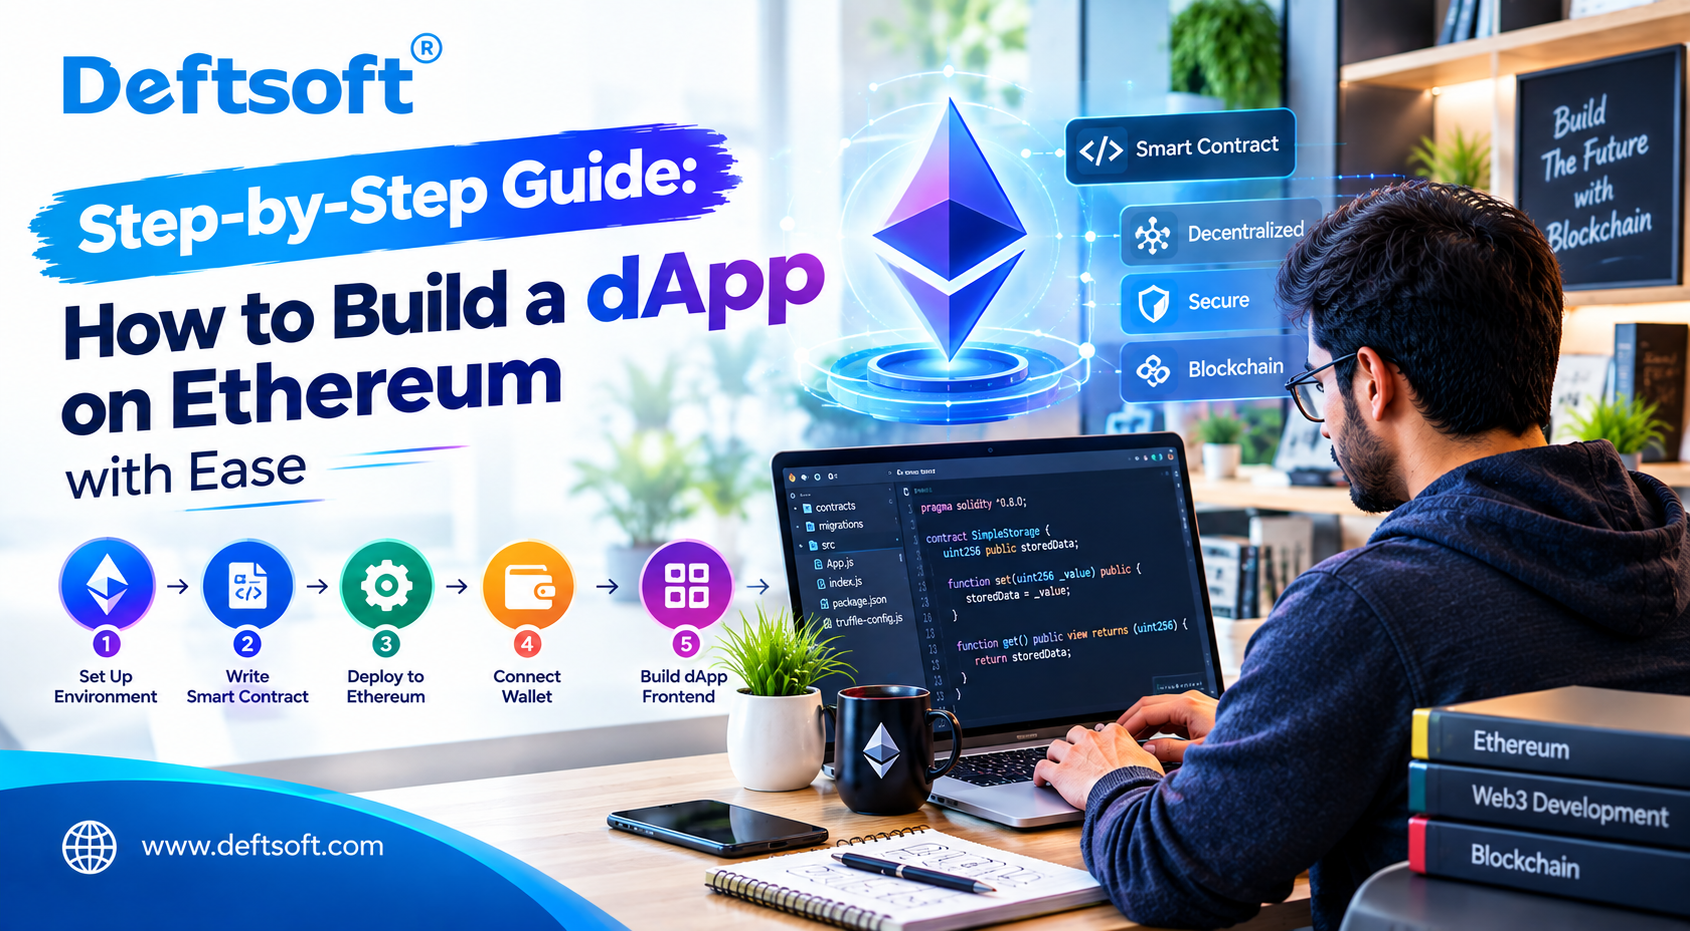
Step-by-Step Guide: How to Build a dApp on Ethereum with Ease 

A technology that started with a digital currency called Bitcoin has now opened the door to building fully functional apps. Many people confuse Ethereum with Bitcoin; however, they’re not the same.

If you’re intrigued by the idea of creating a decentralized app (dApp) on the Ethereum blockchain platform, then this guide is a treasure trove of knowledge for you. It’s your key to unlocking the world of dApp development. Let’s get started.

Is Ethereum Just Another Bitcoin?

Ethereum is not a digital currency like Bitcoin. However, it is a software platform built on blockchain that allows developers to build decentralized apps (dApps).

Ethereum was ideated by Russian-Canadian programmer and cryptocurrency researcher Vitalic Bitterin in 2013. Later, in 2015, it went live. The simplest explanation of Ethereum in two words is ‘Software platform.’

So, how does Ethereum differ from Bitcoin?

“Bitcoin and Ethereum are both use cases of blockchain technology with different purposes.”

– CryptoCasey’s podcast

Bitcoin is simply a digital currency that people can use as a form of payment to send to and from each other or hold as a store of value. On the other hand, Ethereum is a programmable blockchain that people can use to build software to create valuable products and services due to the decentralization properties of blockchain technology.

The software that people can build on Ethereum is called decentralized applications or dApps.

What Exactly is a dApp?

A decentralized app or dApp is an app whose data is stored on a distributed network of computers. It is a Web3 app that can be developed on a platform that is built on blockchain. A dApp enjoys three main benefits of being developed on a blockchain network. These are:

  • Decentralization

 The blockchain network is decentralized. Firstly, it means that the data is stored on a group of computers (nodes) rather than on a central server. Secondly, the network is not owned by any third-party intermediary, not even the government.

  • Transparency

Another important asset of blockchain is transparency. This means that the transactions recorded on the ledger are available for everyone to see and are stored on a network of computers around the world, thus making data impossible to alter or modify.

  • Immutability

Immutability simply means that the data recorded and stored on the blockchain cannot be changed, altered or forged. This un-modification of records is achieved through cryptography and blockchain hashing processes.

In simple words, when a Web3 developer builds a dApp on a blockchain network like Ethereum, he knows that no one can control the data or network or destroy it.

Also Read: The Beginner’s Handbook to Decentralized Apps (dApps)

Things to Know Before Building a dApp on Ethereum

There are two main things to know before beginning to build a dApp on Ethereum. Follow along!

  1. Know About Gas Fee

As discussed before, blockchain is decentralized, meaning it is software distributed across a vast network of computers around the world to incentivize people to host and maintain data on the blockchain. Ether was created as a form of payment to fuel the Ethereum network. 

So, anyone who wants to build a software application, i.e., dApp on an Ethereum network has to pay for the computing power and space required for using Ether. The amount of Ether required for network fees is determined by a built-in pricing system known as Gas.

Note: You only need to pay the gas fee for dApp deployment.

  1. Proficient in JavaScript and/or Solidity

If you’re entirely new to blockchain and dApp development, you cannot directly jump on learning about blockchain programming languages. You must first have the time and patience to learn a basic programming language such as JavaScript or Python. You must also be aware of front-end development as well. It is only then that you can plunge your hands into blockchain programming languages such as Solidity or Go to build smart contracts from dApp.

How to Create a dApp on Ethereum Step-by-Step?

Now that you’re aware of what you need to create a dApp on Ethereum let’s address our primary focus: how to build a dApp on Ethereum. There are numerous steps involved in building a dApp, such as setting up the development environment to deploy the smart contract and then creating a frontend so that the users can interact with the app.

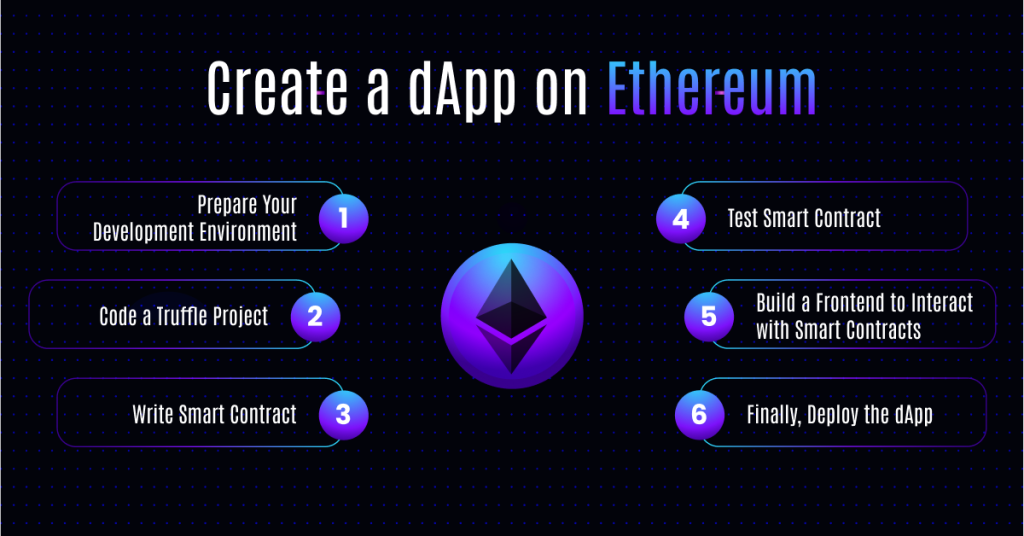
Follow the given roadmap to build dApp on Ethereum:

Create a dApp on Ethereum Step-by-Step_

1. Prepare Your Development Environment

You need to install the following tools and runtime environment:

  • Install Node.js runtime environment and npm package to run JavaScript applications and manage packages. You can download Node.js from here.
  • The next step is to download Truffle, a popular development framework for Ethereum. You can install Truffle with the following bash script on Node.js:

npm install -g truffle

  • Then, download Ganache, an Ethereum development tool that allows you to simulate the blockchain environment locally and deploy smart contracts.
  • It is important to download a software cryptocurrency wallet to interact with Ethereum. To do this, download MetaMask, a browser extension for managing Ethereum accounts and interacting with the blockchain.

2. Code a Truffle Project

After installing all the required tools, create a new Truffle project and set up your directory infrastructure. The goal of Truffle is to deploy dApps and smart contracts to Ethereum. It offers you all the tools and libraries to simplify development, building the contract, testing, deploying and managing it.

3. Write Smart Contract

You can write the smart contract in Solidity, which is one of the most widely used blockchain programming languages for Ethereum. Compile and migrate the smart contract using Truffle. A good tip is to connect your GitHub repository to Truffle Teams.

4. Test Smart Contract

You can write the tests in Mocha and Chai to test the functioning of your smart contract.

5. Build a Frontend to Interact with Smart Contracts

To interact with the smart contract, you need a front-end framework such as React.js. This allows you to integrate Web3.js with the Ethereum blockchain.

6. Finally, Deploy the dApp

Once you’re satisfied with the created version of your dApp, it’s time to deploy your smart contract to Ethereum. You can promote it to production by deploying it to Mainnet or any testnet. After that, connect your frontend with the deployed contract.

Build a dApp on Ethereum with an Example

It’s good to have practical knowledge, but what’s fun when you don’t know how to code the dApp in real life? To make it easy, we’ve taken an example of a peer-to-peer lending dApp that you can build by following these steps. Consider this practice as a warmup exercise so that you can get started with creating your own dApp on Ethereum.

Here are the practical steps to build a dApp on Ethereum:

  1. Set Up Development Environment

The steps are already mentioned above.

  1. Creating a Truffle Project
  • Use the following bash script to initialize the Truffle project:

mkdir LendingDApp

cd LendingDApp

truffle init

  • Use the following Arduino code to prepare the directory structure:

LendingDApp/

├── contracts/

│   ├── Migrations.sol

│   └── Lending.sol

├── migrations/

│   ├── 1_initial_migration.js

│   └── 2_deploy_contracts.js

├── test/

├── truffle-config.js

  1. Write the Smart Contract
  • Create ‘Lending.sol’ in ‘contracts’ folder by writing the following Solidity code:

pragma solidity ^0.8.0;

contract Lending {

    struct Loan {

        uint256 amount;

        address payable borrower;

        address payable lender;

        uint256 interest;

        bool repaid;

    }

    Loan[] public loans;

    mapping(address => uint256[]) public borrowerLoans;

    mapping(address => uint256[]) public lenderLoans;

    event LoanRequested(uint256 loanId, address borrower, uint256 amount, uint256 interest);

    event LoanFunded(uint256 loanId, address lender);

    event LoanRepaid(uint256 loanId);

    function requestLoan(uint256 amount, uint256 interest) external {

        loans.push(Loan({

            amount: amount,

            borrower: payable(msg.sender),

            lender: payable(address(0)),

            interest: interest,

            repaid: false

        }));

        uint256 loanId = loans.length – 1;

        borrowerLoans[msg.sender].push(loanId);

        emit LoanRequested(loanId, msg.sender, amount, interest);

    }

    function fundLoan(uint256 loanId) external payable {

        Loan storage loan = loans[loanId];

        require(loan.lender == address(0), “Loan already funded”);

        require(msg.value == loan.amount, “Incorrect amount”);

        loan.lender = payable(msg.sender);

        lenderLoans[msg.sender].push(loanId);

        loan.borrower.transfer(loan.amount);

        emit LoanFunded(loanId, msg.sender);

    }

    function repayLoan(uint256 loanId) external payable {

        Loan storage loan = loans[loanId];

        require(msg.sender == loan.borrower, “Only borrower can repay”);

        require(!loan.repaid, “Loan already repaid”);

        uint256 repaymentAmount = loan.amount + loan.interest;

        require(msg.value == repaymentAmount, “Incorrect repayment amount”);

        loan.repaid = true;

        loan.lender.transfer(repaymentAmount);

        emit LoanRepaid(loanId);

    }

    function getLoanDetails(uint256 loanId) external view returns (uint256, address, address, uint256, bool) {

        Loan storage loan = loans[loanId];

        return (loan.amount, loan.borrower, loan.lender, loan.interest, loan.repaid);

    }

}

  • Compile the smart contract through the following bash script:

truffle compile

  • Create ‘2_deploy_contracts.js’ in ‘migrations’ folder using the following JavaScript code:

const Lending = artifacts.require(“Lending”);

module.exports = function (deployer) {

    deployer.deploy(Lending);

};

  1. Migrate the Smart Contract

You the following bash script to migrate the smart contract:

truffle migrate

  1. Test the Smart Contract
  • Create ‘Lending.test.js’ in ‘test’ folder by writing the JavaScript code:

const Lending = artifacts.require(“Lending”);

contract(“Lending”, accounts => {

    it(“should allow a user to request a loan”, async () => {

        const instance = await Lending.deployed();

        await instance.requestLoan(100, 10, { from: accounts[0] });

        const loan = await instance.loans.call(0);

        assert.equal(loan.amount, 100, “Loan amount should be 100”);

        assert.equal(loan.interest, 10, “Loan interest should be 10”);

        assert.equal(loan.borrower, accounts[0], “Borrower should be the account requesting the loan”);

        assert.equal(loan.lender, 0x0, “Lender should be empty initially”);

    });

    it(“should allow a user to fund a loan”, async () => {

        const instance = await Lending.deployed();

        await instance.fundLoan(0, { from: accounts[1], value: 100 });

        const loan = await instance.loans.call(0);

        assert.equal(loan.lender, accounts[1], “Lender should be the account funding the loan”);

    });

    it(“should allow a borrower to repay a loan”, async () => {

        const instance = await Lending.deployed();

        await instance.repayLoan(0, { from: accounts[0], value: 110 });

        const loan = await instance.loans.call(0);

        assert.equal(loan.repaid, true, “Loan should be marked as repaid”);

    });

});

  • Run the test by using the bash script:

truffle test

  1. Build the Frontend to Interact with Smart Contracts
  • Set up the React app by using the following bash script:

npx create-react-app lending-dapp

cd lending-dapp

  • You then need to install Web3.js through the following bash script:

npm install web3

  • Create App.js components by using the following JavaScript code:

import React, { useState, useEffect } from ‘react’;

import Web3 from ‘web3’;

import Lending from ‘./contracts/Lending.json’;

const App = () => {

    const [web3, setWeb3] = useState(null);

    const [account, setAccount] = useState(null);

    const [contract, setContract] = useState(null);

    const [loans, setLoans] = useState([]);

    const [loanAmount, setLoanAmount] = useState(“”);

    const [loanInterest, setLoanInterest] = useState(“”);

    useEffect(() => {

        const init = async () => {

            const web3 = new Web3(Web3.givenProvider || ‘http://localhost:7545’);

            const accounts = await web3.eth.requestAccounts();

            const networkId = await web3.eth.net.getId();

            const deployedNetwork = Lending.networks[networkId];

            const instance = new web3.eth.Contract(

                Lending.abi,

                deployedNetwork && deployedNetwork.address,

            );

            const loanCount = await instance.methods.loansCount().call();

            const loanDetails = [];

            for (let i = 0; i < loanCount; i++) {

                const loan = await instance.methods.getLoanDetails(i).call();

                loanDetails.push(loan);

            }

            setWeb3(web3);

            setAccount(accounts[0]);

            setContract(instance);

            setLoans(loanDetails);

        };

        init();

    }, []);

    const requestLoan = async () => {

        await contract.methods.requestLoan(loanAmount, loanInterest).send({ from: account });

        setLoanAmount(“”);

        setLoanInterest(“”);

    };

    const fundLoan = async (loanId, amount) => {

        await contract.methods.fundLoan(loanId).send({ from: account, value: amount });

    };

    const repayLoan = async (loanId, amount) => {

        await contract.methods.repayLoan(loanId).send({ from: account, value: amount });

    };

    if (!web3 || !contract) {

        return <div>Loading Web3, accounts, and contract…</div>;

    }

    return (

        <div className=”App”>

            <h1>P2P Lending DApp</h1>

            <h2>Request a Loan</h2>

            <input

                type=”number”

                value={loanAmount}

                onChange={e => setLoanAmount(e.target.value)}

                placeholder=”Loan Amount”

            />

            <input

                type=”number”

                value={loanInterest}

                onChange={e => setLoanInterest(e.target.value)}

                placeholder=”Loan Interest”

            />

            <button onClick={requestLoan}>Request Loan</button>

            <h2>Loans</h2>

            <ul>

                {loans.map((loan, index) => (

                    <li key={index}>

                        Amount: {loan[0]} – Interest: {loan[3]} – Borrower: {loan[1]} – Lender: {loan[2]} – Repaid: {loan[4].toString()}

                        {!loan[4] && (

                            <>

                                <button onClick={() => fundLoan(index, loan[0])}>Fund Loan</button>

                                <button onClick={() => repayLoan(index, parseInt(loan[0]) + parseInt(loan[3]))}>Repay Loan</button>

                            </>

                        )}

                    </li>

                ))}

            </ul>

        </div>

    );

};

export default App;

  • Connect with smart contract:

Make sure that your frontend is connected to the right network where your smart contract is deployed.

  1. Deploy the dApp

After testing the dApp, the final step is to deploy the smart contract to Ethereum Testnet or Mainnet. Leverage the following steps to do so:

  • Update ‘truffle-config.js’ with the suitable network configuration (e.g., Rinkeby, Mainnet). You can deploy using Truffle through the following bash code:

truffle migrate –network <network-name>

  1. Deploy the Frontend

You can then use a hosting service such as GitHub Pages, Netlify or Vercel to host your React app.

Conclusion

That’s a wrap! If you’re a mere beginner or intermediate and want to refer to a guide on how to build a dApp on Ethereum, this blog is the perfect guide to get started. You can follow the complete roadmap to create your dApp. All you need to do is set up a development environment for creating a smart contract and then test and deploy the dApp. 

If you’re an enterprise or business organization looking to build dApps, Deftsoft has a dedicated team of seasoned dApp developers who can build a professional dApp for your business venture. We’re here to help.

FAQs:

1. What is the first step in building a dApp on Ethereum?

The first step in building a dApp on Ethereum is to prepare your development environment. This includes installing Node.js, npm, Truffle, Ganache, and MetaMask. These tools are essential for running JavaScript applications, managing packages, simulating the blockchain environment locally, and managing Ethereum accounts.

2. Do I need to know any specific programming languages to create a dApp on Ethereum?

Yes, to create a dApp on Ethereum, you should be proficient in JavaScript and have a good understanding of front-end development. Additionally, you will need to learn Solidity, the programming language used for writing smart contracts on Ethereum.

3. What is the role of Gas fees in building a dApp on Ethereum?

Gas fees are required for deploying and running transactions on the Ethereum network. When you build a dApp on Ethereum, you need to pay these fees in Ether (ETH) to compensate for the computing power and storage space utilized on the network.

4. How do I test my smart contract during the dApp development process?

You can test your smart contract by writing tests using Mocha and Chai frameworks. These tests help ensure that your smart contract functions correctly before deploying it to the Ethereum network. Truffle provides built-in support for these testing frameworks.

5. What are the main benefits of developing a dApp on the Ethereum blockchain?

The main benefits of developing a dApp on the Ethereum blockchain include decentralization, transparency, and immutability. Decentralization ensures that the data is stored on multiple nodes rather than a central server. Transparency allows anyone to view the transactions recorded on the blockchain. Immutability means that once data is recorded on the blockchain, it cannot be altered or deleted.

Why Does Your Business Need Blockchain Development Company’s Expertise?

What started as a digital currency, Bitcoin, in 2009 has now evolved into a technology that’s transforming industries. Various industrial segments are evolving with the implementation of blockchain technology. In 2024, Blockchain is known for its three key pillars: decentralization, transparency, and immutability, and it’s being embraced by businesses across the globe.

Driven by its attractive features, numerous enterprises and business organizations are leveraging blockchain technology to make their operations more feasible and interesting. One of its major benefits is the elimination of third-party intervention, ensuring a more streamlined and secure process.

according to Google Trends

Even according to Google Trends, there is a consistent uptrend in the popularity of users indulging with Blockchain technology.

This guide outlines the fundamentals of what to look for in a blockchain development company, the various blockchain development services involved, and, of course, why your business needs a custom blockchain development company.

What Exactly are Blockchain Development Services?

Blockchain development refers to the development, design, testing, and optimization of blockchain technology products such as decentralized applications (dApps), smart contracts, Non-Fungible Tokens (NFTs), crypto wallets, STO development, etc. 

Blockchain development services are services that a blockchain development company provides to build various blockchain-powered solutions with an array of industrial applications, such as in e-commerce, retail, technology, transport and logistics, hospitality, medicine, research, etc. 

For enterprises, business organizations, and startups, the key is to choose a reliable blockchain development company with a proven track record. With such a blockchain development partner, you can be sure that your blockchain development needs are in safe hands.

Why Your Business Must Invest in a Blockchain Development Company?

Outsourcing your blockchain development project is a strategic move. By entrusting your project to a blockchain development company, you can be confident in achieving tangible results. With a dedicated team of seasoned professionals focused on your project, you can achieve success quicker and more efficiently. This practice also combats the need to allocate a hefty in-house budget to kickstart a project.

Why Your Business Must Invest in a Blockchain Development Company

The following are some of the significant reasons why you require investing in a blockchain development company:

  • Years of Dedicated Expertise

A reliable blockchain development company has years of experience related to a specific technology, which in this case is blockchain development. It become quite time-consuming and inefficient to create a team of blockchain developers, UI/UX designers, coders and testers from scratch. This is why it is easier to outsource a blockchain project than to deploy it yourself.

  • Array of Developers

When you hire a blockchain development company for your project, you significantly open the doors to a broad spectrum of blockchain developers. Be it smart contract development, ICO/IEO/STO development, dApp development, NFT marketplace development, P2P lending platform development or any other type of blockchain development services, a smart blockchain development company can cater to all that you need.

  • Customization at its Best

You get a complete and 360-degree evaluation of your project with the experts in blockchain technology before they kickstart the project. These well-versed professionals with tons of experience analyze your requirements, validate your vision and then offer a customized blockchain solution that suits your needs.

  • Faster Time-to-Market

Blockchain development companies work with strict deadlines without hampering the quality of the project outcomes. Therefore, you experience faster time-to-market without compromising on the functionality and efficiency of the final product. One of the other upsides of outsourcing your project is that you get solid feedback from an external source that gives you an open perspective on your approach.

What are the Various Blockchain Development Services?

A custom blockchain development company offers multiple blockchain-related services. Based on your goals and objectives, you can choose any of the following blockchain development services that are prevalent in today’s market:

1. ICO, IEO and STO Development

Are you looking for fresh and unconventional ways to raise funds for your startup or a potential idea? Look no further than the Initial Coin Offering (ICO), Initial Exchange Offering (IEO) and Security Token Offering (STO) development services. Since STO is the latest and most evolved methodology, look for an innovative STO development company that checkmarks all of your requirements.

When outsourcing an ICO, IEO or STO development project, look for a blockchain development company that provides end-to-end token development services that address the entire process of developing and listing tokens on a blockchain platform like Binance and also, marketing these tokens in a suitable ecosystem. Opt for a company that provides an innovative approach, follows a quick preparation process for ICO, IEO and STO development and ensures high-quality fundraising and the correct execution of the development process.

2. dApp Development

With the worldwide adoption of blockchain technology, the industry is inclining towards decentralized applications (dApps). If you’re in search of a leading blockchain development company that creates apps that function on a distributed ledger technology, the dApp development services are the right fit for your requirements. 

These development companies provide custom dApp development services that can build robust decentralized apps on various blockchain platforms such as Binance, Stellar, Ethereum, EOS, Ripple, Hyperledger, Polkadot, etc. The process of dApp development not only includes app development but also involves creating smart contracts to implement certain conditions for the app. 

Look for a company that provides scalable, extensive and easy-to-deploy dApp development services so that you can foster achievable results for your blockchain project.

3. Smart Contract Development

Smart contract development services lay the foundation of blockchain development methodology as these services help streamline various transaction processes that take place on a blockchain network. If you want to implement a smart contract for your dApp or fundraising, etc., it is indeed important to hire professional smart contract developers who can eliminate physical paperwork and also, ease down the legal implementation of smart contracts.

In such cases, it is imperative to hire a custom smart contract development company that has a professional team of developers, designers, code writers, deployers and QA testers. Your primary goal should be to emphasize the importance of getting a ‘secure’ smart contract built by the company. 

There are a bunch of smart contract services available in the industry. These services include smart contract architecture and development, audit and optimization, smart contract for dApps, for NFTs, for DeFi and smart contract consulting.

4. Crypto Wallet Development

Crypto wallets are of premium importance as they store all the decentralized assets inside them. Whether you’re an enterprise, business organization or startup owner looking to secure your digital assets in an intuitive and easy manner, crypto wallet development services are meant for you. 

A crypto wallet development company develops a crypto wallet that stores private and public keys, stablecoins, tokens, Non-Fungible Tokens (NFTs) and other cryptocurrencies with utmost security and perfectly on-time delivery. From DeFi trading to securely investing on decentralized exchange (DEX) platforms, crypto wallets can help you function in the safest manner.

Ensure multi-step authentication, sophisticated security of digital assets and intuitive wallet navigation through crypto wallet development services.

5. Peer-to-Peer (P2P) Lending Platform Development

If you’ve ever taken a loan, you can completely understand the hassle associated with its approval. However, peer-to-peer (P2P) lending eliminates the need for third-party intermediaries such as banks, NBFCs, credit brokers or financial institutions. If you want to get a P2P lending platform built, you can reach out to a P2P lending platform development company.

The company that you outsource your project to takes care of a 360-degree approach which includes the development of the P2P lending platform, loan processing, investments and reducing maintenance costs. By utilizing the power of latest and cutting-edge technologies such as IoT and Artificial Intelligence (AI), a P2P lending platform development company builds robust, seamless, easy-to-use P2P websites and apps.

6. NFT Marketplace Development

If you’re an enterprise or business organization that dreams of building a secure, scalable, and extensive Non-Fungible Token (NFT) platform, then you need to choose an NFT marketplace development company

An NFT marketplace development company can cater to your industry-specific requirements and build a decentralized solution that can host art and collectibles from artists all around the world. The company can create an NFT marketplace on the blockchain of your choice, including Binance, EOS, Ripple, Ethereum, Solana, Avalanche, Polkadot, etc. If you want to achieve exponential growth for your NFT venture, it is quite important to invest in a blockchain development company.

What is the Future of Blockchain Development?

As the blockchain technology is gaining traction in the various avenues, the future of this technology seems bright and promising. Moving on, we can expect certain trendlines and extensive adoption of the technology. The following are some of the major trends to expect in the future:

  • Increased Adoption across Industries

As blockchain technology matures, various industries such as finance, healthcare, and supply chain management are expected to adopt blockchain development services more extensively. A blockchain development company can offer tailored solutions that ensure secure, transparent, and efficient processes, thus driving mainstream adoption.

  • Enhanced Interoperability

Future blockchain development will focus on enhancing interoperability between different blockchain networks. Blockchain development companies will prioritize creating protocols that allow seamless communication and data exchange between disparate blockchains, fostering a more connected and efficient ecosystem.

  • Integration of AI and IoT

The convergence of blockchain with Artificial Intelligence (AI) and the Internet of Things (IoT) will open new avenues for blockchain development services. Blockchain development companies will leverage these technologies to create smart, autonomous systems that can handle complex tasks, enhance security, and improve decision-making processes in real time.

  • Focus on Sustainability

As concerns about blockchain’s environmental impact grow, future blockchain development will emphasize sustainability. Blockchain development companies will innovate to create more energy-efficient consensus mechanisms and explore renewable energy sources to power blockchain networks, ensuring a greener future.

  • Regulatory Evolution

The regulatory landscape for blockchain is evolving, and future developments will be influenced by emerging regulations. Blockchain development services will need to stay compliant with these regulations, and companies will play a crucial role in developing solutions that meet legal standards while maintaining the decentralized ethos of blockchain technology.

Partner with An Innovative Blockchain Development Company

In today’s competitive world, diligently investing in a blockchain development company has become a non-negotiable. One such premier blockchain development company is Deftsoft. For the last 18 years, Deftsoft has been a leading name in various avenues, with blockchain being one of the most successful ones. 

Known for its customized blockchain development services, we offer various services pertaining to blockchain such as ICO, IEO and STO development, smart contract development, P2P lending platform development, NFT marketplace development and crypto wallet development. The company has a team of seasoned professionals, including blockchain developers, UI/UX designers, QA testers, and many other blockchain experts. 

Join hands with an innovative and custom blockchain development company like Deftsoft to yield tangible results that exceed your expectations.

FAQs:

1. What services can I expect from an STO development company?

An STO (Security Token Offering) development company specializes in creating security tokens that represent ownership of assets such as real estate, equity, or bonds. These tokens are developed to comply with regulatory standards and can be traded on blockchain platforms. You can expect an STO development company to handle the entire process, from token creation to listing and marketing, to ensure a secure and legally compliant offering.

2. Why should I hire a blockchain development company for my project?

Hiring a blockchain development company provides access to experienced professionals who specialize in various aspects of blockchain technology. These companies offer comprehensive services, including dApp development, smart contract creation and crypto wallet development. Outsourcing your project can benefit you from their expertise, which can lead to faster development times, lower costs and a higher-quality final product.

3. What blockchain development services can I expect from a professional company?

A professional blockchain development company offers a wide range of services such as dApp development, smart contract development, ICO, IEO and STO development, crypto wallet development, P2P lending platform development and NFT marketplace development. These services are tailored to meet the specific needs of various industries, ensuring efficient and secure blockchain solutions.

4. How does a custom blockchain development company differ from a standard one?

A custom blockchain development company focuses on creating tailored solutions that align with your specific business requirements. They provide a thorough analysis of your project needs, validate your vision and develop a customized blockchain solution. This personalized approach ensures that the final product is optimized for your unique use case, delivering maximum value and efficiency.

5. What factors should I consider when choosing a blockchain development company?

When selecting a blockchain development company, consider factors such as proven track record and experience in blockchain projects, range of services offered, including dApp development, smart contracts and STO development, customization capabilities to meet your specific project requirements, speed of development and adherence to deadlines, quality of the development team including developers, designers, and QA testers and compliance with regulatory standards and focus on security. By evaluating these factors, you can ensure that you choose a reliable and competent blockchain development partner.