The mobile app development industry is growing worldwide, with many startups looking to expand their digital presence. Mobile apps have changed how companies interact with customers. These mobile applications are responsible for 88% of mobile time spent worldwide. In essence, every user in today’s world wants a seamless experience on their device. It is only natural that mobile app development companies have become important for businesses. India is the fastest-growing country in terms of demand for services related to mobile app development. Businesses know that mobile app development services must be bespoke.
Our experts at Deftsoft believe the global mobile app development market will reach $270 billion by 2025.
Several stages are involved in mobile app development, such as planning, designing, developing, and testing. An app can only be successful if it is feature-rich and user-centric. Some key technologies in app development are AI, IoT, and AR. These technologies allow more innovative, more performant applications to be built.
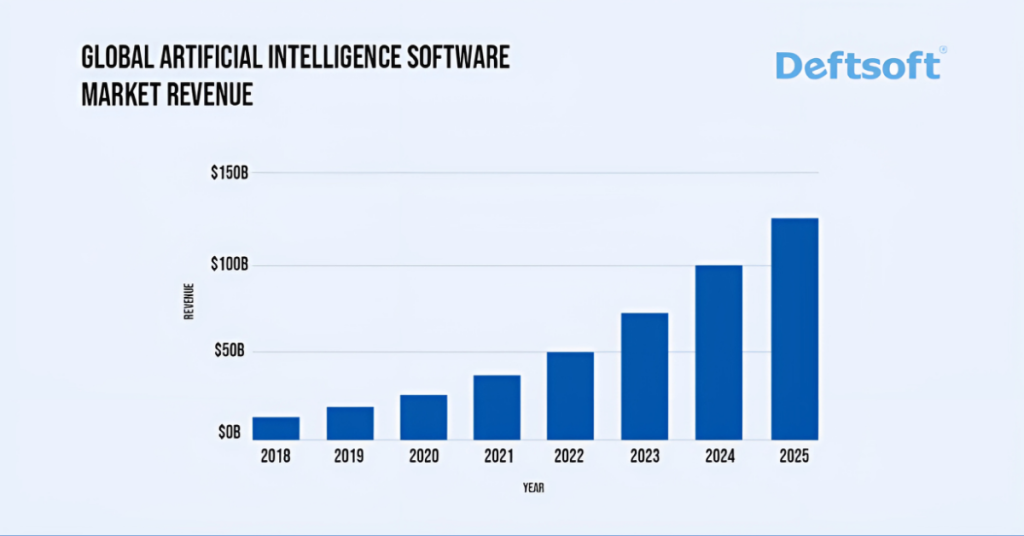
“Our research shows that the software development market is estimated to reach $126 billion by 2025. ”
It is a competitive landscape in mobile app development. Everyone wants their apps to be perfect and intuitive, so app development companies develop premium, user-friendly applications. Addressing user needs to find solutions is the fundamental purpose of this field. The future of these apps seems bright, and new possibilities are bound to open in time. It’s a competitive market, and businesses must adapt or be passed by the competition to stay ahead.
This web blog will explore significant aspects of mobile app development services and demonstrate how important it is to find the right partner.
Why Mobile App Development Service Matters?
Mobile app development has become essential to any business looking to boost customer engagement and reap the benefits of growth. With the rise of smartphone usage among consumers for services and information, mobile app development offers more accessibility to your potential customers. A dedicated mobile app personalizes the user experiences and thus allows businesses to connect with their customers effectively.
Mobile apps can also provide real-time promotions and updates on demand, strengthening customer loyalty through immediate communication and rewards. Mobile app development is an investment that pays off through greater brand visibility. Hence, businesses can extend their reach to more audiences. Mobile applications have evolved and are indispensable to fit today’s digital trends.
Deftsoft- A Mobile App Development Services Leader
With over 15,000 projects delivered globally, Deftsoft celebrates the completion of its 19-year digital solution journey. We are a web and mobile development company with over 1200 clients, specializing in helping businesses implement innovative digital experiences to drive scale. We are here to deliver personal, meaningful solutions that touch people with creativity, so we use technology as a tool.
We know the growing popularity of mobile apps and provide services such as web & mobile development, digital marketing, AEM, metaverse, and blockchain development. We work closely with our customers, from conceptualizing ideas to completing an application. With a well-established history, our work speaks for itself, making us the best mobile app development services company in India. When it comes to bringing digital mobile transformation, our proven track record showcases our commitment to excellence.
Deftsoft’s Mobile App Development Services
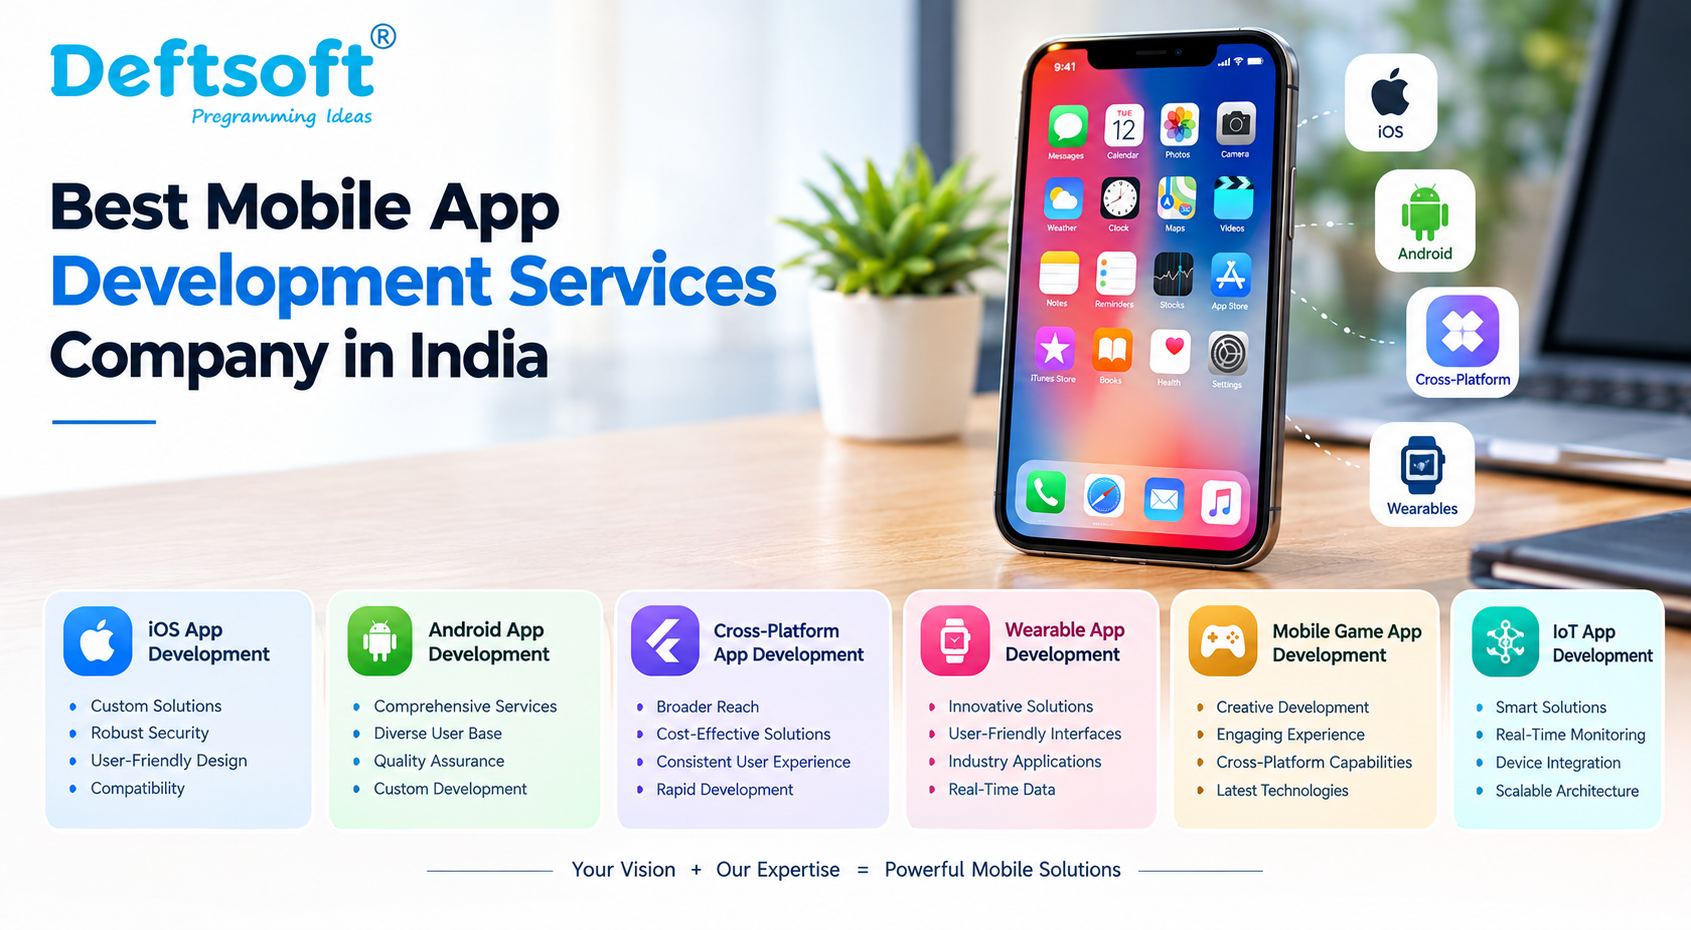
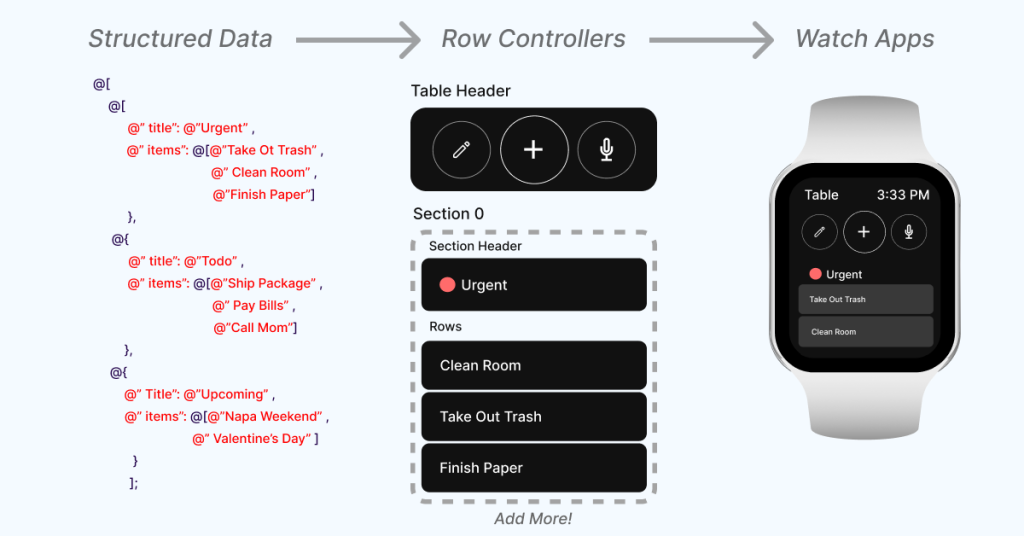
Deftsoft provides a holistic list of mobile app development services for different types of businesses. Our team of experts has experience developing mobile apps for iOS and Android (both smartphones and tablets), cross-platform development (React Native and Flutter), wearable applications like Apple Watch, and even games. We specialize in building user-friendly and innovative solutions to improve the User Experience of your existing clients.
1. iOS App Development
Deftsoft is a leading iOS app development company known for building robust and scalable apps with a high level of security accurately aligned to the Apple ecosystem. Have your app tailored with 19 years of experience in the area. We develop customized applications specifically created for iPhones, iPads, iMac, and Apple Watches, undergoing strict quality standards implementation to satisfy a wide audience.
Custom Solutions— Our iOS apps are personalized to meet your business objectives while keeping user demands in mind.
Robust Security — Our app has been developed with advanced security measures to protect user data.
User-Friendly Design – We work to develop a seamless user experience.
Compatibility— Our apps are compatible with the latest Apple devices & operating systems.
2. Android App Development
Regarding Android app development services for value-added bespoke applications, Deftsoft is a top choice. We are one of India’s Best mobile app development services companies to make an app appealing and increase retention.
Comprehensive Services—We deliver end–to–end services from the earliest stage, from app design and development to testing and optimization.
Diverse User Base – Our solutions reach smartphones, tablets, wearables, and Android TVs.
Quality Assurance – A robust testing process ensures a completely bug-free user experience.
Custom Development – We deliver Android apps that reflect your brand and are built to address custom solutions.
3. Cross-Platform App Development
Deftsoft’s cross-platform application helps you satisfy the needs of a larger audience. Our approach ensures that your apps work on iOS and Android platforms without any issues.
Broader Reach— Cross-platform apps help businesses connect to a wider user base.
Cost-Effective Solutions — creating a single app available for various platforms reduces the overall development cost.
Consistent User Experience — We always stick to a single style, i.e., uniformity across different devices.
Rapid Development — Our framework helps in developing apps faster without compromising quality.
4. Wearable App Development
At Deftsoft, we create mobile applications for wearable devices, including smartwatches and fitness trackers. Our solutions improve connectivity and the quality of user experiences, making them suitable for sectors such as healthcare or entertainment.
Innovative Solutions—We develop apps that work with wearable technology seamlessly.
User-Friendly Interfaces—Our designs are mobile-friendly (work well even on smaller screens and tap targets).
Real-Time Data— We build apps that provide users instant access to real-time information.
5. Mobile Game App Development
Gaming is a profitable domain, and Deftsoft is committed to helping businesses thrive in this space. Our team is skilled and experienced in fully-cycle mobile game app development for native and cross-platform environments.
Creative Development—If you envision it, our team of skilled game developers, designers, and animators will build it.
Engaging Experience— Our experiences are immersing, and we build 2D & 3D games that grip the user.
Cross-Platform Capabilities — Games that are designed to work smoothly on different devices.
Latest Technologies—Our team uses the latest technologies, most advanced tools, and techniques for game development to enhance gameplay and graphics.
6. IoT App Development
Deftsoft provides the best IoT app development services to enhance business communication. We assist companies in successfully deploying IoT technology across numerous industries.
Custom IoT Solutions— We develop purpose-built apps for different sectors, such as healthcare and manufacturing.
Improved Connectivity — Our IoT apps improve interaction between devices and users.
Scalable Applications — We offer solutions that scale as your business grows.
Unique aspects —Our mobile apps present some features, including real-time monitoring of data and device management
Deftsoft’s mobile app development services are designed to equip businesses of different scales and sizes—SMEs or large enterprises. Deftsoft is on a mission to ensure that no business lags in today’s digitally connected world. We focus on quality, user experience, and the latest industry trends that drive success and enhance engagement.
Wrapping Up!
Creating a mobile app is more than just building software—it’s about making a connection and enriching an experience. At Deftsoft, we completely understand your journey regarding app development and brainstorming ideas. This is why, after nearly 20 years in the industry, we love making experiences that cut through for your audience.
We help you do just that, from truly custom mobile applications to unique IoT solutions. Ready to take the next step? Let’s discuss how we can collaborate to make your vision a reality. Partner with Deftsoft and innovate something extraordinary together!
Frequently Asked Questions (FAQs)
1. Which is the best mobile app development company in India? Many companies offer quality app development, but Deftsoft is known for its innovative solutions, skilled team, and successful track record in creating custom mobile apps.
2. What services does a mobile app development company provide? Top app development companies in India, like Deftsoft, offer end-to-end services, including iOS and Android app development, Cross-Platform app development, UI/UX design, maintenance, testing, and app deployment.
3. How long does it take to develop a mobile app? The timeline depends on the app’s complexity. Simple apps may take 3-6 months, while complex ones can take up to a year. We provide a detailed timeline for each project.
4. Why choose an Indian company for mobile app development? Indian companies like Deftsoft offer high-quality development at competitive rates, a skilled workforce, and expertise in emerging technologies, making them a smart choice for global businesses.
5. How can an app development company ensure the security of my app? Deftsoft prioritizes app security with industry best practices, including data encryption, secure APIs, and regular security audits to safeguard your app from potential threats.
6. What technologies does Deftsoft use for app development? Deftsoft uses the latest technologies, including Flutter, React Native, Swift, and Kotlin ensuring apps are fast, responsive, and compatible across multiple platforms.
The possibilities of AI in mobile app development are boundless, and as we look toward 2025, the technology promises to revolutionize the industry in ways we’ve only begun to imagine.
With the rapid advancements in the tech industry, we’re on the brink of a new era in which the days of apps functioning solely based on predetermined inputs will soon be over. Eventually, we will welcome intelligent applications that not only can respond to commands but also anticipate your needs, adapt to your behaviors, and deliver personalized experiences in real-time. Our dear readers – this is the future of AI in mobile app development in 2025!! Seasoned developers or beginners can leverage innovative AI-powered innovations to craft intuitive, unique applications that can transform how users interact with their devices.
Although 2025 has yet to arrive, the crucial role of AI in mobile app development is already making new waves in 2024. According to research by Exploding Topics, around 77% of firms worldwide are unlocking AI’s new possibilities in their business plans. And most of the professionals in these companies are leveraging AI advancements, specifically for mobile app development. According to “Business of Apps” statistics, the market size of the AI app sector generated $1.8 billion in 2023. The official data for the year 2024 is not out yet. These eye-opening figures about AI suggest how Artificial Intelligence is not just a futuristic concept but a present-day reality.
Now, as we venture into 2025, the present-day reality or futuristic concept (Whatever you want to say) of AI is set to be a game-changer for mobile apps. From automating code generation and reducing development time to enhancing security measures through advanced threat detection, AI is debuting innovations that are set to reshape the entire app creation lifestyle in 2025. The merge of AI and mobile app development in 2025 will not only alter the way we interact with our devices but will also open new horizons for innovation, personalization, and efficiency.
With the growing use of AI in mobile app development, developers will no longer be limited by traditional constraints. Instead, they’ll harness AI’s potential to create apps that are faster, smarter, and more responsive to user demands.
As your premier mobile app development guide, Deftsoft takes the responsibility to help you explore the heightened role of AI in mobile app development. Our detailed guide will look through the AI technologies that are slated to reshape the mobile app development industry in 2025. Moreover, we’ll also discuss the real-world examples of AI-driven apps that are currently changing the landscape of mobile app development.
Before delving into the key AI technologies that will bring new change in 2025, let’s examine the current landscape of mobile app development.
Into the Current Landscape of Mobile App Development
The mobile app development industry has grown exponentially over the past decade, driven by the increasing demand for mobile solutions that cater to a wide range of user needs.
Today, mobile app development is one of the fastest-growing sectors in the tech field. According to our experts, the software development market is estimated to earn $126 billion by 2025.
Honestly, this number was expected! In this modern, fast-paced world, smartphones and mobile devices have become integral parts of everyday life. As of 2024, around 4.88 billion people are estimated to own a smartphone. Do you know the shocking thing? 635 million new smartphone users have recently bought mobile phones (between 2023 and 2024).
Eventually, this massive growth of smartphones has accelerated the need for mobile apps, too. In the fast-paced world, people demand highly personalized, useful mobile apps that will ease their daily life tasks and others. Considering this high demand, businesses are focusing heavily on developing apps to enhance user engagement, streamline processes, and deliver personalized experiences. Today, there are 8.93 million mobile apps (out of this, 3.5 million are on Google Play, 1.6 million are on the Apple App Store, 0.483 are on the Amazon App Store, and the remaining number belongs to different platforms).
AI Technologies, Which Has Laid the Foundation of the Mobile App Development Revolution
Now, let’s set consumer demands for mobile apps aside and focus on the technologies that have made waves in the mobile app development industry.
1. Machine Learning
As a development enthusiast, you would be aware of this innovation. As one of the most impactful AI technologies, it allows apps to learn from user interactions, analyze data patterns, and make decisions without being explicitly programmed. The availability of ML algorithms has made analyzing user behavior completely outstanding. This is evident in apps like Netflix and Spotify, which use ML to suggest shows, movies, and music based on individual preferences. Apps like Google’s Gboard use ML to predict the next word or phrase a user intends to type, speeding up the messaging process. Then comes Amazon, which also uses ML to offer personalized shopping recommendations based on browsing history. That’s why around 35% of Amazon’s revenue comes from its recommendation engine.
2. Multimodel AI
During a 2023 presentation at the conference EmTech MIT, Mark Chen (the head of frontiers research at OpenAI) said, “The interfaces of the world are multimodal. We want our models to see what we see and hear what we wear, and we want them to also generate content that appeals to a more than one of our senses”. Do you know what Mr. Chen is talking about? Well, he is arguing about Multimodel AI. This innovative technology mimics how humans perceive the world through different stages. It takes heavy inspiration from the models of OpenAI’s GPT-4, Google’s Gemini, and other tools.
3. Natural Language Processing (NLP)
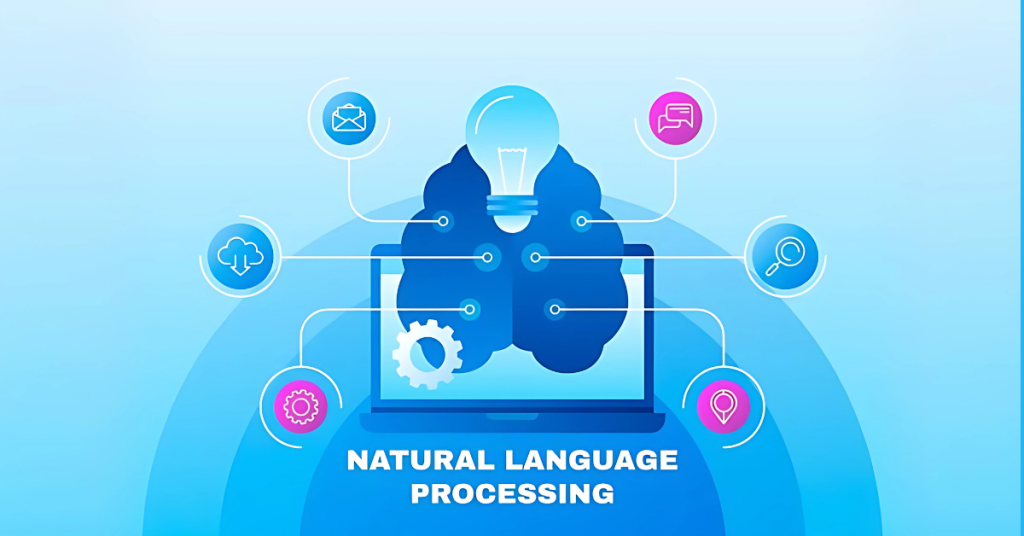
Natural language processing enables apps to understand and respond to human language, making it a crucial element in building conversational interfaces like voice assistants and chatbots. As a smartphone user, you would surely know of AI-powered virtual assistants like Siri (Apple), Google Assistant, and Alexa (Amazon). In today’s modern world, they have become an integral part of everyday life as they streamline tasks like setting reminders, sending messages, and searching for information hands-free. Many companies, like Sephora and H&M, also incorporate NLP-driven chatbots in their apps to provide customer support.
The role of AI in mobile app development is becoming bigger and better. And these technologies are perfect proof of that. Besides ML and NLP, various innovations have made a significant impact of AI on the app development industry. This may include image and voice recognition, as well as predictive analysis, which have even helped in the surge of Uber’s popularity. Many such technologies are redefining innovation in the industry. Now, as we approach 2025, a new set of technologies has arrived which are aiming to transform mobile app development.
AI Innovations to Revolutionize Mobile App Development Industry by 2025
1. Predictive Analysis
As one of the exciting AI technologies in mobile app development, predictive analysis has already changed the industry significantly. As the name suggests, “Predictive Analysis” is an innovation that uses data, machine learning, and statistical techniques to forecast future outcomes based on historical patterns. By analyzing large amounts of user data (such as preferences, behaviors, and interactions), mobile apps can make informed predictions to improve their user experiences and increase audience engagement. As of now, you’ll find various examples where apps have reached a new level of success by implementing predictive analysis to their business model. Some of the prime examples of this are:
Netflix: With over 277.65 million paid subscribers, Netflix relies heavily on predictive analysis to recommend movies and shows. The platform credits 80% of its viewership to recommendations based on predictive algorithms that analyze user data.
Amazon: As mentioned before, Amazon generates 35% of its sales from predictive recommendations. By analyzing browsing history, past purchases, and shopping behavior, Amazon suggests products users are most likely to buy next, driving sales and enhancing the user experience.
Spotify: The iTunes era is over! The world has shifted to Spotify and one the main reasons behind this is availability of personalized playlists. Spotify uses predictive analysis to generate personalized playlists like “Discover Weekly”. This feature, powered by data-driven predictions, increase user retention and enaggement, as users are introduced to songs they’re likely to enjoy.
In the last few years, Predictive Analysis has been revolutionizing mobile app development by helping apps deliver more personalized and timely experiences. Many news tabloids, like Global News Wire, have recognized the predictive analytics industry as one of the fastest-growing industries. It is expected to reach a market size of $30 billion with a CAGR of 20.4% by 2028. Innovative AI tools like “The AI and Analytics Engine,” “Amazon SageMaker,” “Trifacta,” “Obviously AI,” & more are allowing non-technical users to solve their business issues seamlessly.
What to Expect in 2025?
Now, as we approach 2025, the hype around Predictive Analysis is neither going to fade nor stay stagnant. Instead, it is going to rise a few more ladders. The market size of predictive analytics stood at $11.88 billion in 2023. According to ‘Edit Verse,’ this number may rise significantly in 2024.
Gartner, a leading analytics, research, and expert guidance firm, also made some exciting predictions about the data & analytics industry for 2025. According to this,
“Augmented Analytics Will Become Mainstream”
By 2025, augmented analytics, powered by AI and machine learning, will become a mainstream technology, revolutionizing the mobile app industry. This shift will empower app developers, businesses, and users alike, enhancing app performance and user experience. As AI automates data insights, apps will be able to deliver hyper-personalized content, services, and recommendations based on user preferences. For example, a shopping app could predict future user purchases and offer personalized deals in real-time, enhancing user engagement and satisfaction.
2. Extended Reality (XR)
Extended Reality (XR) is a broad term that encompasses immersive technologies like Virtual Reality (VR), Mixed Reality (MR), and Augmented Reality (AR). These technologies blend the physical and digital worlds to create immersive experiences where users can interact with virtual elements or enhance their real-world surroundings with digital transformation. As one of the hottest AI technologies in mobile app development, XR continues to advance in reshaping the industry with more engaging and interactive experiences.
I. For Retail and E-Commerce Apps
If you uses Flipkart or Amazon, you would know there is an option under each product which allows users to visualize how furniture would look in their homes before buying. Using AR technology, users can place 3D models of furniture in their real-world environment through their mobile phone camera. Isn’t this an exciting feature? Well, it has to be since AR is behind its creation.
Beside this, Sephora’s mobile app uses AR to let users visually try on makeup products. By using the front camera, customers can see how different makeup shades look on their faces in real-time, reducing the need for in-store trials.
According to Threekit, 2024 recorded around 55% use of Augumented Reality across different retail accounts. Due to this, retailers were able to boost their conversion rate by 40%. This resulted into the tremendous growth of AI in app development, specifically in retail and e-commerce sector.
The global virtual reality market is estimated to surge over $20.9 billion by 2025. This means, the role of AI through the Extended Reality will reach new levels in retail and e-commerce sector.
II. For Real Estate Apps
Many renowned real-estate apps, like Zillow 3D Home, allow home buyers to take virtual tours of properties through VR. Instead of visiting a house in person, users can explore 3D virtual walkthroughs directly from their mobile devices, saving time and making the real estate search more convenient. In 2024, many real estate businesses (established and startups) are focusing on implementing VR in their business model. From virtual tours to sample videos of properties, AI is making necessary advancements in the real estate sector.
Considering the benefits of integrating AI in mobile apps, many businesses are fostering the need for AI in mobile app development. According to Biz4Group, real-estate apps with virtual reality have seen a 7.3% rise in their popularity.
III. Gaming and Entertainment
Do you know that Pokémon Go, one of the most popular AR-based mobile games, uses AR to blend virtual Pokémon into real-world environments through the user’s smartphone camera? This app became a global sensation, showing the potential of XR in gaming by engaging users in both the physical and virtual worlds. Inspired by this, many developers are creating such games. This clearly shows the heightened role of AI in mobile app development. By 2025, Artificial Intelligence (AI) is set to revolutionize the gaming industry by enhancing player experience, creating smarter and more responsive in-game environments, and personalized content. Popular games like Fortnite are already using AI enemy bots that aim to stimulate real players, offering a challenging experience to users while filling up multiplayer arenas. However, if we look at industry experts, AI in mobile app development is redefining the gaming industry.
Advanced NPC (Non-Player Characters)
In August 2024, the Times of India reported that Nvidia had announced the gaming debut of its AI-powered NPCs (Non-Player Characters) in Mecha Break.
(Mecha Break is a multiplayer mech battle game set, which is set to be released in 2025). It will be available on Xbox Series X/S, PlayStation 5 and PC. The game’s integration of Nvidia ACE will allow players to interact with NLPs using voice commands.)
Procedural Content Generation
AI will drive the creation of unique, infinite game worlds and levels. By leveraging AI in mobile app development, procedural generation aims to automatically design new maps, missions, and environments, offering personalized experiences to each player. This approach ensures that no two game sessions are the same, keeping players engaged for longer periods. Minecraft and No Man’s Sky already use procedural generation, and by 2025, this will be more common across a wider range of games.
3. Automated Chatbots
Automated chatbots are AI-powered software applications designed to simulate human-like conversations with users. These chatbots use natural language processing (NLP), machine learning, and predefined algorithms to understand and respond to user queries without needing human intervention. They can be integrated into various platforms, including mobile apps, websites, and social media, offering quick and efficient customer service.
Automated chatbots are interpret user input (text or voice) and generate relevant responses. They can handle a wide ramge of interactions, from simple FAQs to complex problem-solving tasks. You might have encountered with them. Some of its prime examples include Siri (Apple), Google Assistant, Duolingo’s chatbot, and banking apps like Capital One’s Eno.
What to Expect in 2025?
The heightened role of AI in mobile app development has made automated chatbots a remarkable technology. In 2023, the market size of global chatbots stood at $5.7 billion. According to the Markets and Markets industry report, this number is going to make a significant jump by reaching $15.5 billion in 2028. Thus, we can expect chatbots to reach new peaks in terms of market size by 2025. This growth is evident as AI chatbots are becoming highly useful in real-time customer support across mobile apps. This is why Gartner also predicts that chatbots will become the primary medium of customer services for businesses by 2027.
According to Tido Statistics, the number of businesses implementing AI chatbots in their apps or sites is estimated to increase by 34%. As of today, around 42% of B2C companies and 60% of B2B firms are using AI chatbots.
In 2024, over 8.4 million businesses are using voice assitants and chatbots. As the Ai-powered chatbots are gaining more popularity, it is expected that this innovation will completely replace the human support. Even, Gartner is of the same viewpoint.
Besides this, let us share one more valuable piece of information. AI-powered chatbots, especially those driven by large language models (LLMs) like GPT-4, are poised to revolutionize the mobile app development landscape in 2025. These advanced LLMs, including GPT-4 by OpenAI, Google’s PaLM 2, Anthropic’s Claude 2, and Meta’s LLamA are transforming how businesses interact with users, offering personalized, responsive, and human-like services. Thus, this type of shift will completely change the app industry by offering personalized solutions.
By 2025, automated chatbots will become a core feature of mobile apps across industries. Developers will increasingly rely on LLMs to streamline user interactions and reduce the complexity of app interfaces. By incorporating AI in mobile app development, they will be able to enhance the overall app efficiency. The rise of AI-powered chatbots is undoubtedly changing the future of AI in mobile app development, setting new standards for user experience.
Conclusion
The role of AI in mobile app development is set to expand dramatically in 2025, revolutionizing the industry. From predictive analytics and extended reality to machine learning and advanced NPCs, AI is pushing the boundaries of innovation, personalization, and efficiency in mobile app development. As developers and businesses harness the power of AI, mobile apps will become smarter, faster, and more responsive than ever before, delivering enhanced experiences to users worldwide. In the remarkable transition of industry, Deftsoft stands at the forefront of mobile app development, blending innovative technology with the power of AI.
As a premier mobile app development company, Deftsoft harnesses AI to create smarter, more efficient applications to enhance the user experience of our clients. We embrace the heightened role of AI in mobile app development. This is why our team of experts employs advanced algorithms and machine learning to develop customized solutions that not only meet client expectations but also anticipate user needs. Whether you’re looking to streamline operations or engage users with intuitive interfaces, Deftsoft is your go-to partner for cutting-edge mobile app solutions. Explore our services and embrace the future of AI in mobile app development!
Did you know that global mobile app installs across Google Play and the App Store are expected to reach 230 billion by 2025? Additionally, consumer spending on these platforms is projected to soar to a staggering $270 billion. With experts predicting a major surge in Artificial Intelligence (AI) by 2025, the mobile app landscape is set for a significant transformation. From voice recognition to virtual assistants to predictive analytics, AI-powered apps are projected to redefine the realm of the digital world. Exciting, right? It certainly is. Forget about 2025; mobile apps have already become an essential part of our daily routines, helping us manage everything from finances to staying connected with loved ones and handling tasks more efficiently.
Think about your morning routine: you might kick-start the day with a fitness app guiding your workout, order breakfast through a food delivery app, and book a ride via a transportation app – all before even stepping out the door. Now, as we approach 2025, businesses and individuals have started recognizing the vast opportunities in this space. For aspiring developers, this makes mobile app development one of the most promising career paths for 2025, as demand for cutting-edge mobile apps continues to rise rapidly.
According to Precedence Research, the market size of global mobile app development is predicted to reach $1,383.65 billion by 2033. Moreover, our experts have also predicted that the global app revenue will reach $270 billion by 2025. This means the future of mobile app development is bright. If you’re a beginner looking to enter the mobile app development market, 2025 is the right time.
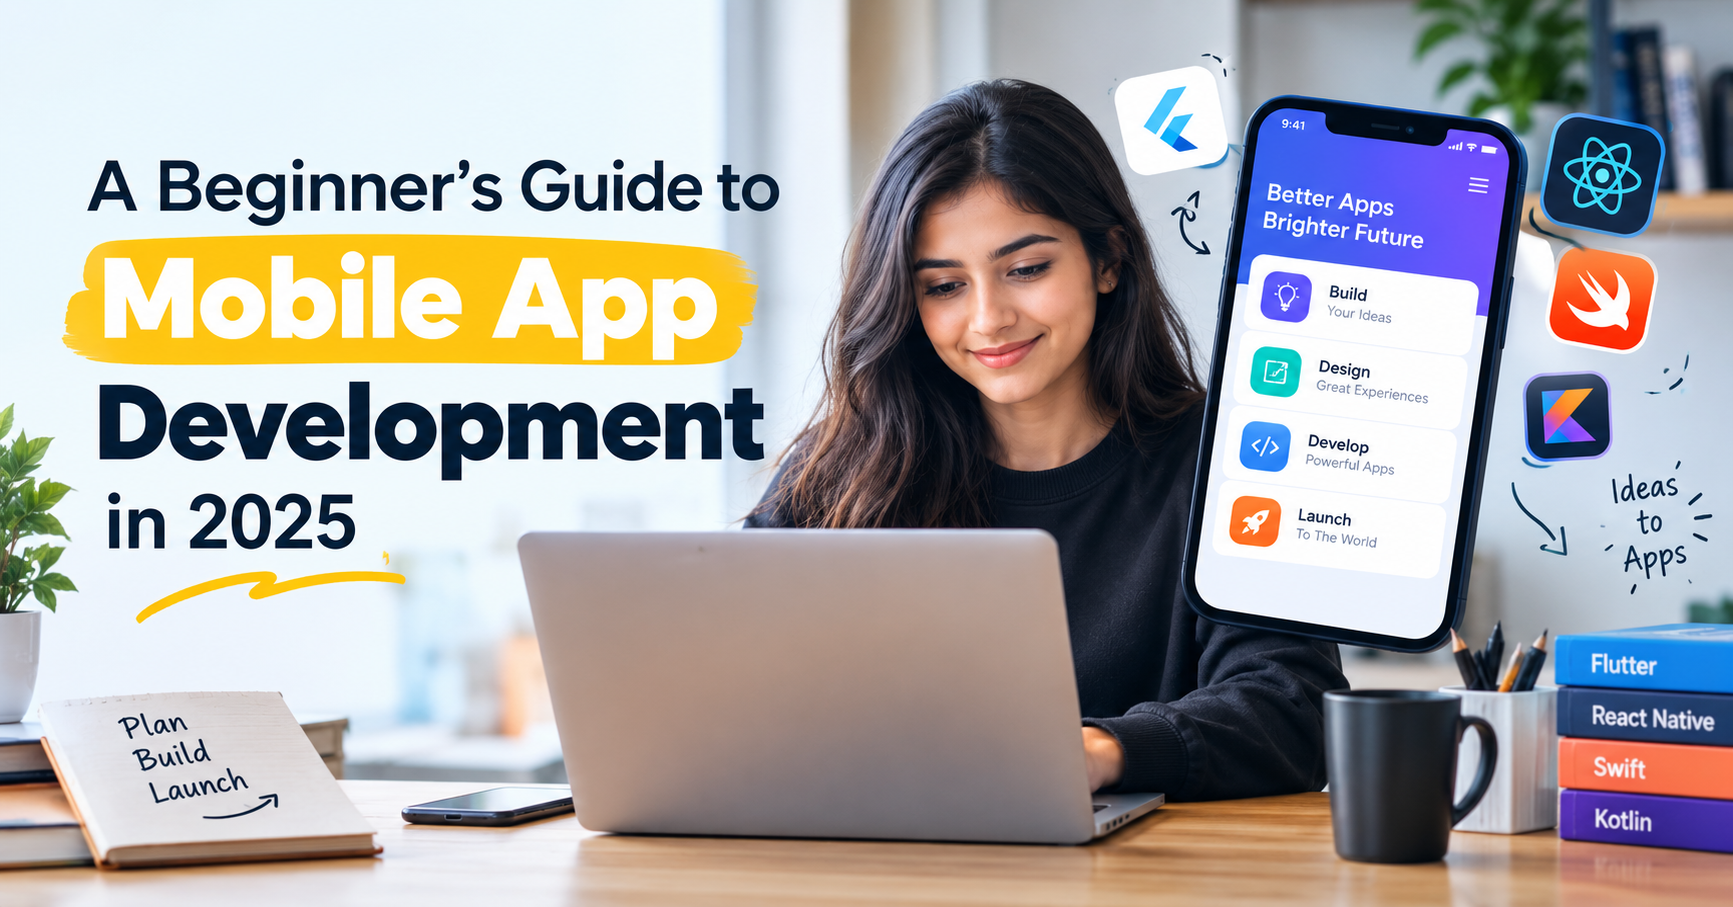
Since this industry is so dynamic and complicated, it may be difficult for many to navigate it effectively. This is why Deftsoft has created a detailed beginner’s guide for mobile app development to help you navigate this industry effectively in 2025. From discussing the benefits of mobile app development to unraveling essential tools to execute this process seamlessly, our detailed beginner’s guide to mobile app development touches on valuable topics related to this industry. At last, we have dedicated a special section to help you become a professional mobile app developer.
In this crowded market, Deftsoft wants you to become like Sinbad the Sailor, someone who makes every effort to navigate the ever-changing digital seas. Read our beginner’s guide to mobile app development to rise above the competition and chart a course for success.
Before delving into the benefits, let’s understand the concept of mobile app development.
Understanding Mobile App Development: Meaning, History & Evolution
What is Mobile Application Development?
As the name suggests, ‘Mobile app development is the process of creating software applications that run on mobile devices such as smartphones and tablets.’ The process involves designing, building, testing, and deploying apps that deliver specific functionalities or services to users.
History & Evolution of Mobile App Development
How many of you are aware of the history of mobile app development? Hardly, a few of you! Right? This is why, in our detailed beginner’s guide to mobile app development 2025, we’ve included a dedicated section on the history and evolution of mobile app development.
Early Beginnings (From the 1970s to 1990s)
The concept of mobile applications dates back to the late 1970s, with the advent of the first automated cellular network in cars in 1979. A few years later, Motorola launched DynaTAC8000X (the first commercial mobile phone of its time).
In 1989, Psion released EPOC (a mobile OS). With this, the evolution of mobile phones also started—Nokia launched their first GSM phone, and Apple launched their first tablet in 1993.
The incorporation of mobile apps can be found in 1994, when the world’s first smartphone, Simon, was launched. This revolutionary mobile featured simple apps like a calendar, notepad, touchscreen, sketchpad calculator & more. This was a time when the history of mobile applications began.
In 1997, Nokia made an update by including a game app, ‘The Snake’ in their 2110 model.
With the introduction of WAP (Wireless Application Protocol) in 1999, internet accessibility became really easy. All technologies were hitting the market at the right time.
Altogether, this led to the launch of Handango in 1999. Handongo became the world’s first mobile app store. It allowed users to download mobile apps like Palm OS and Windows Mobile. The same year, the web app concept was introduced through Java Technology. Java is a programming language widely used for building cross-platform applications, which would play a significant role in mobile app development in the 2000s.
The Rise of Jave ME & Smartphone Revolution (2000s & 2010s)
During the Y2K era, mobile phone trends and popularity reached their peak. In the early 2000s, Java Micro Edition (Java ME) emerged as a significant development platform. This innovative platform allowed developers to create applications for various mobile devices. However, the real game changer was the launch of the iPhone in 2007 and the subsequent introduction of the App Store in 2008. At that time, Apple’s version 2.0 app store made 500 apps available to its users.
This led to the record-breaking sales of iPhone in 2008. Around 10 million downloads were made on the App Store just three days after the launch.
This period also witnessed the rise of app giants like Facebook, Instagram, and Angry Birds, which became global phenomena. Both Android and iOS app downloads crossed the whopping mark of 10 billion in 2011.
Mobile phone companies like Blackberry and Nokia fell behind because they didn’t keep up with the advancements made by Apple, Samsung, and others. OnePlus has emerged as a new-generation leader in this market.
The Current Landscape (the 2020s)
As of today, 8.93 million apps are available worldwide. Of these, 3.553 million are available on the Google Play Store, 1.642 million on the Apple App Store, and the remaining are on other app stores like Microsoft Store, Amazon App Store & etc. In the 2020s, mobile app development has become a critical component of digital transformation for businesses and organizations. Various mobile app development trends have changed the industry. With the widespread adoption of 5G technology, artificial intelligence (AI), and augmented reality (AR), mobile apps are becoming more interactive and personalized.
Benefits of Securing a Career in Mobile App Development: Why You Should Step Into This Industry?
Mobile application development has become a cornerstone of modern business, providing numerous benefits in today’s fast-paced digital world. If you’re a development enthusiast, delving into the mobile app development industry will open the doors to various opportunities for you. In this section of our beginner’s guide to mobile app development, we’ve listed the top reasons why you should secure a career in the mobile app development industry. Read now!
1. A Secured Career In One of the Fastest Growing Job Sector
As the IT industry is booming, so does the technologies surrounding it. Today, in this industry, various jobs are available in different fields, like: tech support, database analyst, business analyst, and mobile app developer. Speaking of mobile app development, let us inform you that a mobile app developer has been named the ‘Best Job in America’ by CNN Money. Moreover, a prediction has been made that the jobs in the mobile app development sector will witness a growth of 19% in the coming years, with a median salary of more than $97,000.
Furthermore, the BLS (Bureau of Labor Statistics) has also predicted a significant rise in software development jobs, including mobile app development. The data indicates a 25% growth in the job sector in this decade.
As we publish this detailed beginner’s guide to mobile app development, Deftsoft confidently thinks,
“Mobile app development is a promising, lucrative and dynamic career path.”
2. The Rising Influence of Mobile Apps in Business or Brand Building
In today’s digital world, mobile apps have become indispensable for businesses aiming to build their brand and connect with customers. With smartphones becoming an essential part of our daily lives, apps offer businesses and brands a direct, personalized way to engage consumers, strengthen loyalty, and drive growth. According to Statista, the total number of smartphone users worldwide has reached 4,479.66 billion users in 2024 so far. The data also estimates this number to reach a new peak of 6.2 billion in 2029. Moreover, 63% of mobile users prefer to use an app instead of a website, making apps the preferred channel for communication, shopping, and brand interaction. This massive user base demonstrates why mobile apps are now central to brand-building strategies.
Some of the most recognizable brands today have solidified their market position by developing highly functional and engaging mobile apps. For instance, Starbucks has grown its brand through its app, which integrates a loyalty program, mobile payments, and personalized offers, driving 23.4 million active users last year. Similarly, Nike has used its app to offer exclusive content and personalized fitness programs, reinforcing its image as a customer-centric brand.
As mobile apps’ influence on business and brand building continues to rise, the demand for professional mobile app developers is also increasing.
3. Evolution of Mobile App Development As An Easy Process
Mobile app development has undergone a remarkable transformation over the past two decades, evolving from a complex and time-consuming process to a more accessible, streamlined activity. In the early 2000s, developing apps required extensive coding knowledge, specialized skills, and significant time. Only a few developers working in specific environments like Java or Blackberry OS could build simple mobile apps. However, things started changing with the rise of no-code and low-code platforms like Bubble and OutSystems, which allow non-developers to build functional apps using drag-and-drop interfaces.
(Additional Information: No-code and low-code platforms are innovative software development environments that aim to help non-developers build apps seamlessly. These platforms offer various drag-and-drop tools, pre-built templates, and automated processes. This technology started gaining widespread acceptance in the late 2000s.)
Research shows that low-code platforms can cut app development time by as much as 90% compared to traditional coding methods. Gartner Forecasts also predicts that low-code platforms will be responsible for around 65% of app development in 2024.
Moreover, advanced frameworks like React Native and Flutter allow developers to create apps for both iOS and Android with a single codebase, significantly reducing development time and effort. Considering these benefits, around 87% of developers use advanced frameworks for seamless mobile app development.
With the rise of advanced technologies, mobile app development has become faster, more cost-effective, and increasingly accessible to a broader audience.
Mobile App Development Platforms/Frameworks You Need to Know
As a beginner, have you ever considered developing mobile applications? You might know various technologies are used to build well-functional mobile apps. But what are these technologies? How do they help developers in mobile app development? Well, that’s when the mobile app development framework enters the chat.
To answer your questions accurately, we’ve incorporated a detailed section on frameworks in our beginner’s guide to mobile app development.
What are Mobile App Development Frameworks?
A mobile app development framework is a software structure (which acts like a library) that provides developers with the necessary tools, libraries, and interfaces to build mobile applications efficiently. The mobile app development framework acts as a foundation upon which apps are developed, streamlining the coding process by offering pre-built functionalities. The key components of mobile app development frameworks are as follows:
UI Components, such as buttons, menus, and forms.
Development Tools for coding, debugging, and testing.
APIs (Application Programming Interfaces) allow seamless interaction with mobile hardware and software features, such as cameras, GPS, or notifications.
Code Reusability to ensure consistency across the app.
Classification of Mobile App Development Frameworks
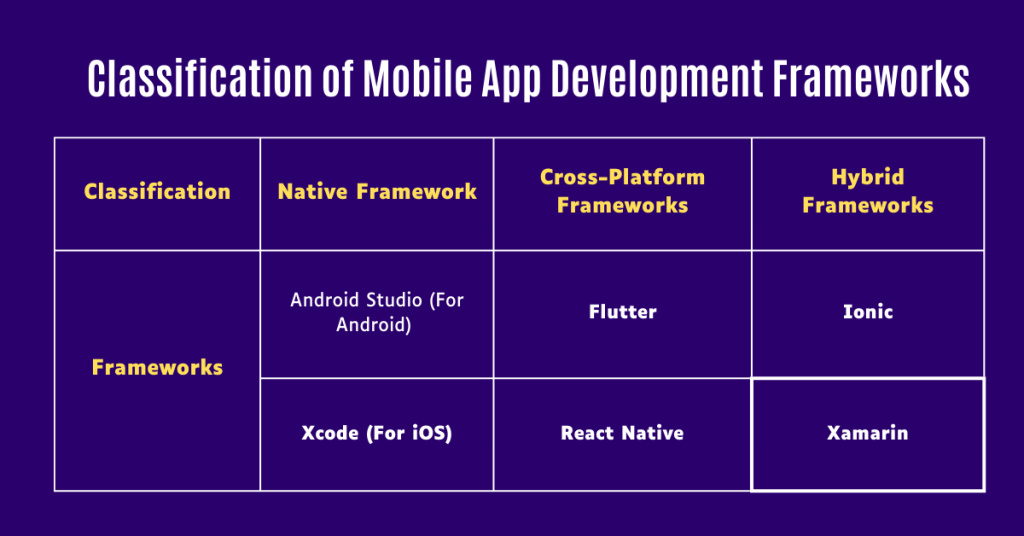
As a beginner, you should know mobile apps are of three types – Native Apps (designed for a particular platform or device such as Android or iOS), Web Apps (designed to look and feel like mobile apps when accessed on a browser), and Hybrid Apps (these are a blend of native and web apps).
Since mobile apps are categorized differently, distinct frameworks are used to develop each type of application. This is why mobile app development frameworks can also be classified into three types: Native, Cross-Platform, and Hybrid Frameworks.
1. Native Framework
These are specific to operating systems like Android or iOS. Native apps are built using the programming languages and tools provided by these platforms.
Android Studio (For Android Apps Only)
Android Studio is regarded as the best Native mobile app development framework. Google launched it in 2013 as the official Integrated Development Environment (IDE) for Android app development. Built on IntelliJ IDEA, Android Studio offers a rich set of features, including a robust code editor, real-time code analysis, and a powerful emulator. Using various programming languages such as Java and Kotlin, Android Studio provides effortless mobile app development.
Xcode (For iOS)
Xcode is Apple’s integrated development environment (IDE) designed to create iOS, macOS, watchOS, and tvOS apps. Launched in 2003, Xcode is one of the reliable native app development frameworks. It comes with a comprehensive suite of tools and resources, including a powerful code editor, a graphical interface builder, and various debugging tools. Unlike Android Studio, Xcode supports Swift and Objective-C programming languages, which are essential for high-performance iOS application developments.
These innovative frameworks allow developers to write code once and deploy it across multiple platforms, such as iOS and Android. By running a single code, developers can effectively build mobile applications, saving time and resources. According to the 2023 Statista Survey, the top cross-platform app frameworks used by software developers are given below.
Flutter
Flutter is one of the leading cross-platform app development frameworks. It was first described and unveiled in 2015 at the Dart Developer Summit. Officially, Flutter was launched on May 12, 2017. The 2023 Statista Survey shows Flutter is the most popular cross-platform mobile framework. 46% of software developers (around 1/3rd of the total professionals) use Flutter.
React Native
React Native is a popular open-source UI software framework released by Facebook on March 26, 2015. The first version of React JavaScript Configuration was launched in 2015 during a technical talk event. Over the years, this innovative framework has become widely popular for cross-platform development. According to the 2023 Statista Survey, React Native is the second most popular cross-platform mobile platform. 35% of the seasoned developers use React Native for their application development requirements.
3. Hybrid Frameworks
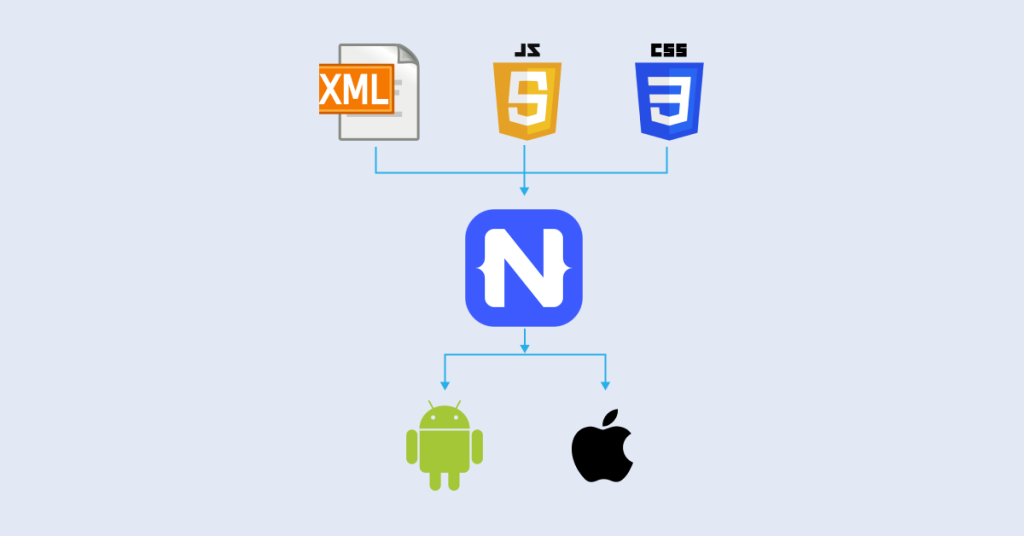
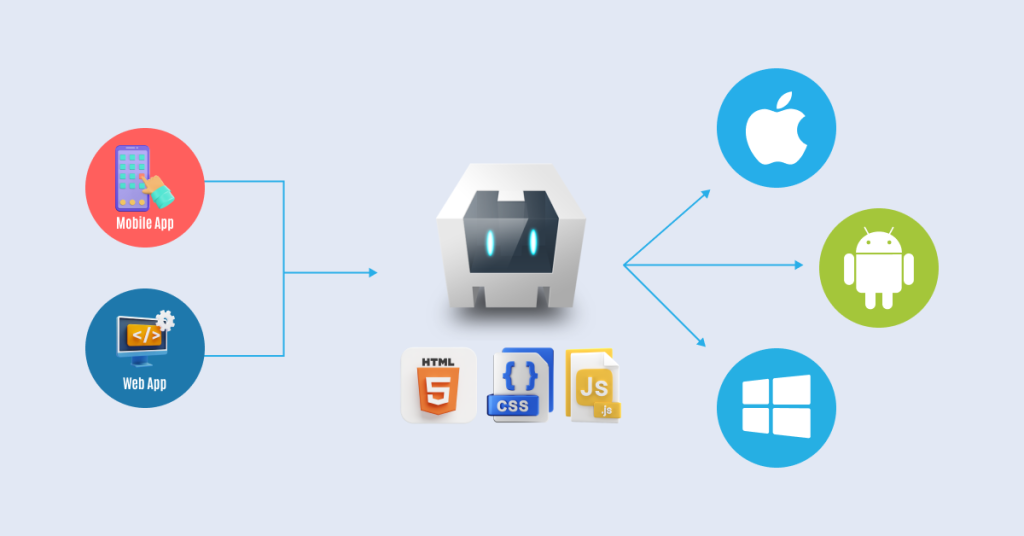
These frameworks combine web technologies like HTML, CSS, and JavaScript with native elements, enabling developers to create apps that work across platforms. Like cross-platform frameworks, Hybrid frameworks also allow developers to run single code across multiple platforms. However, what makes Hybrid frameworks different is their flexibility in launching web apps and mobile apps simultaneously. The following are two of the best hybrid mobile app development frameworks.
Ionic
As an open-source framework, Ionic is the ultimate option for developing Hybrid apps. Ionic provides seamless mobile application development using web technologies like HTML, CSS, and JavaScript. Launched in 2013 by Max Lynch, Ben Sperry, and Adam Bradley, Ionic quickly gained prominence due to its ability to create cross-platform apps with a single codebase. This is why Ionic is often counted among the best cross-platform mobile application frameworks. It uses AngularJS and Apache Cordova (formerly PhoneGap) to enable developers to write code once and deploy it on both iOS and Android platforms.
Xamarin
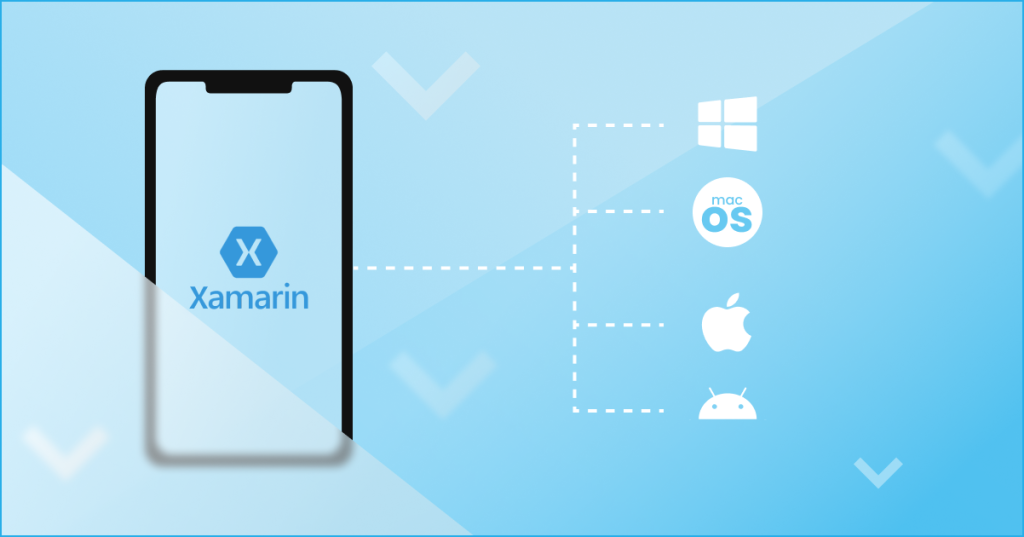
Introduced by Microsoft in 2011, Xamarin is a framework for developing cross-platform mobile applications. It uses C# and the .NET framework to provide hassle-free development. Xamarin allows developers to share up to 90% of their code across Android, iOS, and Windows, streamlining the development process and reducing costs. For top-tier hybrid mobile app development, consider integrating Xamarin with Visual Studio. By doing so, you can unlock a comprehensive development environment, including debugging, testing, and deployment tools.
How to Become a Mobile App Developer?
In our beginner’s guide to mobile app development, we’ve dedicated a comprehensive section to answering your questions about becoming a professional mobile app developer. Consider reading this whole to unlock valuable information from our beginner’s guide to mobile app development.
Who, Exactly, is a Mobile App Developer?
Simply put, a mobile developer is a professional who specializes in creating applications for mobile devices such as smartphones and tablets. Their primary role involves designing, coding, testing, and maintaining apps that run on various mobile operating systems, such as Android and iOS.
To become a successful mobile app developer, you should master diverse skills that span technical knowledge, problem-solving abilities, and soft skills. Below are the essential skills for a mobile app developer.
Proficiency in programming languages like Java, Kotlin, Swift, Objective-C & more.
Understanding of mobile development frameworks (Kotlin, Swift, React Native, Flutter, Xamarin & more)
Deep knowledge of mobile UI/UX designs.
Experience in using Integrated Development Environments (IDEs).
Skilled in using version control systems
Knowledge of different architectural patterns such as Model-View-ViewModel (MVVM) or Model-View-Controller (MVC)
Strong problem-solving skills to identify, analyze, and fix bugs.
Effective communication, teamwork, and project management skills.
How to Become a Mobile App Developer? – Step by Step Process
Many individuals with a keen interest in mobile app development face difficulties in getting an accurate roadmap to becoming industry professionals. In our beginner’s guide to mobile app development, we provide your ultimate roadmap to help you reach the top.
Step #1: Understand the Basics
Start by gaining a strong foundation in computer science or a related field. A degree in Computer Science, Software Engineering, or a similar discipline is highly beneficial. Alongside this, acquire proficiency in programming languages relevant to mobile development. For Android development, learn Java or Kotlin. Learn Swift or Objective-C for iOS mobile app development. If you’re interested in cross-platform development, JavaScript (with frameworks like React Native) or Dart (with Flutter) is crucial.
(Read the section above of this beginner’s guide to mobile app development to learn about these technologies.)
Step #2: Build Your Skills Through Hands-On Projects
Our years of experience as a leading mobile app development company have taught us that “Nothing makes you learn better than working on real-life projects.” Alongside completing your qualification, consider starting your own mobile app (it should be a completely different task from your educational institute curriculum). This could be anything from a simple to-do list app to a more complex application. These projects help you apply what you’ve learned and build a portfolio.
Step #3: Gain Experience
After completing your graduation level education, look for internships or junior developer roles to gain practical experience. Working on live projects with experienced teams provides valuable insights and skills. Moreover, working with like-minded people will give you additional knowledge about the job sector.
Step #4: Develop a Strong Portfolio
While working as a junior mobile app developer, consider creating a portfolio highlighting your best projects. Include descriptions, screenshots, and links to your apps or code repositories. This may help demonstrate your abilities and skills to potential clients or firms. Another thing: “Mobile app development is a rapidly evolving field.” Stay updated with the latest trends, tools, and technologies to survive in this ever-evolving industry. Follow some leading industry blogging websites to read beginner’s guide to mobile app development, attend monthly (if not weekly) webinars, and take online courses (on weekends) to stay ahead of the industry.
Step #5: Focus on Networking
In a crowded market like mobile app development, networking plays a crucial role in becoming successful.
As your trusted beginner’s guide to mobile app development, we recommend that you focus on expanding your networking with industry professionals.
Sometimes, your talent might not even work, but your network with industry people can help you grab a well-paying job. Thus, join developer communities, attend tech meetups, and participate in online forums to connect with other professionals. Networking can unlock a comprehensive suite of job opportunities and collaborations.
Step #6: Prepare for the Job Market
Craft a professional resume and cover letter highlighting your skills, experience, and projects. Tailor them to each job application to align with the position’s requirements. Revise all your knowledge to prepare for technical interviews.
Follow this beginner’s guide to mobile app development and build a successful career in this industry. Understand these steps carefully to build a successful career as a mobile app developer. Embrace learning opportunities, stay curious, and persist in your efforts to grow and succeed.
About Deftsoft, A Premier Mobile App Development Company
After reading this beginner’s guide to mobile app development, you might be thinking about Deftsoft. Well, here’s some information you need to know.
With 19+ years of experience, Deftsoft is a premier mobile app development company. As an industry leader in mobile app development, we specialize in developing custom solutions tailored to meet the unique needs of businesses across various industries. Our team of experienced developers, designers, and project managers work collectively to deliver mobile apps that stand out in both functionality and design. What sets Deftsoft apart from its competitors is its commitment to leveraging cutting-edge technologies and industry best practices. Whether it’s about developing native apps for Android and iOS or cross-platform solutions using frameworks like React Native and Flutter, we aim to fulfill your unique requirements. Deftsoft isn’t only your ultimate beginner’s guide to mobile app development; we’re also the leading service providers in this industry.
Conclusion
Mobile app development has come a long way, from its humble beginnings in the 1970s to the dynamic and versatile industry it is today. With advancements in technologies like 5G, AI, and AR, mobile apps are set to become even more integral to our daily lives. The increasing demand for mobile apps in various sectors (from healthcare to entertainment) opens up vast opportunities for developers.
To all those aspiring mobile app developers,
2025 is the perfect time to enter this industry and conquer it. The mobile app development landscape in 2025 and even in the future looks promising and consistent. Take this as an opportunity to make a career out of this.
Deftsoft’s beginner’s guide to mobile app development is your roadmap to navigating this exciting industry. By leveraging the right tools, platforms, and strategies, you can set sail like Sinbad the Sailor and conquer the digital seas of mobile app development.
Thanks for reading our beginner’s guide to mobile app development! Stay tuned for more informative blog posts. Also, look through the mobile app development services by Deftsoft to know more. You can also recommend our firm to your close ones who are looking for a reliable mobile app development company. With 19+ years of experience, we’re your ultimate application development partner. Contact us now!
Frequently Asked Questions (FAQs)
1. What are the key trends in mobile app development for 2025?
In 2025, mobile app development will focus on advancements such as AI integration, 5G connectivity, enhanced AR/VR experiences, and increased use of cross-platform frameworks. These trends aim to create more intuitive, responsive, and engaging apps.
2. Do I need prior coding experience to start mobile app development?
While coding experience can be beneficial, many tools and platforms that offer drag-and-drop features and simplified coding environments are available for beginners. Starting with these tools can help you build a foundation before diving deeper into coding.
3. What programming languages are most relevant for mobile app development in 2025?
For 2025, languages like Swift for iOS, Kotlin for Android, and Dart for Flutter are highly relevant. Learning these languages will help you develop apps that are both modern and compatible with current technology trends.
4. How do I choose the right app development platform?
Choosing the right platform depends on your target audience and app requirements. Consider whether you need to develop for iOS, Android, or both, and evaluate cross-platform solutions like Flutter or React Native based on your project needs.
5. What are some common challenges faced by beginners in mobile app development?
Beginners often encounter challenges such as understanding complex coding languages, managing app performance, and ensuring compatibility across different devices. Overcoming these challenges requires practice, continuous learning, and leveraging resources such as online tutorials and forums.
6. How can I stay updated with the latest developments in mobile app technology?
Stay informed by following industry blogs, participating in online communities, attending tech conferences, and subscribing to newsletters related to mobile app development. This will help you stay up to date with new tools, frameworks, and best practices.
7. How big is the mobile app market in 2025?
According to our expert analysis, by 2025, global consumer spending on premium apps, in-app purchases, and subscriptions through Apple’s App Store and Google Play is expected to hit $270 billion annually. This figure represents a nearly 2.5-fold increase compared to 2020, a surge driven by the accelerated adoption of mobile technology during the COVID-19 pandemic.
In 2017, who would have thought that a newly debuted innovation like Flutter would revolutionize mobile app development forever? Certainly, no one! But Flutter did this so effortlessly. In the ever-evolving world of tech industry, app development with Flutter has emerged as a game-changer. This Google-developed innovation has given the developers their biggest power – ‘An ability to create a cross-platform mobile application.’ Unlike other tools (which often require separate codebases for iOS and Android app development), Flutter allows developers to build visually pleasing, high-performance apps from a single codebase, saving their time and resources without compromising quality. With the introduction of Flutter 3.0 and several other advancements, Flutter has officially become one of the best frameworks to execute cross platform development.
‘Flutter is the most popular framework for cross-platform app development. Around 46% of the developers around the globe prefers an app development with Flutter’.
– According to the June 2023 Statista Survey by Lionel Sujay Vailshery,
As we have moved ahead from 2023, Flutter continues to evolve, introducing new features and improvements that further solidify its position as a leading app development tool.
Considering the massive interest of developers and businesses in leveraging this framework, Deftsoft has decided to walk you through the essential information you need to know about Flutter. This is why we’ve come up with a detailed guide related to app development with Flutter.
We’ll start by exploring what Flutter is and why it stands out from other development tools. From there, we’ll dive into the key benefits of executing app development with Flutter. Next, we’ll guide you through the process of setting up this reliable app development too. Moreover, this guide will also explore the heart of Flutter – its widgets – starting with an introduction to the difference between stateless and stateful widgets and highlighting must-know widgets for beginners. Finally, we’ll share the best practices and tips to help you finish app development with Flutter seamlessly.
So, without further ado, let’s jump straight into this blog post.
What is Flutter?
Flutter is an innovative open-source UI software development kit developed by Google in 2017. Unlike other tools, Flutter can help create cross-platform applications by using a single codebase only. It was first described and unveiled at the 2015 Dart developer summit. The first-ever version of Flutter was called ‘Sky,’ and it was used on Android devices. Google officially launched ‘Flutter’ on May 12, 2017. In no time, this unique application framework gained a lot of popularity and acclaim. A year later, Google released Flutter 1.0 during the framework’s live event on December 4, 2018. Taking constructive criticism in mind, Flutter 1.12 was launched on December 11, 2019, to provide better services.
2020 was the year when industry people started recognizing the potential of Flutter. In May 2020, Flutter Dart SDK (Software Development Kit) version 2.8 and 1.17.0 were released. Both these versions proved to be revolutionary for Flutter as they enable developers to leverage Metal API and new material widgets.
After this, Google didn’t stop to elevate the functionality and advancements in Flutter’s mechanism. Eventually, they ended up launching various versions – Flutter 2 in 2021, Flutter 3 & Dart 2.17 in 2022 and Dart 3 in 2023.
Recently, the Flutter 3.24 version was launched in August 2024.
Key Benefits of App Development with Flutter
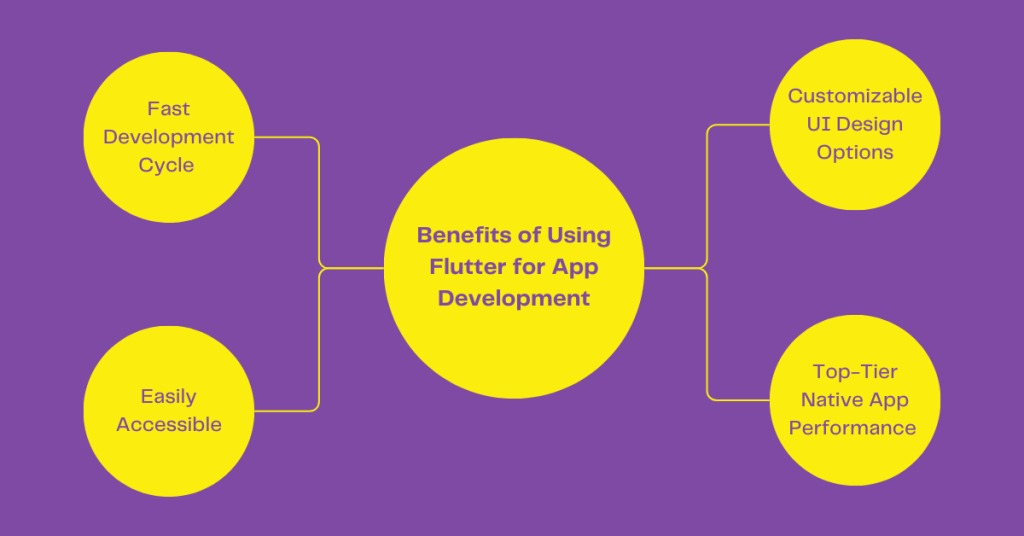
According to recent 2024 surveys, over 2 million developers have executed hassle-free app development with Flutter. Moreover, the 2022 Stack Overflow Developer Survey has counted Flutter as one of the ten most popular technologies in the tech field. This data clearly indicates the level of trust Flutter has gained among industry experts. This framework offers many benefits, contributing significantly to its rising popularity. Let’s explore these key benefits of Flutter.
1. Fast Development Cycle
Flutter’s innovative architecture enables developers to create high-quality applications across multiple platforms (desktop, web & mobile) through a single codebase only. Moreover, adding new features to apps with Flutter’s help is quick and efficient (Thanks to the availability of the ‘Hot Reload’ feature). Altogether, Flutter’s fast development cycle saves developers valuable time and resources.
2. Customizable UI Design Options
What sets Flutter apart from its competitors is its availability of highly customizable UI design options. App development with Flutter also offers easy customization, even for complex UI designs. Whether it’s shared element transitions, shadow manipulations, color & shape, or transformative, Flutter allows effortless design solutions. Moreover, Flutter’s mechanism also allows its applications to adapt to different screen sizes and ratios (according to device – phone or tablet). In short, a developer can create beautiful and well-managed user interfaces on Flutter.
3. Top-Tier Native App Performance
Flutter is a robust and versatile framework for building high-quality native apps across multiple platforms. Many businesses often struggle to create native apps, so they consider alternative options like PWAs (Progressive Web Apps). However, with the arrival of Flutter in the market, these alternative options have also fallen off. Businesses have started using Flutter to create high-end native apps. Flutter’s mechanism offers top-notch native app development capability, eliminating the use of any separate code or performance bugs.
4. Easily Accessible
As an open-source framework, Flutter is free to use. This reduces development costs as no licensing fees are involved. This transparency of Flutter allows users to inspect, understand, and contribute to the framework, ensuring high-quality and secure code. The framework’s open-source nature also fosters a strong and active community of developers. This means extensive resources, libraries, and tools are available, and developers can seek help and share knowledge about app development with Flutter easily.
Setting Up Flutter: A Step-by-Step Guide
Setting up Flutter for app development is a streamlined process that enables developers to create natively compiled applications for mobile, web, and desktop from a single codebase. Here’s a detailed step-by-step guide to start app development with Flutter.
Step #1: Install Flutter
A. Download Flutter SDK
Visit Flutter’s official website and download the latest stable version of the Flutter SDK for your operating system. This is a foundational step to execute an app development with Flutter.
B. Extract the SDK
Extract the downloaded zip file to a desired location on your machine. For example:
For Windows: C:\src\flutter
For macOS/Linux: ~/flutter
C. Update Your Path
For: Windows:
Open Start Search, type in “env” and select “Edit the system environment variables”.
Click on “Environment Variables”.
In the “System variables” section, find the Path variable and click “Edit”.
Add the full path to the flutter/bin directory (e.g., C:\src\flutter\bin).
For macOS/Linux:
Open your terminal.
Add the following line to your shell startup file (.bashrc, .zshrc, or .bash_profile):
Run source ~/.bashrc or source ~/.zshrc to refresh the environment variables.
D. Run Flutter Doctor
Open your terminal or command prompt and run:
This command checks your environment for any dependencies you need to install and provides guidance on how to fix any issues.
Open Xcode, go to “Preferences” > “Locations”, and set the Command Line Tools to the latest version.
Step #3: Set Up a New Flutter Project
A. Create a New Project
Open your terminal or command prompt and navigate to the directory where you want to create your project.
Run this:
Replace my_app with your preferred project name.
B. Navigate to Your Project Directory
C. Open the Project in Your IDE
Open the project directory in Android Studio or VS Code.
Step #4: Run Your Flutter App
A. Connect a Device
Ensure an Android Emulator or iOS Simulator is running, or connect a physical device.
B. Run the App
In your terminal, run:
You can also use the “Run” button in your IDE.
Step #5: Build and Release Your App
A. Build for Android
To build a release APK, run
B. Build for iOS
To build for iOS app development with Flutter, ensure you have a physical device or simulator connected and run:
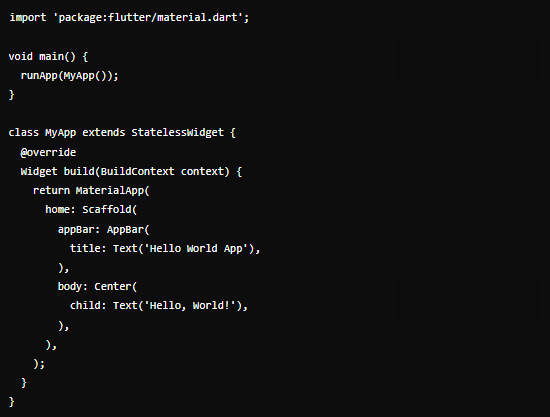
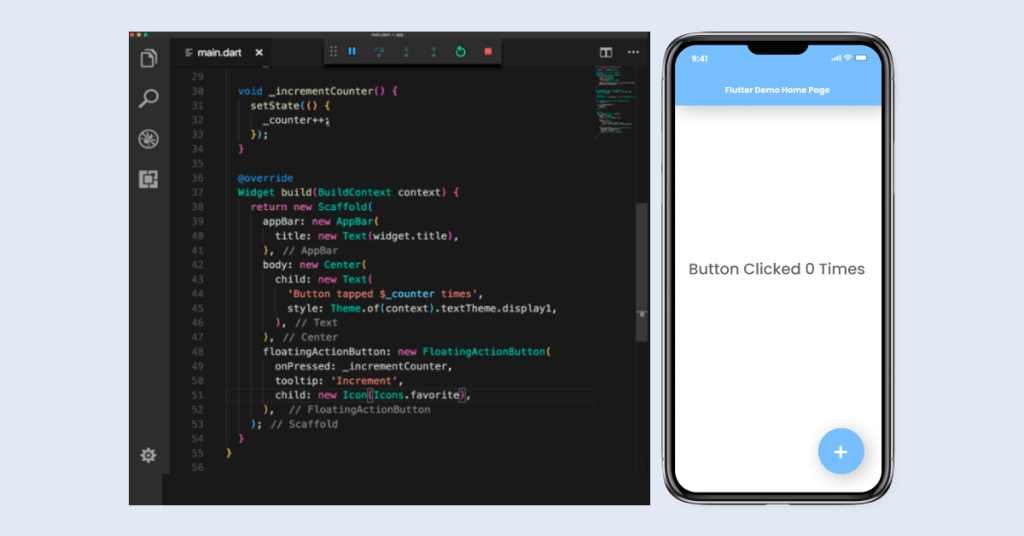
Sample Code: Basic Flutter App
Here’s a simple example of a Flutter app that displays “Hello, World!”:
Exploring Flutter Widgets
The building blocks of the user interface (UI) in Flutter are known as Widgets. Everything you create in a Flutter app, from the simplest button to complex layouts, is in a widget. In short, these widgets in Flutter represent an app’s visual and interactive elements. Widgets (the heart and soul of Flutter) can be categorized into five divisions.
Two Types of Flutter Widgets (On the Basis of Change of State): Stateless vs Stateful Widgets
Flutter Widgets can also be classified into two primary types – Stateless and Stateful, on the basis of their change of state. Let’s differentiate both of them to understand their crucial meaning.
1. Stateless Widgets:
Meaning:
Stateless widgets are immutable, meaning that once they are built, they cannot change their state or properties. They are particularly designed for situations where the UI doesn’t need to update or change based on user interaction or other events.
Key Characteristics:
The properties of a Stateless widget are final and cannot be altered once the widget is created.
They have a single build() method.
Since stateless widgets are immutable, they don’t need any updates or an internal management system.
Example:
Container, Padding, Center, DecoratedBox, Opacity & More.
2. Stateful Widgets
Meaning:
As the name ‘Stateful’ itself suggests, Stateful Widgets are dynamic and can change over time in response to user action or other events. Unlike ‘Stateless Widgets,’ they maintain a mutable state that can be updated, causing the widget to rebuild and reflect the changes.
Key Characteristics
They are mutable, dynamic, and ever-evolving.
The State object can be updated, and when it is, the widget’s build() method is called again to reflect the updated state.
They have a plethora of lifecycle methods that allow developers to handle initialization and resources and perform cleanup.
Examples:
Checkbox, Slider, Textfield & Animated0pacity.
Summing Up: Stateless vs. Stateful Widgets
Aspect
Stateless Widget
Stateful Widget
Mutability
Immutable
Mutable
State Management
No internal state management
Manages state via State object
Lifecycle Methods
Only build() method
Full lifecycle methods
Use Cases
Static content, simple layouts
Interactive, dynamic UIs
Performance
Typically faster due to immutability
Slightly slower due to state management
Must-Known Widgets for Beginners
Flutter offers a wide variety of widgets, but as a beginner, it’s important to understand some core widgets that are essential for building basic apps. Here’s a list of must-known widgets that beginners can consider in successful app development with Flutter.
1. Container
What does it do?
This versatile widget allows you to apply padding, margins, borders, and background color to its child widget.
2. Text
What does it do?
It helps to display a string of text or labels within an app.
3. Row and Column
What Does It Do?
During app development with Flutter, They help to arrange widgets either horizontally or vertically.
4. Image
What does it do?
It aims to display images in your app, such as logos, profile pictures, or any media.
5. Scaffold
What does it do?
It provides the basic structure of a visual app, such as the AppBar, body, and floating action button.
6. Listview
What does it do?
It is used when you need a scrolling list of items.
7. Elevated Button
What does it do?
It is used for clickable buttons in the app.
8. TextField
What does it do?
A widget that allows users to enter text.
9. Padding
What does it do?
This widget aims to facilitate the successful padding around a widget.
10. Icon
What does it do?
It displays an icon from a predefined icon set.
Best Practices and Tips for Flutter Development
App development with Flutter is an effective way to turn your vision into reality. The process of app development with Flutter may seem easy to many. However, if we dig deep, this may pose various challenges. Following are some expert tips and practices to consider for successful app development with Flutter.
1. Use Widgets Efficiently
Flutter is built around widgets, so focus on creating reusable, efficient widgets to keep your code organized and reduce redundancy. During an app development with Flutter, consider breaking your UI into smaller components for better maintenance.
2. Leverage State Management
Choose the right state management solution based on your app’s complexity. Providers, Riverpod, and Bloc, are popular options for managing the app state efficiently.
3. Optimize Performance
Minimize build method calls, use const constructors where possible, and avoid unnecessary rebuilds. Profiling tools like Flutter’s DevTools can help identify performance bottlenecks.
4. Testing and Debugging
During an app development with Flutter, prioritize writing unit, widget, and integration tests. Flutter’s flutter_test package provides robust tools for automated testing, ensuring your app’s stability across updates.
Conclusion: Is Flutter Right for Your Next Project?
So, now, we’ve finally reached the end of this blog. We would like to address your frequently asked questions related to app development with Flutter.
Is Flutter the right choice for my next project?
Today, Flutter stands as the most popular framework for app development. Unlike its competitors, Flutter excels in creating high-quality, natively compiled apps for both iOS and Android from a single codebase. With its wide range of pre-designed widgets and components, app development with Flutter provides a highly responsive and visually appealing user interface. On top of that, this leading framework has a vibrant community and strong support from Google. This means developers can find ample help and solutions within Flutter’s community. Considering all these points, Deftsoft believes.
“App development with Flutter for your next project is the right choice”
With 19+ years of experience, Deftsoft is a premier provider of flutter app development solutions. Our experienced team is dedicated to providing successful app development with Flutter. Whether you’re looking to create a dynamic app or enhance an existing one, our team offers top-tier efficiency, scalability, and excellence. Trust us in our expertise to turn your app ideas into reality! Contact us now!
A cross platform app is essential for small businesses aiming to reach a broader audience. By utilizing a single codebase, these companies ensure that your app runs smoothly on various platforms, such as iOS and Android. This approach not only saves time but also reduces costs, making it a smart choice for businesses with limited resources.
Ultimately, considering a cross platform app development guarantees a consistent user experience across all devices. This uniformity enhances brand recognition and user satisfaction, crucial elements for any business looking to build a loyal customer base. Moreover, the streamlined development process allows for quicker updates and easier maintenance. As easy as the whole cross platform app development may sound, it is surely much more complex.
This is why Deftsoft has come up with a detailed blog post on cross platform app development – allowing you to facilitate this process smoothly. This blog post discusses the key benefits, reliable tools/frameworks, and platforms supported by cross-platform app development. Since cross platform app development is a multifaceted practice, we’ll also dig deep into its application uses across various industries. In the end, you’ll get to know comprehensively about the challenges and emerging trends in this innovative development.
So, don’t wait now! Without further, jump into this blog post to read.
What is Cross Platform App Development?
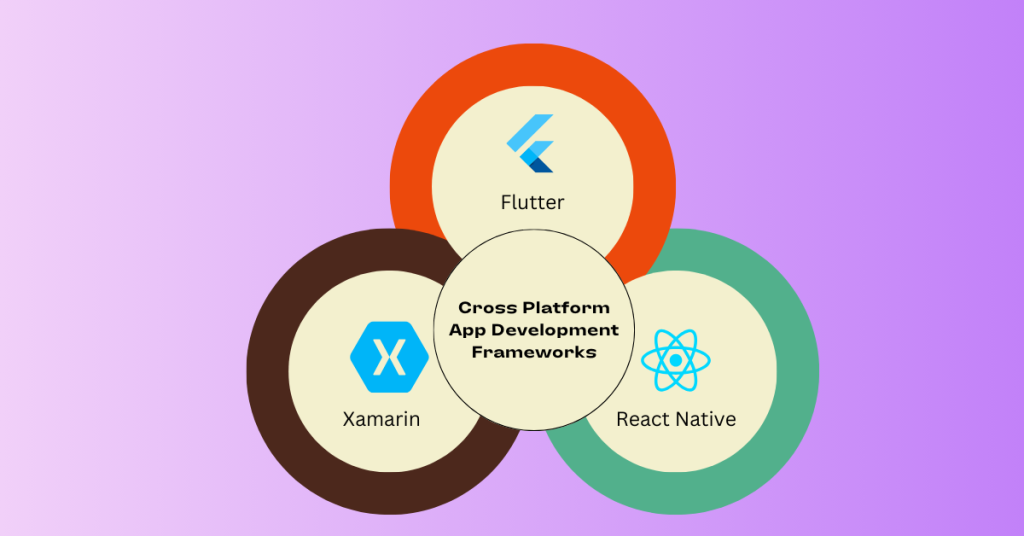
Cross platform app development refers to the process of creating mobile applications that can run on multiple operating systems, such as iOS and Android, from a single codebase. This approach utilizes tools and frameworks like Flutter, React Native, and Xamarin to streamline the development process.
Benefits of Cross Platform App Development
The key advantages of cross platform app development include cost savings, faster time-to-market, and a consistent user experience across different devices. These benefits make it an ideal choice for small businesses looking to maximize their impact with minimal investment. Let’s discuss each in detail!
1. Cost-Effectiveness
Cross platform app development services offer significant cost savings for small businesses. By developing a single codebase that runs on multiple platforms, businesses can reduce the need for multiple development teams. This consolidation leads to lower overall development expenses.
Furthermore, maintaining one codebase is more economical than managing separate versions for each platform. Updates and bug fixes can be implemented once and deployed across all platforms, reducing ongoing maintenance costs and ensuring a more streamlined development process.
2. Time Efficiency:
Cross platform app development enable faster time-to-market by allowing simultaneous deployment on multiple platforms. This speed is crucial for businesses looking to launch their products quickly and gain a competitive edge.
The development process is also more efficient, as developers can focus on optimizing one codebase instead of juggling multiple ones. This streamlined approach accelerates the development cycle, ensuring that businesses can respond rapidly to market demands and user feedback.
3. Consistency:
Using cross platform app development ensures a consistent user experience across different devices and platforms. This uniformity helps in building a solid brand identity, as users encounter the same interface and functionality regardless of their device. Consistency across platforms also enhances user satisfaction, as it minimizes the learning curve and potential frustrations with different app versions. This seamless experience is vital for retaining customers and encouraging positive word-of-mouth recommendations.
What are the Core Technologies/Frameworks Used for Cross Platform App Development
Cross platform app development relies on several core technologies to create applications that run seamlessly on multiple platforms. These technologies provide the foundation for building robust, high-performance apps that meet diverse business needs. Let’s explore some of the most popular and powerful frameworks used in this domain:
1. Flutter
Flutter, developed by Google, is a leading technology in the realm of cross platform app development. It uses the Dart programming language and offers a comprehensive set of pre-designed widgets. These widgets enable developers to create highly responsive and visually appealing user interfaces. Flutter’s hot reload feature allows developers to see changes in real time, significantly speeding up the development process. Its rich set of libraries and tools makes it an ideal choice for creating high-quality mobile apps that perform consistently across both iOS and Android platforms.
2. React Native
React Native, created by Facebook, is another prominent framework used in cross platform app development. It allows developers to use JavaScript and React to build mobile applications. One of the key advantages of React Native is its ability to leverage native components, which ensures a high level of performance and a native-like user experience. React Native also has a large and active community, providing a wealth of resources, plugins, and tools that make development more efficient and effective.
3. Xamarin
Owned by Microsoft, Xamarin uses C# and .NET to provide a robust environment for cross platform development. Xamarin allows developers to write most of their code once and share it across multiple platforms, including iOS, Android, and Windows. This not only accelerates the development process but also ensures a consistent user experience across different devices. Xamarin’s integration with Visual Studio, a powerful IDE, further enhances the development workflow, making it easier to build, test, and deploy cross platform applications.
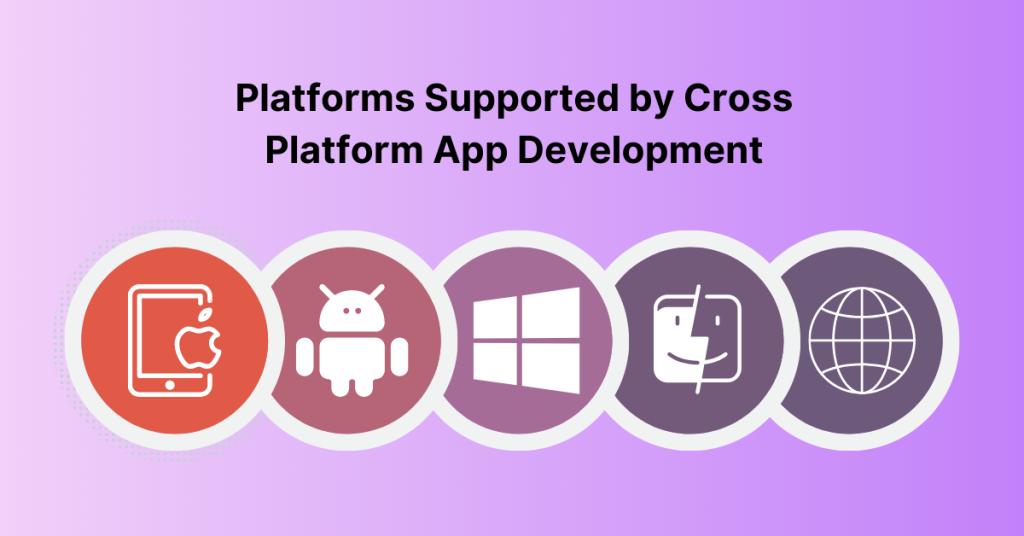
What are the Platforms Supported by Cross Platform App Development?
Cross platform app development services are designed to create applications that work seamlessly across a wide range of platforms. This broad compatibility ensures that businesses can reach a larger audience without the need for separate native apps for each platform. The key platforms supported include:
1. iOS
Cross-platform development tools like Flutter, React Native, and Xamarin make it easier to build iOS apps that run smoothly across devices. These tools provide access to native iOS features and functionalities, ensuring the apps deliver a high-quality user experience while adhering to Apple’s strict guidelines.
2. Android
Android is another major platform supported by cross platform development tools. These tools allow developers to create apps that work efficiently on a wide range of Android devices, from smartphones to tablets. The ability to reach a large and diverse user base makes Android support essential for any cross platform app.
3. Windows
Cross platform app development also extends to Windows, allowing businesses to create applications that run on Windows PCs and tablets. This capability is particularly useful for enterprise applications that need to support a range of devices used in corporate environments.
4. macOS
In addition to iOS, cross platform tools also support macOS, enabling the development of desktop applications for Apple’s operating system. This ensures that businesses can provide a consistent experience across both mobile and desktop platforms.
5. Web
Many cross platform development tools also support the creation of web applications. This allows businesses to reach users on any device with a web browser, providing maximum flexibility and accessibility. Web support is crucial for creating progressive web apps (PWAs) that deliver a native-like experience on the web.
Cross Platform Development Tools
The success of cross platform Development depends on a robust set of development tools and frameworks that streamline the development process and enhance productivity. Some of the key tools used in this field include:
1. Integrated Development Environments (IDEs):
Integrated Development Environments (IDEs) are essential for cross platform development. Visual Studio, Android Studio, and Xcode are among the most popular IDEs used by developers. Visual Studio, with its powerful debugging and coding tools, is widely used for Xamarin development. Android Studio provides a comprehensive environment for building Android apps, while Xcode is the go-to IDE for macOS and iOS development. These IDEs offer a range of features that facilitate coding, testing, and deployment, making the development process more efficient.
2. Build Tools:
Build tools like Gradle and Maven are crucial for managing dependencies and automating the build process. Gradle is widely used in Android app development, providing a flexible and efficient way to manage project builds. Maven, often used in conjunction with Java projects, helps manage project dependencies and build lifecycle, ensuring that the app is built and deployed correctly.
3. Testing Frameworks:
Testing is a critical component of cross platform app development, ensuring that the app functions correctly on all supported platforms. Appium and XCTest are popular testing frameworks used in this domain. Appium is an open-source tool that allows automated testing of mobile applications, supporting both iOS and Android platforms. XCTest, developed by Apple, is used to test iOS applications, providing a robust set of tools for unit and UI testing.
By leveraging these core technologies, platforms, and tools, cross platform development services enable businesses to create high-quality, versatile applications that meet the needs of a diverse user base. This approach not only enhances development efficiency but also ensures a consistent and engaging user experience across all devices.
Applications of Cross Platform App Development (Industry-Wise)
Cross platform app development has become a game-changer across numerous industries by providing a unified approach to app creation that works across different operating systems. This versatility is highly valued in various sectors:
Healthcare: In the healthcare industry, cross platform apps streamline patient management, appointment scheduling, and telemedicine services. By utilizing a single codebase, healthcare providers can ensure that their apps offer consistent functionality and user experience across both iOS and Android devices. This efficiency supports better patient engagement and more effective management of medical records.
Retail: Retail businesses leverage cross platform development to create shopping apps that enhance the customer experience with features like product catalogs, real-time inventory updates, and secure payment gateways. These apps help retailers maintain a strong digital presence, reaching a wider audience without the need for separate development efforts for different platforms.
Finance: Financial institutions benefit from cross platform apps by offering banking services, investment tracking, and personal finance management tools across various devices. This approach ensures that users can access their financial information securely and consistently, regardless of the device they use.
Education: Educational institutions use cross platform apps to deliver e-learning platforms, interactive courses, and student management systems. These apps provide a seamless educational experience for students and educators, making learning accessible from different devices and operating systems.
Travel and Hospitality: The travel industry utilizes cross platform app development for booking systems, travel itineraries, and customer support. This consistency across devices enhances the user experience, allowing travelers to manage their trips effortlessly, whether they’re using smartphones or tablets.
Cross platform development provides a flexible, cost-effective solution for industries seeking to reach diverse audiences while maintaining a high-quality user experience.
Challenges and Limitations in Cross Platform Development
Cross platform app development has become an attractive option for businesses looking to reach a wider audience with a single codebase. However, despite the advantages, cross platform development comes with its own set of challenges and limitations that can affect the final product’s quality and user experience. Below, we’ll explore some of the key challenges and limitations in cross platform development.
1. Performance Issues
One of the most significant challenges in cross platform app development is performance. While cross platform frameworks have made strides in optimizing performance, they often cannot match the performance of native apps. Native apps are built specifically for a particular operating system, allowing them to leverage the platform’s full capabilities, including advanced graphics and hardware acceleration.
In contrast, cross platform apps may struggle with performance, particularly in areas like graphics rendering and animations. This is because cross platform frameworks rely on a layer of abstraction that communicates with the underlying native code, leading to potential delays and lag. For performance-intensive applications, such as those involving complex animations, gaming, or augmented reality (AR), these issues can significantly impact the user experience. Users may notice slower load times, frame drops, or less responsive interactions, all of which can detract from the app’s overall usability and appeal.
2. Limited Access to Native Features
Another limitation of cross platform development is the restricted access to native features and APIs. While cross platform app development frameworks offer a broad range of functionalities, they may not fully support all the native features available on each platform. This limitation can hinder the development of apps that require deep integration with the device’s hardware or operating system-specific features.
For example, if an app needs to utilize the latest camera technology, biometric authentication, or advanced geolocation services, cross platform frameworks may not offer the same level of access or performance as native development. In some cases, developers may need to write custom native code to bridge the gap, which can complicate the development process and reduce the advantages of using a cross platform approach. Additionally, the delay in updates and support for new native features can leave cross platform apps lagging behind their native counterparts.
3. Potentially Higher Initial Costs
While one of the primary benefits of cross platform development is the potential for cost savings, especially when maintaining and updating apps across multiple platforms, the initial investment can be higher than anticipated. This is particularly true for small businesses or startups with limited resources.
The learning curve associated with new cross platform frameworks can be steep, requiring developers to familiarise themselves with the specific tools, libraries, and best practices of the chosen framework. Additionally, setting up the development environment and ensuring that the app works seamlessly across different devices and operating systems can be time-consuming and resource-intensive.
These initial costs, both in terms of time and money, may outweigh the long-term benefits for some businesses. It’s essential to carefully assess whether the potential savings in maintenance and updates justify the upfront investment. In some cases, especially for simple or small-scale apps, native development might offer a more straightforward and cost-effective solution.
Emerging Trends in Cross Platform Development in 2025
Cross platform development has rapidly evolved, with new trends and technologies reshaping the landscape. As businesses increasingly seek to deliver apps across multiple platforms with minimal effort, developers are continually innovating to improve performance, user experience, and development efficiency. Below are three emerging trends in cross platform development that are gaining traction.
1. Hybrid Frameworks Combining Native and Web Technologies
A growing trend is the use of hybrid frameworks that blend native and web technologies to create more versatile and high-performing apps. Frameworks like Ionic and React Native enable developers to use web technologies such as HTML, CSS, and JavaScript while still allowing access to native features through plugins or custom modules. This approach offers the flexibility of web development with the performance and functionality of native apps, making it an attractive option for developers looking to balance ease of development with high-quality user experiences.
2. Adoption of Progressive Web Apps (PWAs)
Progressive Web Apps (PWAs) are gaining popularity as an alternative to traditional cross platform apps. PWAs offer a seamless user experience by combining the best features of web and mobile apps, including offline access, push notifications, and the ability to install on the home screen without requiring app store downloads. PWAs are built using standard web technologies, making them easier to develop and maintain. They also provide a more consistent experience across different devices and operating systems, making them an appealing choice for businesses looking to reach a wide audience without the complexities of native app development.
3. Integration of AI and Machine Learning
The integration of artificial intelligence (AI) and machine learning (ML) into cross platform development is an emerging trend that enhances app functionality and user experience. Cross platform app frameworks are increasingly supporting AI and ML capabilities, allowing developers to build intelligent features like personalized recommendations, voice recognition, and predictive analytics directly into their apps. This trend is particularly important as businesses seek to create more interactive and intuitive apps that can adapt to user behavior. As AI and ML technologies continue to advance, their role in cross platform development is expected to grow, enabling more sophisticated and responsive applications.
Conclusion
In conclusion, cross platform app development is becoming increasingly vital for businesses aiming to maximize their reach and efficiency. As emerging trends such as hybrid frameworks, Progressive Web Apps (PWAs), and AI integration reshape the development landscape, companies can now create more versatile, high-performing apps with minimal effort. These innovations not only streamline the development process but also enhance user experience across various platforms. While challenges like performance issues and limited access to native features persist, the evolving tools and technologies are making cross platform development more accessible and effective. By staying ahead of these trends, businesses can leverage the full potential of cross platform development to create robust, user-friendly applications that meet diverse market needs.
If you’re in need of a reliable partner for cross platform app development, look no further than Deftsoft. With 19+ years of experience, we have established ourselves as a premier source for top-tier cross platform app development services. Our expert team specializes in creating seamless, high-performance applications that run flawlessly across multiple platforms, including iOS, Android, and Windows. Trust Deftsoft to deliver innovative solutions that save you time and money while expanding your reach. Partner with us today and experience the difference of working with a top cross platform app development company.
FAQs
1. What is cross-platform app development?
Cross-platform app development refers to creating mobile applications that can run on multiple operating systems, like iOS and Android, using a single codebase. This approach saves time and resources by allowing developers to write one set of code that works across different platforms.
2. What are the advantages of cross-platform app development?
The main advantages include reduced development costs, faster time to market, and broader audience reach. Additionally, maintaining a single codebase simplifies updates and bug fixes across all platforms.
3. Which frameworks are popular for cross-platform app development?
Popular frameworks include Flutter, React Native, Xamarin, and Unity. Each offers unique features that make it easier to build high-quality apps that perform well across different platforms.
4. How does cross-platform app development impact app performance?
Modern cross-platform tools have significantly improved performance, allowing apps to run smoothly with near-native functionality. However, for highly complex apps, native development might still offer better performance.
5. Is cross-platform app development suitable for all types of apps?
Cross-platform development is ideal for most business apps, e-commerce solutions, and social platforms. However, for apps requiring extensive platform-specific functionalities, like high-end gaming or complex AR/VR applications, native development may be more appropriate.
Hey there, all code wizards and pixel pushers! Imagine this: You’ve just created a fantastic new feature for your app with the help of React Native. It’s sleek, it’s responsive, and you can’t wait to see it in action. You launch the app, but instead of the smooth experience you envisioned, you’re met with bugs and crashes. The frustration will surely kick your mind at that moment, making you stare at lines of code and wonder where things went down. And, in such conditions, only one thing will help you: Debugging React Native Apps.
Whether you’re dealing with performance issues, UI glitches, or unexpected crashes, debugging React Native apps will surely help you identify and fix problems. The debugging process may seem simple, but it can sometimes feel like trying to find a needle in a haystack.
However, fear not!
Deftsoft has come up with a detailed blog post to guide you through the best tools and practices for debugging React Native apps easily. Our expert developers recommend the top 10 tools and practices to execute a hassle-free debugging of React Native apps.
So, let’s jump straight into the blog post without further ado.
Let’s Know the Basics first!
Before delving into the tools and techniques for debugging React Native apps, let’s first understand the basics. Read this section to learn what React Native and debugging React Native apps are exactly.
What, Exactly, is React Native?
As a passionate and well-informed developer, ‘React Native’ wouldn’t be a strange term for you. It is a popular JavaScript-based mobile app development system that helps developers build seamless, high-quality, cross-platform mobile apps with a single codebase. The history of React Native can be traced back to 2013 when Facebook was improving the efficiency of its mobile app. While doing this, Facebook’s lead developer, Jordan Walke, made one revolutionary discovery. He found a hassle-free method for the generation of UI elements using JavaScript.
(Generating UI elements on Facebook’s mobile webpage was essential to elevate its efficiency)
As soon as Walke found this method, an immediate Hackathon (a social coding event) was organized to learn more about this method.
Today, this same method is popularly known as React Native. The moment it came into the life, the mobile app development industry changed forever.
Jordan Walke initially used React Native to generate UI elements on iOS apps in 2013. Android support through React Native came in 2015. Months later, Facebook publicly debuted a framework for debugging React Native apps.
In just three after its public launch, React Native became the second biggest project on GitHub.
That’s enough information about React Native. Now, let’s understand debugging React Native apps in detail.
Understanding Debugging React Native Apps
As mentioned earlier, React Native is an open-source Facebook project that was created to develop seamless mobile applications.
Ultimately, the mobile applications developed using the React Native framework are known as ‘React Native Apps.’ There are a wide range of benefits of creating a mobile app through React Native. However, with the plethora of benefits, such as cost-efficiency, consistent user experience, and access to native modules, you can also encounter several bugs and glitches. Eventually, the bugs in a mobile app negatively impact not only the app’s functionality but also the user experience and reputation of the brand value. Altogether, this can lead to lost revenue, increased support costs, and higher development expenses. Therefore, debugging React Native apps becomes essential.
Debugging involves a series of steps that help developers to analyze and remove the problem effectively. In short, debugging is the process of identifying, analyzing, and fixing errors or bugs in software code.
In the words of Kyle Simpson, author of ‘You Don’t Know JS,’
“Good debugging tools & practices can significantly reduce the number of bugs in your application, leading to a smoother and more reliable user experience.”
– Kyle Simpson, author of ‘You Don’t Know JS
Reading this quote, you may be wondering, what are the best debugging tools to effectively identify and fix the errors in React Native apps?
Well, to find the answer to this, read the next section.
Essential Debugging Tools for React Native
Honestly, debugging is one of the critical aspects of software development, and its importance in elevating React Native apps cannot be overstated. By debugging React Native apps, developers not only identify and resolve prevalent issues but also ensure the reliability of the codebase. A wide range of effective tools are available for successfully executing and debugging React native apps. Some of the best ones include:
React Native provides its own in-app debugging tool specifically designed for React Native applications. It started gaining a lot of popularity in 2017 as a standalone app built on top of the Chrome Developer Tools. Moreover, it can also integrate with Chrome DevTools and Redux DevTools, providing an ultimate enhancement.
You can access this tool by directly visiting React Native’s official website. To execute a debugging of React Native apps, either shake your device or use the below keyboard shortcuts.
Assessing the Dev Menu on Different Platforms
For iOS Simulators
Either press’ Cmd ⌘ + D’ or visit the menu bar at the top of your screen, navigate to ‘Device,’ and select ‘shake.’
For Android Emulators
Either press’ Cmd ⌘ + M’ or simulate a shake by selecting the corresponding option from th emulator’s extended controls.
Besides using keyboard shortcuts and gestures, you can also access the Developer Menu on Android devices and emulators through ‘adb’ (Android Debug Bridge). This is a leading command-line tool that allows seamless communication with an Android device or emulator.
Here’s how it works:
Open a terminal window (on macOS or Linux) or a command prompt (on Windows).Enter the command – ‘adb shell input keyevent 82’.
Key Features of React Native Debugger
React Native Debugger is a powerful mobile app development tool that combines multiple debugging tools into a single interface. It provides comprehensive functionalities that streamline the development process. Here are the key features of this effective tool for debugging React Native apps.
1. Reload
A ‘Reload’ feature aims to provide instant feedback when identifying and fixing bugs. To enable this feature, navigate to the ‘Default’ option.
2. Open Debugger
Clicking on ‘Open Debugger’ allows you to access Chrome Developer Tools.
3. Open React DevTools
It is a standalone tool for debugging non-browser-based React Native apps. Thus, clicking on ‘Open React DevTools’ doesn’t redirect you to the tools. Consider installing or running the’ dev tools’ package to access it. Moreover, we highly recommend running this command via nix.
4. Show Inspector
By tapping on ‘Show Inspector,’ you can get detailed info about a specific bug.
5. Disable Fast Refresh
‘Fast Refresh’ is a separate feature in React Native that allows you to instantly see changes in their app without losing the current state. It updates the app when changes are made to the code. However, there may be situations where it is necessary to disable Fast Refresh to debug certain issues.
6. Configure Bundler
‘The Bundler’ is a feature that allows the successful bundling of JavaScript Code and assets for the React Native apps. However, by configuring the bundler, you’ll be able to adjust various settings effectively.
7. Show Performance Monitor
It provides real-time metrics and insights into the performance of your React Native apps.
How to Set Up and Use React Native Debugger?
I. Install React Native Debugger
macOS: Download from GitHub or use Homebrew: brew install –cask react-native-debugger
Start the app’s development server: npx react-native start
Enable debugging:
Shake your device or use the simulator’s menu to open the developer menu.
Select Debug JS Remotely.
Expo
Open React Native Debugger.
Start Expo project: expo start
Enable debugging:
Open the developer menu.
Select Debug Remote JS.
III. Use React Native Debugger
React DevTools: Inspect and modify components.
Redux DevTools: View and manage Redux state and actions.
Console: Check app logs.
Network: Monitor network requests.
IV. Troubleshooting
Ensure ports match (default is 8081).
Check network connections.
Restart tools if necessary.
2. LogBox
As a well-updated developer, many of you would remember ‘React Native 0.69’ in June 2020. React Native Team debuted an updated framework with the name of ‘React Native 0.69’. This framework brought several improvements and features, including enhancements to LogBox (an innovative tool designed to improve error and warning logging).
LogBox is a comprehensive logging system in React Native that replaces older YellowBox and RedBox systems. It provides more actionable error and warning messages, making logs easier to understand and act upon.
Key Features
1. Notifications
This support of log notifications allows all consoles. Warn and console.log messages to being showed up easily.
2. Code Frames
The inclusion of code frames on the right side of the log inside the app allows you to identify the source code of every warning and error quickly.
3. Component Stacks
Component stacks in LogBox provide detailed information about the hierarchy of React components leading up to an error. Eventually, this feature will allow developers to quickly identify the origination of issues within their code.
4. Stack Frame Collapsing
It is important to clean the relevant codes or frames in an app while executing debugging. This is why Stack Frame Collapsing in LogBox is designed to intelligently collapse frames that are not immediately relevant to the current debugging task, such as internal framework code.
5. Syntax Error Formatting
Syntax error formatting in LogBox enhances the clarity of error messages related to syntax issues, making it easier for developers to spot and fix mistakes in their code.
How to Set Up and Use LogBox?
Before delving into the steps, first, make sure your React Native project is using version 0.63 or higher. You can check this by running the following code.
After this, enable LogBox in your ‘App.js’ or ‘index.js’ file. Use these codes to do so:
Once LogBox is set up, consider debugging React Native apps with it. Here’s how it works.
1: LogBox will display a notification at the bottom of your app’s screen whenever an error or warning occurs. Consider tapping on the notification to get detailed information about the error or warning.
2: Upon tapping the notification, you’ll see an error or warning message at the top. Below this message, you’ll see the component stack trace. This is where you’ll see a list of stack frames (specific lines of code). Consider clicking on these frames to redirect yourself straight to the relevant code in your editor.
3: You may find a plethora of stack frames in it. Ultimately, one may feel confused about the most pertinent parts of the stack trace. But you don’t need to worry. LogBox automatically collapses less relevant stack frames to reduce clutter. This way, you can focus on important parts of the stack trace.
4: In the worst scenario, if there’s a syntax error in your code, LogBox will highlight its exact location to help identify the spot and correct the mistake. Moreover, if you find any warnings or errors (that even LogBox features can’t fix), suppress them using:
#5: After fixing all the issues, disable LogBox with:
3. Flipper
Flipper is an open-source platform developed by Facebook that is designed to provide comprehensive debugging and performance tools for mobile app developers. Launched in 2019, Flipper supports both iOS and Android applications, integrating various tools and plugins to streamline debugging workflows. It emerged from the need for a unified platform that could enhance mobile development processes and provide more detailed insights into app behavior.
Features
There are various features that altogether establish Flipper as a reliable tool for debugging React Native apps. Take a look below:
1. Unified Debugging Interface:
Flipper provides a single platform where you can access various debugging tools, streamlining the process of diagnosing and resolving issues. This unified interface helps developers quickly switch between different aspects of debugging without needing multiple tools.
2. Plugin Architecture:
One of Flipper’s key strengths is its extensibility. It supports a wide range of plugins, such as React DevTools, Redux DevTools, and Hermes Debugger. These plugins integrate directly into Flipper, offering specialized functionality for React Native and other frameworks.
3. Interactive Debugging:
Through Flipper, you can interact with your app in real-time. This feature allows you to inspect and modify the app state, trigger actions, and observe changes dynamically, which is helpful for debugging complex issues.
4. Performance Monitoring:
Flipper includes performance monitoring tools that provide insights into key metrics like memory usage, CPU consumption, and network activity. These tools help identify performance bottlenecks and optimize the app’s performance.
5. Network Inspection:
The network plugin in Flipper allows you to inspect and analyze network requests and responses. You can view request details, headers, and payloads, which is crucial for debugging API interactions and ensuring correct data flow.
How to Set Up and Use?
Installation:
Download Flipper from the Flipper website. Choose the appropriate version for your operating system (Windows, macOS, or Linux) and follow the installation instructions.
Integration with React Native:
For iOS:
Add Flipper dependencies to your Podfile:
use_flipper!
Run pod install in your iOS directory to install the dependencies.
For Android:
Modify your android/app/build.gradle to include Flipper dependencies:
Sync your project with Gradle files to apply the changes.
Configuration:
Ensure that Flipper is correctly initialized in your app’s entry point. For React Native, this usually involves configuring the Flipper initialization in your MainApplication.java file for Android and AppDelegate.m for iOS.
Usage:
Launch Flipper on your desktop and connect it to your running application. You’ll see various plugins and tools in the Flipper interface. Use the plugins to inspect logs, debug errors, and interact with your app.
4. Reactotron
Reactotron is a desktop application developed by Infinite Red specifically for React and React Native developers. It was introduced to offer a straightforward tool for debugging React applications and enhancing developer productivity. Reactotron provides real-time insights and interactions with React applications, making it a valuable asset in development.
Key Features
A significant reason behind the popularity of Reactotron is its features. Take a look below!
1. Real-time State Inspection
Reactotron provides a live view of your app’s state, including Redux store and component state. This real-time inspection helps developers understand how state changes over time and diagnose state-related issues.
2. Action Tracking
It tracks and displays Redux actions and their effects on the state. This feature is useful for debugging Redux-related issues and ensuring that actions are being dispatched and processed correctly.
3. Performance Monitoring
Reactotron offers performance monitoring capabilities, including network request logging and performance metrics. These helps identify slow network requests and optimize the app’s performance.
4. Customizable Plugins
The tool supports various plugins for extended functionality, such as React Navigation tracking, API request logging, and more. These plugins can be tailored to fit specific needs in your development workflow.
How to Set Up and Use?
Installation:
Download Reactotron from the Reactotron GitHub repository. Install the desktop application according to your operating system.
Integration with React Native:
Install Reactotron dependencies in your project:
Configure Reactotron in your project:
In your index.js or App.js, initialize Reactotron:
If you’re using Redux, install and configure the Redux plugin for Reactotron:
Add the plugin to your Reactotron configuration:
Configuration:
Run your app and check the Reactotron desktop application for activity to ensure Reactotron is properly connected. If needed, configure specific plugins or settings through Reactotron’s configuration options.
Usage:
Launch Reactotron on your desktop and connect it to your app. Use the Reactotron interface to inspect the state, track actions, debug errors, and monitor performance.
5. VS Code Extensions
Visual Studio Code (VS Code) is a popular open-source code editor developed by Microsoft. Over the last years, VS Code has become widely adopted due to its versatility, rich feature set, and extensive ecosystem of extensions.
It was first announced and released in April 2015. Initially, it was introduced as a cross-platform editor built on the Electron framework, which allows applications to be built using web technologies like HTML, CSS, and JavaScript.
However, in 2016, Microsoft expanded VS Code’s functionality by introducing the Extensions Marketplace.
Key Features
The main features of VS Code Extension are given below.
1. Rich Extension Ecosystem:
VS Code’s extension marketplace offers a vast array of extensions to enhance coding efficiency, including tools for debugging, code linting, and integration with various services.
2. Customizable Environment:
Extensions enable users to customize their coding environment, including themes, keybindings, and settings. This flexibility helps tailor the editor to individual preferences and project needs.
3. Integrated Debugging:
VS Code’s built-in debugging features include breakpoints, variable inspection, call stacks, and interactive debugging. These tools make it easier to diagnose and fix issues directly within the editor.
4. Code Intelligence:
IntelliSense provides autocompletion, code navigation, and refactoring tools. Extensions can enhance IntelliSense capabilities for different languages and frameworks, improving coding efficiency.
How to Set Up and Use?
Installation:
Download and install VS Code from the official VS Code website.
Access Extension Marketplace:
Open VS Code and access the Extensions view by clicking on the Extensions icon in the sidebar or pressing Ctrl+Shift+X.
Search and Install:
Search for extensions relevant to your needs, such as React Native Tools, ESLint, or Prettier. Click “Install” to add them to your VS Code setup.
Configuration:
Configure each extension according to your project requirements. For example, set up debugging configurations in the .vscode/launch.json file for React Native or customize ESLint rules in .eslintrc.
Usage:
Utilize the features provided by the extensions to enhance your development workflow, including debugging React Native apps. Use integrated debugging tools to set breakpoints, inspect variables, and step through code. Apply code linting and formatting to maintain code quality and consistency.
Nuclide: One of the Reliable Tools for Debugging React Native Apps, But No Longer Available Now!
As a well-informed developer, you would definitely have heard of ‘Nuclide.’
Nuclide was a powerful integrated development environment (IDE) created by Facebook in 2015. It was designed and developed by Facebook to enhance the development experience of React Native, Flow, and other technologies. Nuclide was built as a package on top of Atom.
(Atom is an open-source text editor developed by GitHub)
In the mid-2010s, Nuclide became a reliable tool for integrated debugging React Native apps. However, this success was only short-lived. In 2018, Facebook announced that it would discontinue the development and maintenance of Nuclide. Eventually, Nuclide was officially Sunsetted.
While you may still find older versions of Nuclide or its codebase online, they are no longer actively maintained. We highly recommend against using them, as more reliable and technologically advanced tools for debugging React Native apps have arrived on the market.
(We have provided this information on Nuclide as there were mixed and confused viewpoints on the existence of Nuclide online. Back then, it was a great option for debugging React Native apps. But, in 2024, there are better options)
Best Practices for Effective Debugging
Since we’ve gone through all the best tools for successfully debugging React Native apps, let’s look at the best practices to facilitate an effective debugging process.
1. Using Breakpoints
In simple words, Breakpoints are a fundamental tool for debugging, allowing developers to pause the execution of their code at specific points to inspect the app’s state. This is why and how you can use breakpoints effectively.
a. Strategic Placement
Consider placing breakpoints where you suspect a little about the occurrence of any issue at a key point in the code flow.
(We highly recommend you avoid scattering breakpoints randomly as this can lead to a lot of confusion)
b. Conditional Breakpoints
As their name suggests, ‘Conditional Breakpoints’ can only be used to pause execution when a specific condition is met. Typically, conditional breakpoints are useful in loops or repetitive code where you want to catch a specific case.
2. Source Maps
While using languages that compile to JavaScript (such as TypeScript or CoffeeScript) in debugging, Source Maps are often used to restore minified code to its original state.
Source Maps are files that map the compiled or minified code back to the original source code.
Here are the best practices for using Source Maps.
a. Enable Source Maps in Development
Make sure source maps are enabled in your development environment. You can do this by setting a configuration option in your build tool (e.g., Webpack, Babel).
b. Verify Source Map Accuracy
Double proofreading or verification is an essential task while debugging React Native Apps.
Sometimes, source maps may not accurately map to the original source due to incorrect configuration. Therefore, ensure your build pipeline is correctly set up so that you can generate accurate source maps.
3. Using Log Statements Effectively
If you don’t want to use ultra-technical methods to analyze your code, it is best to write log statements.
Log statements are a simple yet powerful way to understand what is happening in your code at different points in time. By doing so, you can easily identify, analyze, and fix issues.
Given below are some of the best practices for using log statements. Consider reading this.
a. Log Relevant Information
Many developers often understate this practice, but honestly, focusing on logging relevant data like variable values and function entry/exit points surely helps understand the existence of any issue.
b. Use Log Levels
While debugging React Native apps, consider implementing different log levels (like debug, info, warning, and error) to categorize the severity and purpose of the logs. By doing so, you can remove all the irrelevant logs based on what you’re currently investigating.
In JavaScript, use the following codes to categorize logs.
Keep these effective practices in mind while debugging React Native apps. By mastering this, you can quickly identify and resolve any existing issues in React Native applications.
Deftsoft: A Leading React Native App Development Company, Helping You in Debugging
With over 18+ years of experience, Deftsoft is a premier React Native App development company. In today’s dynamic world, a well-organized React Native app is essential to enhance the visibility of your business or brand. Trust the expertise of Deftsoft to experience unparalleled React Native app development services. Our team excels in crafting robust, user-friendly apps while prioritizing efficient debugging processes. We leverage advanced debugging techniques to identify and resolve issues swiftly.
Wrapping Up
Mastering debugging React Native apps is essential for making high-quality, reliable applications. In this guide titled ‘Debugging React Native Apps: 5 Best Tools and Practices’, Deftsoft hopes you’ve gained valuable knowledge about this challenging task. Use these effective tools and practices to enhance your debugging process and significantly streamline issue resolution. However, if you’re unable to do it, consider contacting Deftsoft. As a premier React Native app development company, we provide effective solutions, including debugging. Our highly skilled React Native developers use the best tools and practices to ensure a smoother, more productive debugging process, ultimately leading to a more polished and dependable app. Let Deftsoft be a trusted React Native debugger for you!
Game development is currently experiencing a major boom and game developers are becoming more enthusiastic than ever. They’ve been on a constant hunt for the best game development tools. Talking about game development tools, Unity vs Unreal is a significant game development battle.
The popularity of these two game development engines has enhanced multifold in the past few years. Thanks to the robust and numerous features of the two, game developers can create hyper-realistic games through their help.
If you’re a game developer or gaming fanatic, this blog is a useful resource for you to understand the dynamics of Unity vs Unreal Engine 5. We’ll discuss the advantages and disadvantages of the two gaming engines and which one is more popular.
Without further ado, let’s begin!
What is Unity in Game Development?
Created by Unity Technologies, Unity is a cross-platform game development engine. It is extensively used by developers to create 2D and 3D games across multiple platforms, such as mobile devices, consoles, and PCs. Unity offers a comprehensive set of tools and features that simplify the game development process, making it accessible to both beginners and experienced developers.
First released in June 2005 at the Apple Worldwide Developers Conference as a Mac OS X game engine, it now supports multiple platforms, enabling developers to build their game once and deploy it across various devices, including iOS, Android, Windows, macOS, and major gaming consoles.
Note: The latest version of Unity, Unity 6, is now available for preview.
Features of Unity Game Engine
The significant features of Unity are as follows:
Integrated Development Environment (IDE)
Unity offers an intuitive and user-friendly interface where developers can design, develop, and test their games.
Cross-Platform Compatibility
Unity supports multiple platforms, allowing developers to build their game once and deploy it across different devices, including iOS, Android, Windows, macOS, and gaming consoles like PlayStation and Xbox.
Asset Store
Unity has an extensive asset store where developers can find pre-made assets such as characters, environments, sounds, and plugins to enhance their games.
Scripting
Unity uses C# as its primary scripting language, providing powerful capabilities for customizing game mechanics and behaviors.
Graphics and Physics Engines
Unity includes robust graphics and physics engines that enable realistic rendering and interaction within the game world.
Community and Support
Unity has a large, active community and a wealth of tutorials, documentation, and forums where developers can find support and share knowledge.
What are the Advantages of Unity Game Development?
Considered one of the most beginner-friendly game development platforms, the Unity engine has many benefits. In fact, this is what an anonymous Reddit user has to say:
“…….To conclude this poem, Unity from my perspective can bring my dream of making a game to life quicker than UE, and most importantly can fuel my motivation more easily.”
There are numerous advantages of Unity game development, thus making it a popular choice among game developers across the globe. The following are the noteworthy benefits of Unity:
User-Friendly Interface and Ease of Use
Unity’s integrated development environment (IDE) is known for its intuitive and user-friendly interface. This makes it accessible to beginners who are new to game development. The drag-and-drop functionality, combined with visual editing tools, allows developers to quickly prototype and iterate on their games without needing extensive coding knowledge.
Cross-Platform Compatibility
One of Unity’s standout features is its ability to build games for multiple platforms from a single codebase. Developers can create games for iOS, Android, Windows, macOS, Linux, WebGL, and major gaming consoles like PlayStation and Xbox. This cross-platform compatibility significantly reduces development time and effort, allowing developers to reach a broader audience with minimal additional work.
Extensive Asset Store
Unity’s Asset Store is a treasure trove of pre-made assets, including 3D models, animations, sound effects, and plugins. This allows developers to quickly find and integrate high-quality assets into their projects, speeding up the development process and reducing costs. The asset store also offers various tools and extensions that enhance the functionality of the Unity engine.
Scripting with C#
Unity uses C# as its primary scripting language, which is known for its ease of use and versatility. C# allows developers to implement complex game mechanics and behaviors efficiently. Additionally, Unity provides extensive documentation and a large community of developers who contribute tutorials and support, making it easier to learn and troubleshoot.
Graphics and Performance
While Unity is often compared to Unreal Engine 5 in terms of graphics capabilities, it holds its own with a robust graphics engine that supports advanced rendering techniques. Unity is well-suited for both 2D and 3D games, providing tools to create visually appealing games. When considering Unity vs. Unreal Engine 5, Unreal might have an edge in photorealistic graphics, but Unity excels in flexibility and ease of use for a wide range of projects.
Strong Community and Support
Unity boasts a large and active community of developers, which is a significant advantage. The community contributes to forums, shares knowledge, and collaborates on projects, providing a valuable resource for troubleshooting and learning. Unity Technologies also offers extensive documentation, tutorials, and support to help developers at all skill levels.
What are the Disadvantages of Unity Game Development?
While Unity offers numerous advantages, it also has some disadvantages that developers should consider. Here are some of the key drawbacks:
Performance Limitations
One significant disadvantage of Unity is its performance limitations, particularly for high-end, graphically intensive games. Compared to Unreal Engine, Unity’s graphics rendering capabilities are not as advanced. This can be a critical factor in the debate of Unreal Engine vs Unity, especially for developers aiming to create photorealistic environments or highly detailed 3D models.
Asset Overhead
Unity’s extensive asset store, while beneficial, can sometimes lead to issues with asset quality and optimization. Developers may rely heavily on third-party assets, which can result in inconsistent performance and visual quality. Managing and optimizing these assets to ensure smooth gameplay can be challenging, adding to development time and effort.
Limited Out-of-the-Box Tools
Unity provides a versatile platform, but some advanced features and tools may require additional plugins or custom development. For example, high-end visual effects, advanced physics, and certain AI functionalities often need third-party plugins or extensive scripting. In the comparison of Unreal Engine vs Unity, Unreal Engine offers more built-in tools and features for such complex requirements, potentially reducing the need for additional resources.
Complexity in Larger Projects
As projects scale up in size and complexity, Unity can become harder to manage. Large teams may struggle with version control and project organization. Unity’s component-based architecture, while flexible, can make maintaining clean and efficient codebases for extensive projects difficult.
Subscription Costs
While Unity offers a free version, the Pro version comes with subscription costs that might not be affordable for all developers, especially indie developers and small studios. The ongoing costs can add up, making budget management a concern. This financial aspect is often highlighted in discussions of Unreal Engine vs Unity, where Unreal Engine’s royalty-based model might be more attractive for some developers.
Limited High-End Visual Capabilities
Unity’s graphics engine, though robust, does not match the high-end visual capabilities of Unreal Engine. Developers looking for cutting-edge graphics often find Unreal Engine more suitable due to its superior rendering capabilities and advanced visual effects. This difference is crucial in the Unreal Engine vs Unity debate for developers prioritizing top-tier visual fidelity.
What is Unreal Engine in Game Development?
Unreal Engine is a game development platform introduced by Epic Games, the same company that created Fortnite. This game development engine was showcased for the very first time in a first-person shooter video game called Unreal in 1998.
It is a powerful and widely-used game development engine known for its high-fidelity graphics and robust feature set. Unreal Engine 5, the latest iteration, pushes the boundaries of visual realism and performance with groundbreaking technologies.
Features of Unreal Engine
The significant features of Unreal Engine are as follows:
Nanite Virtualized Geometry
Nanite allows developers to create highly detailed environments without compromising performance. It efficiently handles millions of polygons, enabling stunningly detailed models and textures that scale seamlessly.
Lumen Global Illumination
Lumen provides real-time dynamic lighting, offering realistic lighting and reflections without the need for complex baking processes. This makes it easier to create immersive environments that respond to changes in lighting conditions.
Enhanced Performance and Scalability
Unreal Engine 5 is optimized for next-generation consoles and high-end PCs, delivering exceptional performance. Its scalable architecture ensures compatibility with a wide range of devices, from powerful gaming rigs to mobile platforms.
MetaHuman Creator
This tool enables the creation of highly realistic human characters quickly and easily. Developers can generate lifelike characters with detailed facial animations and expressions.
Quixel Megascans Integration
Unreal Engine 5 integrates with Quixel Megascans, providing access to a vast library of high-quality 3D assets and textures. This integration streamlines the asset creation process, saving time and enhancing visual quality.
What are the Advantages of Unreal Engine Game Development?
Here are some of the key advantages of using Unreal Engine for game development:
High-Quality Visuals and Graphics
Unreal Engine is renowned for its capability to produce stunning, high-quality visuals. Its rendering engine supports complex shaders and high-resolution textures, allowing developers to create realistic and immersive environments. The visuals make it a strong contender in the Unity vs Unreal debate, especially for projects that prioritize graphical excellence.
Blueprint Visual Scripting
Unreal Engine’s Blueprint system offers a visual scripting language that enables developers to create gameplay mechanics, animations, and more without writing code. This feature is particularly useful for designers and artists who may not have extensive programming knowledge but want to prototype and implement features quickly. In the Unity vs Unreal Engine 5 comparison, Blueprint gives Unreal an edge in terms of accessibility for non-programmers.
Strong Community and Support
The Unreal Engine community is large and active, providing a wealth of resources, tutorials, and forums for developers to seek help and share knowledge. Epic Games also offers extensive official documentation and learning resources, making it easier for developers to get started and improve their skills.
Integrated Tools and Ecosystem
Unreal Engine comes with a suite of integrated tools that streamline the development process. These tools include a robust animation system, a material editor, and advanced physics and particle systems. This comprehensive toolset reduces the need for external plugins and third-party tools, which is a notable advantage when comparing Unity 3D to Unreal Engine.
Versatility Across Industries
While primarily known for game development, Unreal Engine is also used in various other industries, such as film, architecture, automotive, and virtual production. Its versatility and high-quality output make it suitable for creating cinematic experiences, architectural visualizations, and interactive simulations.
Performance and Optimization
Unreal Engine is designed to maximize performance and optimize game rendering. Its architecture supports the efficient handling of complex scenes and high-fidelity graphics, ensuring smooth gameplay even on demanding projects. This focus on performance is a key advantage when considering Unity vs Unreal for high-end game development.
Marketplace and Asset Availability
The Unreal Engine Marketplace offers a wide range of assets, including 3D models, animations, sounds, and plugins. This extensive library allows developers to find and integrate high-quality assets into their projects easily.
What are the Disadvantages of Unreal Engine Game Development?
While Unreal Engine may be considered a powerful and versatile engine for creating solid games, it also has its fair share of disadvantages. Here are some of the key drawbacks:
Steeper Learning Curve
Unreal Engine is known for its complexity, which can pose a challenge for beginners. Its comprehensive feature set and advanced tools require a significant time investment to master. Compared to Unity, which is often considered more user-friendly, the learning curve can be a deterrent for new developers. This is a crucial factor in the Unity vs. Unreal debate, especially for those just starting in game development.
Performance Overheads
Despite its high-performance capabilities, Unreal Engine can have substantial performance overheads, particularly for smaller projects or less powerful hardware. The engine’s advanced features and graphical capabilities can lead to longer loading times and higher system requirements. In the Unity vs. Unreal Engine 5 comparison, Unity often proves to be more efficient for simpler, less resource-intensive projects.
Licensing and Costs
While Unreal Engine offers a royalty-based licensing model, this can become expensive for successful games. Developers are required to pay a percentage of their revenue after a certain threshold, which can add up for high-earning titles. In contrast, Unity provides a subscription-based model that may be more predictable in terms of budgeting. This aspect is frequently discussed in the Unreal Engine vs. Unity evaluation.
Resource Intensity
Unreal Engine’s powerful features come at the cost of being resource-intensive. Development projects in Unreal Engine often require more powerful hardware and larger development teams to fully utilize its capabilities. This can be a limitation for indie developers and smaller studios, making Unity 3D vs. Unreal Engine a critical consideration for those with limited resources.
Community and Support Disparities
While Unreal Engine has a strong community and support system, it can be less accessible than Unity’s. Unity’s larger user base and more extensive documentation can make finding solutions and getting help easier.
Which Engine is Better for Game Development: Unity vs Unreal Engine 5?
When entering the Unity vs Unreal Engine 5 debates, there are a significant number of factors that decide which gaming platform is better. The answer is quite subjective.
If you’re a mere beginner who wants to get the hang of game development, then Unity is more beginner-friendly than Unreal Engine. On the other hand, you need a bunch of dedicated time to figure out how to use the various tools in Unity Engine. Most of the Unreal tools such as animations, VFX, sound, AI, terrains and physics go unused.
Also, Unity supports cross-platform development, supports lower-performance machines and is quick and simple to iterate, therefore, providing a powerful toolbox to create any type of game.
However, if you’ve been a professional in the gaming industry for years, Unreal Engine is your best friend. You can create hyper-realistic games as it provides multi-layered professional tools that require years of dedicated experience to use properly.
And, what about which engine is more popular?
Over the past five years, people are showing more interest in Unity than Unreal Engine because of its beginner-friendliness and the ease to iterate the code. The following data from Google Trends is a witness in itself!
Looking for a Hyper-Realistic Game Development Company?
Whether you’re an entrepreneur or enterprise wanting to roll out your own 2D or 3D mobile game in the market, Deftsoft is here to help. We’ve got a seasoned team of game developers, UI/UX designers and testers who can build hyper-realistic games irrespective of the type you want. From Unity 3D to Unreal Engine, we develop next-gen games so that you can target an enhanced user base. Your search for the best mobile game development company ends here!
FAQs:
1. What are the key differences between Unity vs Unreal Engine 5?
Unity and Unreal Engine 5 both offer powerful tools for game development but they have distinct features. Unity is known for its user-friendly interface and cross-platform compatibility, making it ideal for beginners and smaller projects. In contrast, Unreal Engine 5 excels in high-fidelity graphics and advanced rendering capabilities, making it a preferred choice for experienced developers aiming for photorealistic environments.
2. How does the learning curve of Unreal Engine vs Unity compare?
Unity is generally considered more beginner-friendly due to its intuitive interface and extensive documentation. Unreal Engine 5 has a steeper learning curve because of its comprehensive feature set and advanced tools. Beginners might find Unity easier to get started with, while seasoned developers might prefer the powerful capabilities of Unreal Engine vs Unity.
3. Which engine performs better for mobile game development: Unity 3D vs Unreal Engine?
Unity 3D is highly regarded for its cross-platform support and optimization for mobile devices, making it a popular choice for mobile game developers. Unreal Engine 5 also supports mobile development but is often favored for its high-end graphics and performance, which might be overkill for simpler mobile games. When considering Unity vs Unreal for mobile, Unity’s efficiency and ease of use give it an edge.
4. What are the advantages of using Unity vs Unreal Engine for indie developers?
Indie developers often prefer Unity vs Unreal Engine due to Unity’s user-friendly interface, extensive asset store, and lower system requirements. Unity allows indie developers to quickly prototype and deploy games across multiple platforms without extensive coding knowledge. Unreal Engine 5 offers advanced features and high-quality graphics but can be more resource-intensive and complex.
5. Which engine is more popular in the industry today: Unity vs Unreal Engine 5?
In recent years, Unity has gained more traction, especially among beginners and small to mid-sized studios. Unity’s ease of use, extensive community support, and cross-platform capabilities are beneficial. Unreal Engine 5 is highly regarded for its cutting-edge graphics and is preferred by larger studios and professionals in the industry. However, Google Trends data indicates a growing interest in Unity vs Unreal due to its beginner-friendliness and iterative development process.
The tech world was introduced to the term ‘cross-platform’ right back in September 2018 when Sony announced that it had opened the doors for cross-platform play on PlayStation 4 for Fortnite. It was a game-changer in the gaming and development industry!
This is when many developers and software engineers in the masses got thrilled about the concept of cross-platform development. Fast-forward to 2024, cross-platform app development has become a staple for both iOS and Android apps.
One recent study revealed that approximately 87% of developers are currently relying on cross-platform frameworks for mobile app development.
This blog will familiarize you with the best cross-platform app development frameworks you can use for your project. You’ll also understand what’s the buzz about cross-platform mobile app development frameworks and how you can find the best cross-platform framework for your project.
Understanding the Buzzword ‘Cross-Platform’ Development‘
Cross-platform development refers to creating software applications that can run on multiple operating systems (OS) without needing to be rewritten for each one. Instead of building separate versions for Windows, macOS, Linux, Android, and iOS, developers use tools and languages that allow a single codebase to be deployed across different platforms.
Imagine you want to build a mobile app. Traditionally, you would need to write one version in Swift or Objective-C for iOS and another in Java or Kotlin for Android. Cross-platform development simplifies this process.
For example, using a framework like Flutter, you write your app in the Dart programming language. This single codebase can then be compiled to run on both iOS and Android devices.
How Cross-Platform Frameworks Come into Play?
Cross-platform frameworks are essential for the process of cross-platform mobile app development. They provide the necessary tools, libraries, and runtime environments to ensure the app works correctly on various platforms.
Popular frameworks include Flutter, React Native, Xamarin, and many more. These frameworks bridge the gap between the different operating systems, translating the single codebase into native code for each platform.
This approach saves time, reduces development costs, and ensures a consistent user experience across devices. Let’s explore the top 8 most popular cross-platform mobile development frameworks that can help you save time and generate an outstanding, power-packed app.
App Developers Most Used Cross-Platform Development Frameworks
It’s time to explore the best cross-platform app development frameworks that are mostly used by top-notch app developers:
1. Flutter
When talking about their favorite choice, developers talk about Flutter. Created by Google, Flutter is an open UI toolkit that allows web, mobile and desktop app developers to create cross-platform apps. They just need to use a single codebase to build apps for various platforms and devices.
Programming Language Used: It uses a modern and expressive language called Dart, which allows quicker development.
Best Feature: Your app feels exactly like a native app on any device, as Flutter combines the native code within half the budget.
Some of the main highlighting features of Flutter are as follows:
Hot Reload:
Developers can easily keep up with the changes in the code as they are reflected simultaneously. Because of the faster development cycles, developers can easily find the best fit for UI concepts and introduce error correction.
Native Feature Adaptation:
Flutter has the freedom to integrate various native functionalities such as geolocation, camera access, etc. This helps developers to tap into platform-specific widgets such as Google Fuchsia, iOS and Android.
Broad-Spectrum Support:
The Flutter framework is not just a framework to build cross-platform app for iOS and Android, it can also be used to build desktop and web applications. So, if you’re new to development, you can learn Flutter and master building apps for various platforms.
Pros:
Useful for startups as it is economical
High-customization availability
Smooth integration with popular IDEs such as Android Studio and VSCode
Extensive widget library
Cons:
Not suitable for enterprise-level projects
Dart programming language is not that popular
It is a comparatively young
Apps created are larger in size
Popular Flutter Apps:
Alibaba
Hamilton
BMW
GooglePay
2. React Native
React Native is an open-source, cross-platform framework that originated in 2015. It was launched by Facebook and is based on the JavaScript and React. Focused on mobile app development, developers can build robust mobile apps. This framework enables code sharing between iOS and Android, reducing the time and cost of development.
Programming Language Used: JavaScript
Best Feature: React Native provides a near-native performance for both iOS and Android with a single codebase.
Some of the main highlighting features of React Native are as follows:
Multi-Language Support:
One of the best parts of React Native is that it supports multiple programming languages such as JavaScript, Objective-C, C++, Java and Python.
Native Module Integration
React Native allows seamless integration with native modules written in Swift, Objective-C, or Java. Therefore, it saves a lot of time for mobile app developers.
Extensive Community Support
With a vast community of developers, finding solutions to issues and accessing various plugins and extensions is straightforward. This cross-platform framework is relatively older than Flutter and is more popular.
Pros:
Reusable code for both iOS and Android
Large community and extensive libraries
Strong performance close to native
Cons:
Native modules might be required for complex features
Performance can vary based on the app’s complexity
Popular React Native Apps:
Instagram
Airbnb
Facebook
3. Ionic
Ionic is a popular cross-platform framework that leverages web technologies such as HTML, CSS, and JavaScript to build mobile applications. Established in 2013 by Drift CO, it allows developers to create high-quality apps with a single codebase. In short, it is an open-source mobile UI toolkit.
Programming Language Used: JavaScript (Angular, React, or Vue)
Best Feature: Ionic’s comprehensive library of native plugins and UI components ensures that apps have a native look and feel.
Some of the main highlighting features of Ionic are as follows:
Adaptive Styling
Ionic adapts to the platform it’s running on, thus providing a native-like experience on both iOS and Android. When Ionic is paired with Angular, it offers outstanding results, especially in organizing app structure.
Cordova Plugins
Ionic cross-platform framework allows you to access native device features using Apache Cordova plugins. This integration helps you provide an immersive experience by harnessing the power of native features including camera, contacts, geolocation, and many more.
PWA Support
Ionic is not just limited to native apps but it also extends its support in building Progressive Web Apps (PWAs), allowing for the creation of web-based mobile apps.
Pros:
Extensive UI component library
Strong community support
Easy integration with Angular, React, or Vue
Cons:
Performance can be less optimal for complex applications
Requires knowledge of web technologies
Popular Ionic Apps:
MarketWatch
Pacifica
Sworkit
4. Xamarin
Xamarin is a Microsoft product that was launched as a cross-platform framework in May 2011. It is a robust cross-platform mobile app development framework with a high rate of efficiency, as it allows developers to share almost 90% of their code with other platforms. It also allows developers to build iOS and Android applications using C# and .NET.
Programming Language Used: C#
Best Feature: Xamarin provides a near-native performance and extensive access to native APIs, ensuring high-quality app performance.
Some of the main highlighting features of Xamarin are as follows:
Native Performance
Xamarin uses native UI controls to ensure that apps not only look native but also perform with the same efficiency and responsiveness as applications built specifically for iOS or Android. This means that the user experience is seamless and fluid, closely mirroring that of a fully native app, which is crucial for user retention and satisfaction.
Single Tech Stack
With Xamarin, developers can build apps using a single language, C#, across all platforms. This unified approach simplifies the development process, reduces the learning curve, and ensures consistency in code quality. It also allows for easier maintenance and updates.
Integrated Testing
Xamarin provides comprehensive tools for testing apps on multiple devices through the Xamarin Test Cloud. This allows mobile developers to ensure their apps function correctly on various devices and screen sizes, identifying and resolving issues before deployment
Pros:
Native performance and access to native APIs
Comprehensive development environment with Visual Studio
Strong support from Microsoft
Cons:
Larger app size compared to other frameworks
Learning curve for developers unfamiliar with C#
Popular Xamarin Apps:
Storyo
Alaska Airlines
FreshDirect
5. NativeScript
NativeScript is an open-source, cross-platform framework for building truly native mobile applications using JavaScript, TypeScript, or Angular. Launched in 2014 by Progress Software Corporation, it allows developers to leverage native APIs directly without any web views.
Programming Language Used: JavaScript, TypeScript, Angular
Best Feature: NativeScript provides direct access to native APIs, ensuring high performance and a native user experience.
Some of the main highlighting features of NativeScript are as follows:
Native Performance
NativeScript utilizes native components for the user interface, ensuring apps have a genuine native look and feel on both iOS and Android. This approach provides seamless and efficient user experiences comparable to fully native apps.
Single Codebase
With NativeScript, developers can write their code once and deploy it on both iOS and Android platforms. This significantly reduces development time and costs, allowing for a unified approach to app creation.
Extensible Plugins
NativeScript offers an extensive library of plugins that developers can use to enhance and extend the functionality of their apps. This flexibility allows for the easy integration of various features and capabilities.
Pros:
True native performance
Strong integration with Angular
Access to native APIs without additional plugins
Cons:
Smaller community compared to React Native and Flutter
Learning curve for those new to Angular or TypeScript
Popular NativeScript Apps:
SAP Fiori Client
Strudel
Beachy
6. Unity
Unity is a leading cross-platform development framework released in June 2005 by Unity Technologies. Originally introduced as a Mac OS X game engine, it is primarily used for building games but can also be used to create simulations and other interactive experiences. It supports 2D and 3D game development.
Programming Language Used: C#
Best Feature: Unity’s powerful graphics and physics engines make it ideal for game development.
Some of the main highlighting features of Unity are as follows:
Extensive Asset Store
Unity’s Asset Store provides developers with access to a vast library of assets and plugins. This resource includes everything from pre-built characters and environments to complex scripts and extensions. By integrating high-quality, ready-made components, Unity saves significant development time and effort.
Multi-Platform Support
With Unity, developers can create their applications once and deploy them across over 25 different platforms, including mobile devices, desktops, and gaming consoles. This broad support ensures maximum reach and flexibility, allowing developers to target a wide audience with minimal additional work.
Strong Community
Unity boasts a large, active community and extensive documentation, providing robust support for developers at all levels. The community offers forums, tutorials, and resources that can help resolve issues, share best practices, and inspire new ideas, making the development process smoother and more collaborative.
Pros:
Powerful graphics and physics engines
Extensive asset store
Wide platform support
Cons:
Overkill for simple applications
Steeper learning curve for non-game developers
Popular Unity Apps:
Pokémon Go
Monument Valley
Angry Birds 2
7. Solar2D
Solar2D, formerly known as Corona SDK, is a cross-platform framework ideal for 2D game development. It was released in December 2009 and became a preferred language for building mobile, desktop and connected TV apps. It uses a simple, easy-to-learn language and offers a high-performance graphics engine.
Programming Language Used: Lua
Best Feature: Solar2D’s lightweight and fast performance make it ideal for mobile game development.
Some of the main highlighting features of Solar2D are as follows:
High-Performance Graphics
Solar2D is optimized for 2D graphics, making it an ideal choice for game development. Its high-performance graphics engine ensures smooth animations and detailed visuals, crucial for creating engaging and visually appealing games.
Ease of Use
Solar2D uses a simple programming language, Lua, and an intuitive API, enabling rapid development. This ease of use allows developers to quickly prototype, test, and deploy their games, reducing development time and effort.
Cross-Platform
With Solar2D, developers can create games for iOS, Android, and other platforms using a single codebase. This cross-platform capability streamlines the development process and maximizes reach.
Pros:
High performance for 2D games
Easy to learn and use
Active community and extensive documentation
Cons:
Limited to 2D applications
Smaller community compared to major frameworks
Popular Solar2D Apps:
Fun Run 2
Zip Zap
8. Cordova
Apache Cordova (formerly PhoneGap as named by Adobe Systems) is an open-source mobile development framework created in 2009 by Nitobi but was later on purchased by Adobe Systems. It allows developers to build apps using HTML, CSS, and JavaScript. It wraps your code in a native container to access device capabilities.
Programming Language Used: HTML, CSS, JavaScript
Best Feature: Cordova’s extensive plugin library allows access to native device features.
Some of the main highlighting features of the Cordova framework are as follows:
Plugin Architecture
Cordova extends app functionality with a wide range of plugins. It offers customization, flexibility, modularity, and community engagement. Developers can add or remove features without changing the core application code.
Web Technologies
This cross-platform framework leverages web technologies such as HTML5, CSS, and JavaScript to build mobile applications. These apps can potentially run on multiple platforms (iOS and Android) with minimal modifications.
Pros:
Familiar web technology stack
Extensive plugin library
Wide platform support
Cons:
Performance might not match native apps
Dependence on plugins for native functionality
Popular Cordova Apps:
FanReact
Pacifica
JustWatch
Join Hands with the Innovative Cross-Platform Development Company
Are you struggling to find the right cross-platform framework for your project? Look no further than Deftsoft, a premier cross-platform app development company that builds customized solutions for enterprises, business organizations and startups.
Our team of experienced cross-platform developers, UI/UX designers and testers have an experience of more than a decade in various avenues and segments. Achieve accelerated business success by opting for outcome-centric cross-platform app development services. Reach out today for customized cross-platform development.
FAQs:
1. What is cross-platform app development?
Cross-platform app development refers to creating software applications that can run on multiple operating systems (OS) using a single codebase. This approach eliminates the need to develop separate versions for each platform, such as iOS and Android, streamlining the development process and reducing costs.
2. Why choose cross-platform frameworks for mobile app development?
Cross-platform frameworks like Flutter, React Native, and Xamarin enable developers to write code once and deploy it across multiple platforms. This not only saves time but also ensures consistency in user experience across different devices, making it a preferred choice for businesses aiming to reach a broader audience efficiently.
3. What are the benefits of using cross-platform mobile development frameworks?
These frameworks offer advantages such as cost-effectiveness due to shared codebase, faster time-to-market, and easier maintenance. They also provide access to native features and APIs, ensuring that apps perform well and integrate seamlessly with device functionalities.
4. Which cross-platform framework is best suited for my project?
The choice of framework depends on factors like project requirements, team expertise, and desired app performance. Flutter is known for its fast development cycles and native-like UI, while React Native offers strong community support and compatibility with JavaScript libraries.
5. Are there any drawbacks to using cross-platform frameworks?
While cross-platform development offers many benefits, challenges may include performance issues on complex applications, dependency on framework updates, and limitations in accessing platform-specific features without custom native code integration.
Web and mobile developers are looking for novel frameworks and methodologies to flourish robust applications. With the increased adoption of a variety of UI software toolkits to develop iOS, Android and cross-platform apps, React Native vs native remains a constant point of attraction.
As per a survey in May 2024, mobile apps are projected to generate a market revenue of over $935 billion in 2024. In this rapidly evolving landscape, mobile and web developers are constantly grappling with the choice between traditional native iOS and Android app development and the time-saving React Native app development.
This blog is a resourceful guide if you want to comprehend what’s better for mobile app development: React Native vs native app development. We will discuss what native and React Native app development is, factors to consider when choosing the right framework for your app and finally, the significant advantages and disadvantages of the two mobile app development approaches.
Stay with us till the end to gain practical insights that can simplify your next mobile app development project, making your work more efficient and effective!
What is Native?
A native app is an application that is built separately for iOS and Android operating systems. It means that when a developer wants to build an Android app, he’ll make use of Java or Kotlin as programming languages. On the other side, if he wants to build an iOS app, he will use Swift or Objective-C programming languages.
Through the native app development approach, users can create high-quality applications for a specific platform, ensuring optimal app performance and a seamless user experience. Native apps can be built by using various popular coding platforms, such as Android Studio for developing Android mobile applications and Xcode for developing iOS applications.
What is React Native?
React Native is a UI software framework that consists of programming languages, libraries and frameworks dedicated to building cross-platform mobile and web applications. This means that you can build both iOS and Android apps by simply using a single codebase. You just need to code once and build fully functional apps for multiple operating systems.
The React Native framework was introduced by Facebook in 2015 as a time-saving alternative for native app development. Building a cross-platform app from a single codebase and minimal resources is quite a fair deal for numerous mobile and web app developers.
The developers can quickly develop high-performance applications using programming languages such as JavaScript and React. Many developers have switched to the React Native approach due to its feasibility and minimum resource requirement.
What are the Factors to Consider in React Native vs Native Comparison?
If you’re keen to understand the difference between React Native vs native app development, there are some key factors to consider when choosing the right approach for your project. The following are some of the most noteworthy factors to consider when choosing the best choice for your project:
Does Your Project Need High Speed?
Suppose that you’re working on a complex game project that requires high-speed response. This is when you need to opt for native app development. Another instance is when you’re building an app that requires in-depth internal API calls and other set of complex services such as sensors, broadcast receivers and threads, then native app development is the right choice for you.
On the contrary, if you’re building an app like an online clothing store, it doesn’t require complex internal API calls. This is when you can choose React Native.
Do You Have a Limited Budget?
The real question of choosing React Native vs native development is when you have limited resources. It costs a lot more to develop a native app for a dedicated platform than to develop multi-platform apps from a single codebase. If budget is a constraint for you, choosing React Native for cross-platform app development is a judicious choice.
Are You Comfortable with Web Technologies?
If you’re a web developer comfortable with web technologies and have a comprehensive experience with them, then React Native is the smarter choice for you. However, if you’re familiar with Java or Kotlin, then native app development is the best choice for you.
Now that you know what questions to ask before choosing the right framework for your project, let’s discuss the advantages and disadvantages of React Native vs native mobile app development one by one.
What are the Advantages of Native App Development?
The significant benefits of native app development are as follows:
Faster App Development
Native app development is quick and robust because it interacts well with hardware. Native apps are developed using native programming languages such as Kotlin, Java, Objective-C, Swift, etc., and native APIs that function faster than React Native app development. Therefore, native app development offers a faster response time.
Superior UI/UX Experience
One of the major benefits of native app development is the availability of multiple customization options for developing iOS and Android apps. The native apps strictly follow User Interface (UI) guidelines and standards for each of the dedicated platforms, be it Android or iOS app development. Developers can also choose a variety of fonts, icons and animations for their app.
Better Memory Management
Native app development is the best choice for building a complex and resource-intensive application. They have better memory allocation as compared to react native applications.
What are the Disadvantages of Native App Development?
The following are the major disadvantages of native app development:
Highly Resource-Intensive
It becomes quite challenging to maintain different codebases for separate applications for iOS and Android. Especially during the time of making updates, it becomes difficult to perform upgrades with such complexity. Sharing the code between two different operating systems also becomes a daunting task.
Long Time-to-Market
Since native app development focuses on writing separate codebases for iOS and Android apps, it eventually takes time to launch the final app and bring it to the market. Developing native apps also takes dedicated massive teams of developers, UI/UX designers and testers who need to be proficient in native programming languages. Sometimes, it gets difficult to stay up-to-date in the fast world of technology.
High Cost of Development
Because of high maintenance and update costs, native app development is relatively costlier than leveraging React Native for cross-platform app development.
What are the Advantages of React Native App Development?
Here are some of the significant advantages of React Native app development that make it a better choice than native app development:
Budget-Friendly
Since React Native offers a common interface to write the codebase for both iOS and Android apps, React Native app development is very economical. If you’re a startup or mid-sized business organization, React Native is a wonderful choice of framework for saving money and building cross-platform apps.
Time and Resource-Saving
Building cross-platform apps requires a minimum amount of resources and workforce. You can easily find JavaScript and React programmers in the industry who can help you bring your vision to life. Since there is a single codebase for writing code for both iOS and Android apps, the React Native approach is affordable and economical.
Cross-Platform Functionalities
It’s every app developer’s dream to write code just once and then deploy it for all the platforms. React Native framework provides this exact flexibility to the developers and provides a uniform experience to the users across a variety of platforms. Therefore, it significantly reduces the app development time and offers an interactive experience to the users.
Easier Testing and Debugging
React Native offers a plethora of sophisticated tools for testing and debugging applications. Some of the significant tools include Expo and Reactotron. These tools are reliable and offer enhanced functionalities for debugging and testing cross-platform apps.
Active Community
React Native has an active community and massive user base that constantly contributes to improvement and bug-fixing suggestions. The active community plays a significant role in considering the React Native codebase as a reliable and credible choice of framework.
What are the Disadvantages of React Native App Development?
The following are the primary disadvantages of React Native app development:
Limited API Access
You cannot fully access the native features such as native APIs when developing iOS and Android apps through React Native. Cross-platform app development add some constraints to the mobile and web developers in creating apps.
Lagging Performance with Complex Apps
React Native is a considerable choice for app development when building a general app. However, if you’re creating an app that has complex functionalities, the React Native framework seems to slow down and work inefficiently. Developers see themselves facing issues when working with large datasets or complex animations. The reason is that React Native functions over a JavaScript bridge that communicates with native modules which creates delays in the performance.
Limited Customizations
Developers cannot gain complete access to native device features or functionalities that are available when creating native apps for iOS and Android. Therefore, developers struggle to add customized features to Android and iOS apps.
Conclusion
The battle of React Native vs Native app development stands strong when talking about web and mobile app development. If you’re a business organization or a startup that wants to get a native or cross-platform app developed, you must invest in a reliable React Native development company that offers customized solutions.
Deftsoft has a team of seasoned mobile app development professionals from which you can hire React Native developers for your project. We’ll offer you customized native and React Native app development services. Reach out to know more!
FAQs:
1. What is the difference between Native and React Native app development?
Native app development involves creating applications for a single platform, using Swift or Objective-C for iOS, and Java or Kotlin for Android, ensuring high performance and superior user experience. React Native, a cross-platform framework, uses JavaScript and React to build apps for both iOS and Android, streamlining development and reducing costs.
2. What factors should I consider when choosing between React Native and Native app development?
Native development is preferable for projects requiring high-speed performance, intensive API calls, or complex functionalities. React Native is cost-effective, allowing code reuse across platforms and reducing development time. Team expertise is crucial; web technology proficiency favors React Native, while platform-specific language skills favor native development for customized user experiences.
3. What are the advantages of Native app development?
Native apps, optimized for their respective platforms, offer superior performance and responsiveness. They provide an enhanced user experience through detailed customization and adherence to platform-specific UI/UX guidelines. Developers can fully leverage device capabilities, such as sensors and cameras, without restrictions. Additionally, native apps seamlessly integrate with the device’s OS, ensuring smoother and more reliable functionality.
4. What are the advantages of React Native app development?
Using a single codebase for both iOS and Android reduces development costs, accelerates the development process for quicker time-to-market, and ensures a consistent user experience across platforms. With support from an active developer community, this approach requires fewer developers, making it ideal for startups and small businesses.
5. What are the disadvantages of React Native app development?
React Native may struggle with complex apps featuring heavy animations or large datasets, potentially leading to performance issues. Limited access to certain platform-specific APIs can restrict functionalities. Developers might encounter difficulties in implementing highly customized features and achieving the same refinement as native apps. The JavaScript bridge can introduce latency, affecting performance in resource-intensive tasks.
The world is opening up to new possibilities and ways of interacting with smart devices and wearables are the dawn of this new age. Wearables such as smartwatches, Apple Watch, etc., are in their peak era, especially for monitoring health.
According to businessofapps.com, two in five adults used healthcare apps last year, and there was a 35% increase in people using wearables compared to 2018. With such striking adoption of wearable apps, now is the golden period to kickstart your healthcare wearable app development venture.
To back this up, Statista estimated that the market for wearable healthcare devices will reach $76.1 billion by 2029.
This blog is a user-friendly guide for app enthusiasts who want to launch their healthcare wearable app. Whether you want to build your own Android or iOS wearable app, this guide is designed to provide you with the most important tools and frameworks you need to adopt, making the process feel more manageable and less daunting!
What is Healthcare Wearable App Development?
Healthcare wearable app development is the process of creating applications that function on wearable devices such as Android smartwatches, Apple Watch, fitness trackers like Fitbit, etc. The role of these apps is to collect, analyze and show health-related data such as heart rate, respiration rate, sleep patterns, steps taken and tracking menstrual cycle.
These wearable healthcare apps play a significant role in preventing life-threatening diseases such as heart stroke, chronic disease management and prompt a health-conscious lifestyle.
For instance, in recent news, a 73-year-old New Jersey man credited Apple Watch for saving his life. The wearable device alerted the man for a significantly low pulse rate, thus saving his life.
Therefore, healthcare wearable app development is not just about driving business but also about working towards a massive vision of saving lives.
What are the Best Frameworks for Healthcare Wearable App?
Frameworks are essential tools in building an app. They provide pre-built libraries and components that streamline and speed up the process of wearable app development and ensure brand consistency.
Before choosing a framework for your app, it is important to analyze some pivotal factors to make the right decision. Choose a framework that aligns with your app’s goals and the available resources at your end. You can consider the following factors to choose a framework for a healthcare wearable app:
Device compatibility
User-friendliness
Performance
Available community support
We’ve divided this section into two parts: the best framework for Android health wearables and the best framework for iOS health wearables.
Best Framework for Android Health Wearable App Development:
Android Wear SDK
If you want to create an Android wearable app, Android Wear SDK is Android’s official framework for creating wearable apps. It is a self-sufficient toolkit that offers a comprehensive pool of libraries and tools for building Android healthcare wearable apps from scratch.
You need to download Android Studio and then select Wear OS in the Templates pane. Later on, you also need to download SDK Manager from Tools and you’re good to run your first app on Wear OS 4 (latest version).
The following are the highlighting features of the Android Wear SDK toolkit:
Emulator environment to monitor the progress of the app while creating it.
Integrated APIs
Special tools to perform voice-based actions
Custom notifications
Wearable-based layouts for Android smartwatches
Best Framework for iOS Health Wearable App Development:
Apple’s WatchKit
Apple’s WatchKit is Apple’s official framework for building applications. You can create a diverse range of watchOS apps by using useful functionalities such as extended runtime sessions and background tasks.
The following are the highlighting features of Apple’s WatchKit:
1. Libraries:
Exploring libraries inside Apple’s WatchKit allows you to utilize a large number of functions and classes. You can also add unique features to your Apple Watch app, such as a Digital Crown and haptic engine.
Some of the significant libraries and frameworks include the following:
MMWormhole: It is a powerful connectivity toolkit for processing, synthesizing, and analyzing notification sounds. It creates a bridge between iOS and OS X extensions and their corresponding applications. You can install it through CocoaPods.
IGInterfaceDataTable: It helps configure tables with multidimensional data seamlessly. It can also be used to create aesthetic Apple Watch apps with complex data structures.
2. Templates:
Apple WatchKit’s templates ensure that the developers stick to the UI/UX and design guidelines of the Apple Watch’s apps.
3. Debugging Tools:
It often gets difficult to debug wearable apps because of their small size and unique user interactions. Apple WatchKit provides developers with various debugging tools that can help them recognize and fix issues efficiently. You can also do this in real-time with the help of Xcode.
4. Emulator:
Thanks to the Apple WatchKit emulator, which offers a simulated Apple Watch environment, you can develop the Apple Watch wearable app in real-time. This functionality ensures that the app’s UI/UX and capabilities are exactly what the developer intends them to be.
Points to Remember for Healthcare Wearable App Development
Since you’re here to learn about the best frameworks for healthcare wearable app development, the following are the most important features to remember when developing your healthcare wearable app:
UI/UX and App Interface
It is crucial to build an app with a a seamless, user-friendly, and intuitive user interface, keeping in mind the navigational tendencies of wearable device users. A basic rule of thumb is to keep the interface as simple as possible. Remember, the users are not technical experts!
Data Privacy and Security
Since health data is quite sensitive in nature, it is important to integrate robust security measures such as secure data storage, encryption and security compliance like GDPR and HIPAA. Users only rely on apps that keep their data secure.
Easy Integration with Other Systems
The created wearable app must be dynamic enough to get integrated with other health devices and systems easily. For instance, a healthcare wearable app must have the capability to connect with other wearables, electronic health records (EHRs) and third-party health apps.
For instance, many companies are working on building a noninvasive insulin monitoring technology for their smartwatches. If they crack the code, it could be life-transforming!
Join Hands with a Reliable Wearable App Development Company
Whether you want to build a healthcare wearable app from scratch or extrapolate your mobile app idea into a wearable app, look no further than Deftsoft. With a team of 50+ experienced wearable app developers well-established over the last 18 years, we can help you transform your idea into a real-life wearable app. We offer premium wearable app development services that follow a streamlined process to create your healthcare wearable app right from ideation to app launch. Our team of experts offer app consultation, app development, QA testing, launch and consistent wearable app optimization.
Check out our wearable app development services or reach out directly.
FAQs:
1. What are healthcare wearable apps?
Healthcare wearable apps are applications designed to run on wearable devices like smartwatches and fitness trackers. They collect and analyze health-related data to provide insights and improve health management.
2. Why are frameworks important in wearable app development?
Frameworks provide a structured environment for development, offering pre-built components and libraries that speed up the process and ensure consistency in app architecture.
3. How do I ensure data security in my healthcare wearable app?
Ensure data security by implementing robust encryption, secure data storage, and compliance with regulations like HIPAA and GDPR. Regular security audits and updates are also essential.
4. What are the benefits of hiring a wearable app development company?
Hiring a professional development company ensures high standards, optimized performance, and robust security. They bring expertise and experience, reducing the risk of costly mistakes and ensuring ongoing support.
5. What is the future of healthcare wearable apps?
The future of healthcare wearable apps lies in advanced technologies like AI, machine learning, and blockchain, which will enhance data analysis, security, and personalization, playing a crucial role in preventive healthcare and chronic disease management.