Complete IOS App Development Guide 2025
-
By deftsoft
-
24th November 2023
Apple has significantly strengthened its marketplace dominance in 2025, with the App Store generating record-breaking revenue and establishing itself as the most profitable mobile platform globally. iOS apps continue to set industry standards for security, performance, and innovative features, making them the preferred choice for businesses and users alike.
However, as thousands of new apps flood the market daily, there’s a critical shortage of skilled professionals in the iOS app development industry. Despite the seemingly saturated market, businesses desperately need qualified iOS app developers and reliable iOS app development companies to bring their ideas to life. This creates unprecedented opportunities for aspiring developers and established iOS app development agencies.
This comprehensive guide is designed to help you become a leading iOS mobile app developer in 2025. Whether you’re planning to offer iOS App Development Services or join a professional development team, we’ll cover everything from iOS App Development fundamentals to building your first iPhone app development project. From learning the basics to mastering industry-relevant skills, this is your complete roadmap to building a successful career in iOS development. Let’s get started!
Introduction to iOS Development
Suppose you have a groundbreaking idea of creating a social media app for iPhone, iPad, and iMac users. What should you do now? From ideating to pushing your app to the App Store, there’s a connecting bridge called iOS development. By learning iOS development, you can conquer one of the hardest developing designations.
Many people also opt for Android development, but the difference between the two is that Android is open-source, while iOS app development requires you to use Apple’s proprietary resources. The iOS operating system is more efficient, secure, and adheres to Apple’s guidelines. Another reason why most developers prefer iOS or Android is because of Apple’s code development language, called Swift. Because of its enhanced readability, Swift is a preferred language for developers to choose over Java (used for Android development).
Now that you’re familiar with the basics of iOS development, let’s understand the requirements to become an iOS developer.
Prerequisites to Start iOS Development Learning Journey
Many iOS app enthusiasts think that iOS app development is a daunting task and that you need a hefty investment to get started. However, this is not true. You just need 3 things to get started, and you’re bound to succeed:
Get a MacOS System
The starting point for becoming an iOS developer is having a functional Mac system. If you have an iMac or MacBook, that’s great! However, if you’re low on budget, a Mac mini is the best investment you can make. If you have a desktop, you just need to connect the Mac mini device to your desktop, and you’re all set to work on a Mac system.
You can either buy the Mac mini M2 with 8-core CPU, 10-core GPU and up to 24 GB of unified memory or the Mac mini M2 Pro with up to 12-core CPU, 19-core GPU and up to 32 GP unified memory. The M2 one is relatively affordable and can work efficiently with any desktop.
Download Xcode 15
Download Xcode 15, an Integrated Development Environment (IDE), from the Mac App Store to access the latest version of Swift (to write code). You can design, code, test ,and publish your app using Xcode. You can create iPhone and iPad apps with the Apple Xcode.
Apple Developer Account
You need an active Apple Developer account to post your app on the App Store and ace your first iPhone app development. It costs $99 per year. With this special membership, you get full access to a comprehensive set of development tools, advanced app capabilities and services, code-level support, ad hoc distribution for testing and internal use, and many more benefits.
Step-by-Step Guide for iOS App Development
It’s time to address the hottest question of the decade: how to become an iOS app developer? Here is a reliable step-by-step guide to getting started as an iOS developer:
1. Start with an iOS programming language
First, you need to pick a programming language of your choice to start the process of iOS app development. You can choose any one of the following languages:
- Objective-C:
Introduced in the 1980s, Objective-C is the age-old legacy coding language for iOS application development. It is a counterpart of the C language, yet it has been Apple’s official language until Swift’s arrival in 2014.
- Swift:
A modern, easy-to-read, and simpler version of Objective-C called Swift hit the market in 2014. Since then, the developers have never looked back. Because of its simpler syntax, high readability, and user-friendly interface, Swift is the most popular choice of programming language for iOS developers.
2. Start coding your app with Xcode
The next step in the iOS app development is to start writing your first block of code by downloading the Xcode app from the App Store on your MacOS. Since Xcode is an IDE, you can code apps using any programming language you choose, such as Objective-C, Java, C++, Swift, etc.
The Xcode IDE consists of the following features that you can harness for cutting-edge iOS app development:
- Source editor to write professional code
- Asset catalog to manage images
- Version editor for Git source control
- OpenGL Frame Capture
- Interface Builder is built in to design and test the user interface
- Complete documentation and API reference
- Simulator with SDKs
- Live issues to spot errors in real-time
- Integrated Build System
- Continuous Integration to help you build, analyze, and test code
- Static analysis to try various code paths
- XCTest framework to build unit tests
3. Sign up for the Apple Developer program
Learning all new things by yourself while stepping into the developer industry can be a rollercoaster ride. You can make the experience less overwhelming by creating an Apple Developer account and using the available learning resources on your own. You do need to buy a subscription to opt for the Apple Developer program.
You’ll also need the Apple Developer program to publish your first app on the App Store. It is also one of the best practices to follow while iOS app development.
4. Make use of Cloud
Working locally can be a daunting task when formulating a heavy-duty website. To relieve the weight of resource-intensive tasks, you can use cloud computing services such as Amazon Web Services (AWS), Google Cloud Platform (GCP), IBM’s cloud, etc.
When you connect your app to the cloud via APIs, you can use it for storage, database management, app caching, and much more. If you’re using Xcode to code the app, using the Xcode Cloud with continuous integration makes more sense than opting for a third-party cloud service.
5. Use an add-on User Interface (UI) service
When learning how to build your first iOS app on Xcode, building a user-friendly and attractive user interface is crucial. After all, what’s the fun of building an app when it isn’t easy to navigate through? SwiftUI is a User Interface created to give a real-time UI preview of the app. You can integrate SwiftUI within Xcode to build an interactive, user-friendly iOS app.
Here’s how you can enable SwiftUI in Xcode:
- After you create and save a new Xcode project on your Mac, go to ContentView.swift or Scene.Delegate. Swift file based on the project template you picked up.
- Check the file for the required imports, like import SwiftUI.
- If the SwiftUI code is absent in the template, you can replace the existing code with the SwiftUI view.
- If you don’t want to use the above method, you can create a new file with the SwiftUI template as follows:
File > New > File
- Then, choose a simulator from the Xcode toolbar.
- You can then start the SwiftUI app using the ‘Run’ button.
- The code is then compiled, deployed, and launched through Xcode.
6. Test the app
Here comes one of the most crucial parts of iOS app development. Testing the app includes rolling out your newly created app to either a small group of people or using Xcode’s UI testing tools. The motto is to get feedback for the created app.
Don’t worry; your app does not have to perfect the first time. Make sure that you first test the app using Xcode UI testing which acts as a human browsing through the app. You can then create a beta version of the app and gain feedback from the people.
After some time, you can use the TestFlight app to beta test your app. Up to 10,000 users can download and experience your app via a special link rolled out on the TestFlight application.
7. Publish your app
Now comes the final stage of your iOS app development process. This is where the patience is tested. Once you’re done with building and testing, you can submit your app for approval directly via the Xcode application. The approval process can take weeks with a series of rejections and resubmissions, but you need to keep pushing through.
After the app is approved, you can publish your app on the App Store using App Store Connect.
Top-Notch Libraries for iOS Development
Now that you know how to build an iOS app from scratch, we have added a list of must-use libraries that can help you expedite the process of iOS app development. Some of the noteworthy libraries to leverage for your next project are as follows:
1. Alamofire
Alamofire is a powerful and easy-to-use networking library for iOS. It simplifies HTTP networking by providing an elegant interface over the native URL loading system. With Alamofire, developers can perform various network tasks such as making HTTP requests, handling JSON responses, and managing network reachability.
Key Features:
- Simplified network requests
- JSON parameter and response serialization
- Advanced networking features like routing requests and response validation
- Easy integration with Codable and Decodable for parsing JSON data
- Built-in support for SSL pinning
Use Case:
Alamofire is ideal for apps that require robust networking capabilities, such as those that frequently fetch data from APIs or need to upload and download files.
2. Realm
Realm is a modern database framework that enables developers to build offline-first apps with ease. Unlike Core Data, Realm is lightweight, efficient, and has an intuitive API. It offers fast performance and is designed to handle large datasets with low memory overhead.
Key Features:
- Simple and concise syntax for CRUD operations
- Cross-platform support (iOS, Android, and more)
- Real-time data synchronization capabilities
- Reactive extensions work seamlessly with reactive programming libraries like RxSwift
Use Case:
Realm is perfect for apps that require a local database, especially when dealing with complex data models or needing real-time data updates.
3. SnapKit
SnapKit is a DSL (Domain-Specific Language) for iOS Auto Layout. It provides an easy-to-read and expressive syntax for creating constraints programmatically. This can significantly reduce boilerplate code and make the layout code more readable and maintainable.
Key Features:
- Intuitive and expressive syntax for defining constraints
- Support for all Auto Layout features
- Compatibility with UIKit and SwiftUI
- Type-safe layout code, reducing runtime errors
Use Case:
SnapKit is highly beneficial for developers who prefer coding UI layouts programmatically rather than using Interface Builder, providing more control and flexibility in UI design.
4. RxSwift
RxSwift is a library for reactive programming in Swift. It enables developers to write asynchronous and event-driven code using observable sequences and functional style operators. This approach helps manage complex data flows and state changes more effectively.
Key Features:
- Comprehensive support for functional reactive programming (FRP)
- Extensible with various operators for transforming and combining data
- Integration with UIKit to handle UI events reactively
- Powerful debugging tools to track asynchronous operations
Use Case:
RxSwift is ideal for apps with complex asynchronous operations, such as real-time updates, data streams, and reactive UI components.
5. Kingfisher
Kingfisher is a powerful and efficient library for downloading and caching images in iOS apps. It helps manage image loading, caching, and displaying, making it easier to work with images from the web.
Key Features:
- Asynchronous image downloading and caching
- Memory and disk caching support
- Integration with Swift’s UIImageView for setting images with URL
- Powerful image processing options, such as resizing, cropping, and adding filters
Use Case:
Kingfisher is perfect for apps that require frequent loading and displaying of images from remote sources, such as e-commerce apps, social media apps, and news apps.
6. Lottie
Lottie is a library developed by Airbnb that renders Adobe After Effects animations natively on iOS. It allows developers to create beautiful and complex animations easily without writing complex code.
Key Features:
- High-quality, vector-based animations
- Cross-platform support (iOS, Android, and web)
- Easy integration with After Effects via JSON
- Support for interactive animations and transitions
Use Case:
Lottie is ideal for apps that need eye-catching animations to enhance user experience, such as onboarding screens, loading animations, and interactive UI elements.
Things to Keep in Mind While Learning iOS Development
When starting as a newbie in the iOS development industry, especially as a learner, it is vital to keep a note of the following things:
Always start with a project in mind:
When learning to code an iOS app, it is essential to have a project in mind to work on. When an individual starts learning a new skill without any solid objective, he can get lost in the intricacies of the technology.
Stick to the basics:
You can only work on a large-scale project if your basics are strong when learning how to build your first iOS app. You must first become familiar with the fundamentals of iOS app development. You must also be aware of the tools before diving into the actual app-building process.
Testing once is never enough:
After building and designing the app, it is imperative to keep testing it repeatedly. You can use the Xcode simulation to test the app and then take the app to the beta testing stage.
Never stop learning:
Learning never stops when it comes to becoming an iOS developer. New technologies are emerging every day. You must keep yourself updated with what’s new in the market.
Stick to just one language:
The choice is all yours when beginning to learn iOS app development. You cannot jump between different languages while building apps. The thumb rule is to dive deep into one language such as Swift and become an expert in it.
Wrapping Up
Learning something new, as incredibly technical as iOS development, is not easy but exciting. The iOS industry is open to the creations of anyone and everyone who brings positive contributions to society. You can also begin your contributive journey through the art of iOS app development.
Make sure that you keep in mind the tips mentioned in this blog to help you excel in the mobile app development industry. We wish you luck with your very first iOS app!
FAQs:
1. Is Swift enough for iOS development?
Learning Swift is the first and most fundamental step of becoming an iOS developer. It is only 10% of the iOS development process. There are many other things to keep in mind while working on iOS development. One of them is working with UITableView views, connectivity issues, REST APIs, React, JSON parsers, and much more.
2. How many days are needed to learn iOS development?
Learning never stops. However, if you wish to build your own iOS app from scratch, it can take up to 3 months to master the basics.
3. Should you choose Swift or Python to build iPhone apps?
If your goal is to develop iPhone apps, learning Swift is the optimal choice of programming language. Learning Python makes sense when you want to work on backend, data science or web development.
4. Are iOS apps easy to test?
The best part about testing iOS apps is that it you need to test the apps for just one operating system of a proprietary iOS manufacturer. On the other hand, you need to test for Android phones of different manufacturers to test an Android app.
5. What should I look for when choosing an iOS app development company?
When selecting an iOS app development company, look for a proven portfolio of successful iPhone apps, expertise in Swift programming, and experience with App Store submissions. The company should have skilled iOS app developers who understand Apple’s design guidelines and can provide end-to-end development services. Check client reviews and ensure they offer post-launch support for your iPhone app development project.
6. How much does it cost to hire an iOS app development agency?
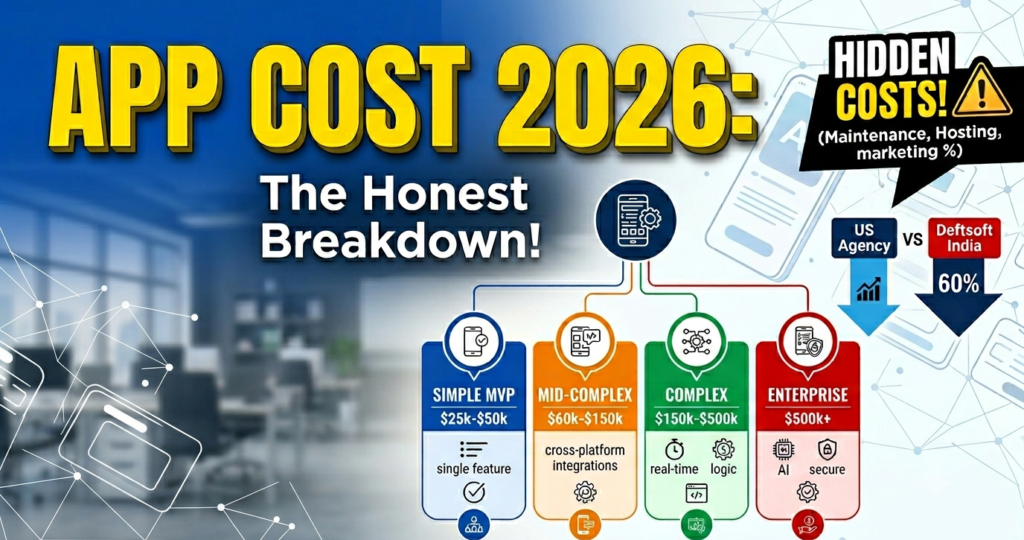
The cost of hiring an iOS app development agency typically ranges from $15,000 to $200,000+, depending on app complexity and features. Simple apps with basic functionality cost less, while complex apps with advanced features require a higher investment. Most iOS App Development Services provide detailed quotes based on your specific requirements and project scope.
7. How long does iPhone app development take with a professional company?
Professional iPhone app development usually takes 3-8 months, depending on app complexity and features. An experienced iOS app development company can deliver simple apps in 2-3 months, while complex enterprise applications may take 6-12 months. The timeline includes design, development, testing, and App Store submission phases.
8. What services does an iOS app development agency typically offer?
A comprehensive iOS app development agency provides services including custom iPhone app development, UI/UX design, Swift programming, App Store optimization, and ongoing maintenance. Professional iOS App Development Services also include API integration, testing, deployment, and post-launch support. Many agencies also offer consultation and project management throughout the development process.
9. Should I hire a freelance iOS app developer or a development company?
While a freelance iOS mobile app developer may be cost-effective for simple projects, an iOS app development company offers better resources, expertise, and reliability for complex applications. Professional agencies provide teams of specialists, structured processes, and comprehensive support that individual developers cannot match. Companies also offer better accountability and long-term maintenance capabilities.
10. Can an iOS app development company help with App Store submission?
Yes, experienced iOS app development companies handle complete App Store submission, including metadata optimization, compliance checks, and review management. Professional iOS App Development Services ensure your app meets Apple’s guidelines and maximize approval chances. They also provide ongoing App Store maintenance and updates after launch.
11. What ongoing support do iOS app development agencies provide?
Professional iOS app development agencies offer comprehensive post-launch support including bug fixes, iOS updates, performance optimization, and new feature development. Quality iOS App Development Services include regular maintenance, security updates, and analytics monitoring to ensure your app remains competitive. Most companies provide flexible support packages based on your ongoing needs.